Christmas tree toy from postcards. Christmas balls from old postcards
There is very little time left until the next new year. And, of course, many residents of our country have already begun to decorate the Christmas tree in their apartments and houses. Of course, in our time in stores, no matter what New Year's toys and decorations they sell, it would seem, buy and decorate. But it's much more pleasant and interesting to do new Year decoration with your own hands from scrap materials available at home.
To make one of these Christmas decorations, we needed:
- postcards 2 pcs.;
- scissors;
- a compass or a small glass;
- PVA glue and super glue;
- pencil and ruler;
- ribbon;
- rhinestones or sequins.
The fact is that while still at school, I collected postcards, and after graduation I didn’t throw them away anywhere and didn’t give them to anyone, so I have a large selection of postcards for various kinds of crafts. Since we are going to do New Year's toy, then I chose from my variety of postcards the most brilliant, well, and which are not particularly a pity to cut.
On the reverse side of the two postcards we have chosen, we draw 20 identical circles using a compass or how we use a small stack of cups.

And carefully cut them out with scissors.

Our mugs turned out to be 40mm in diameter. But you can make circles of any size, the main thing is that all circles have the same diameter.

Now in each circle on the reverse side we need to inscribe an equilateral triangle. We made his template out of cardboard, and circled the triangle with a pencil, duplicating on each mug.

Then, on all 20 circles, we bend three identical sides, that is, we bend the edges of the circles along the lines of the triangle inscribed in it.
Tip: do it better with a ruler, so that the folds are smoother.

I decided to make the top and bottom of the toy from a lilac postcard, and the middle from green. Therefore, further we take the first five circles of lilac color and with the help of PVA glue we glue them together in turn for the side bent sides. It should look like the next photo.

By analogy, we make the bottom of the toy ball from the remaining five lilac circles.
Next, we need to make the middle of the remaining 10 green circles. To do this, we glue them together in a strip with PVA glue, and close them in a “ring”. How to glue stripes correctly is shown in the following photo.

You should get these three parts of the future Christmas tree toy: top, bottom and middle.

Since we plan to hang this toy on our home Christmas tree, it is necessary to make a loop on which we will hang. To do this, we carefully insert both sides of the ribbon into the center of the upper part of the toy and tie it from the inside into a couple of knots. The ribbon should be about 20 cm, otherwise our toy will look ugly. That is, the length of the ribbon should correspond to the size of the toy.

Now carefully glue all parts of the toy ball together with PVA glue.
I made this toy with my four-year-old son, so bumps and holes are visible in some places at the joints of the toy. To hide them and add beauty and brilliance to our toy, we glued round silver rhinestones left over from the nursery with super glue. But you can use sequins or shiny beads instead.

Here we have such a wonderful and original ball-toy for the Christmas tree.

But it is quite simple to manufacture and even school-age children can easily make it.
Happy New Year everyone!
Even a modest souvenir, accompanied by beautiful postcard handmade would make a great gift. Such a card will not only convey warm wishes, but will also be an excellent home decor. We share ways to make amazing New Year cards easily and simply.
1. Almost knitted postcard

The leftover yarn for knitting can be put into action by making a New Year's card out of them with your own hands. Cut a triangle out of cardboard that will become a Christmas tree, generously grease it with glue and wrap it with colored threads. The more colors of yarn used, the better. Then glue the Christmas tree on a regular postcard and decorate it further if desired.
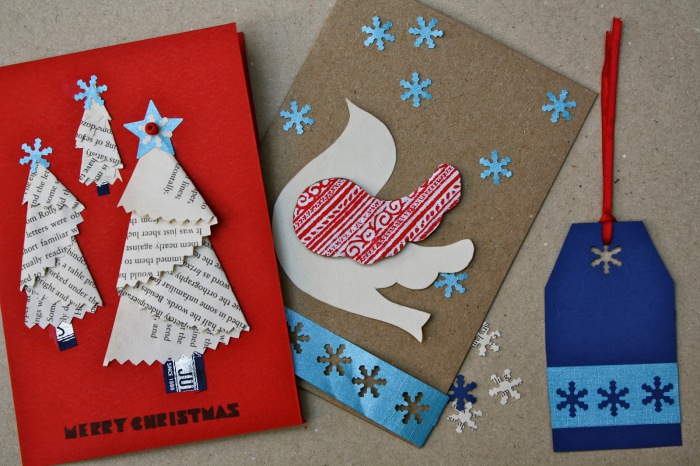
2. Contrasting textile application

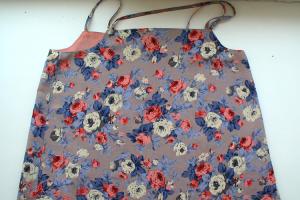
Pieces of bright fabrics will come in handy for creating a postcard. Choose textiles that will not crumble. Cut out simple figures from fabric - Christmas trees, Christmas balls, animals - and glue them on a white postcard. The contrasting combination of colors looks the most impressive.
3. Balls and ribbons

Using ribbons in decor is a win-win solution for those who want to create festive mood. Draw outlines on paper Christmas ball or lay it out with glued beads, and place a bow tied from a narrow ribbon in the upper part. The presence of three-dimensional elements makes the decorative postcard very original.
4. Herringbone with voluminous branches

Twist thin tubes from multi-colored paper. Grease one of the edges with glue so that it does not unfold. Then glue the tubes different lengths for a postcard. A postcard with a voluminous Christmas tree is ready.
5. Laconic stripes

Fans of minimalism will appreciate the discreet but effective postcard, where Christmas tree branches are made from strips of paper. The only decoration of such a postcard is decorative seam on paper branches and a frame along the edges of its front part.
6. Fragrant message

A card that not only looks great, but also smells good is a really nice surprise. Use cinnamon or vanilla sticks as a base for a decorative composition, surrounding them New Year's tinsel, beads, pictures.
7. Winter lace

Lace white color becomes snow-covered Christmas tree branches, and sequins glued to it become New Year's balls. For the background, use paper of any pastel shade or textured fabric, such as burlap.
8. Simple drawing

Even a simple drawing on a New Year's card can look impressive. In order for the postcard to look noble, pay special attention to the accuracy of its application. We also recommend using rough craft or snow-white glossy paper.
9. Sewing on paper

easy way to make a postcard voluminous - sew on any paper figure with one seam passing through the center and bend its edges. You can also use several figures of the same shape, sewing them with a common seam, and gluing one of them as a background. Then the image will be even more voluminous.

10. With quilling elements

Quilling is the art of creating decorative compositions from strips of paper. It will not be possible to fully master it a couple of days before the New Year, but it is quite possible to apply individual techniques in the decor of a postcard. Circles of twisted narrow strips of paper become New Year's balls, and the tree - a green curved line drawn on a postcard.
11. A combination of several different textures

Another easy way to diversify a familiar application is to use materials with a different texture for it. For example, knitted fabric, cardboard, plain thin paper. Then, despite the simple form of the elements, the postcard will look non-trivial.
12. Eye-catching contrasts
It is not at all necessary to use white paper as the basis of the postcard, and make the application bright. Do the opposite and decorative composition play with new colors.
13. Either an inscription or a drawing

For lettering and drawing, choose a paint that contrasts with the paper base. The more intricate and decorative the inscription is, the better. Don't forget to surround it with small, simple drawings.
14. Cute scenery

A simple landscape applique will be a real decoration for a New Year's card. Complete it with voluminous elements - cotton wool imitating snow, beads, sequins, and even chains. Such a New Year's card with your own hands looks very cozy.
15. Elegant brutality

Punch holes on the thick paper of a saturated color along the outline of the triangle. Stretch the threads between them in a chaotic manner. Do not make too many stitches - our New Year's card is valuable for its conciseness.
16. Maximum shine

Draw a Christmas tree on paper and generously grease it with silicone glue. Then add sequins and beads. After drying, a thick thread can be glued along the contour. Such a New Year's card with your own hands will sparkle with all the colors of the rainbow.
17. Paper snowmen

The basis for a snowman postcard is folded several times White paper. Grease it a little with glue so that the snowman keeps its shape. From the remnants of the fabric, make a hat and scarf for the snowman, draw his face.
18. The second life of old buttons

In every house there are many buttons that are no longer needed, but it is a pity to throw them away. the day before new year holidays buttons will come in handy. Glued on a postcard, they become Christmas balls. Complete the composition with a simple inscription. New Year card ready with your own hands.
When gifts for loved ones are ready, it's time to think about decorating. own house. Do not forget
You can make such a ball for decorating a Christmas tree with your own hands.
When I was little, I saw someone have a very unusual ball of postcards. I really wanted to learn how to make these balls. It turned out that it is not difficult at all.
I learned how to make balloons from postcards. They were big, elegant, I really liked them, but I didn’t think of where to adapt them. Therefore, I made the same ball, only small, from a dense colored one. This ball could be hung on a Christmas tree.
Then I made two more of the same Christmas balls, and both are from . In this form, this garbage, which any normal person would have thrown away long ago, has been decorating my Christmas tree for about a decade and a half)))
At the time when I was making these balloons, there was not such a variety of materials for creativity on sale as there are now (shiny cardboard, shiny paper with a holographic effect, etc.).
Once in a store I came across toothpaste in an unusually beautiful shiny box, which I could not pass by :) So for the first time I saw paper with a holographic sheen.
At home, I tried to erase the inscriptions from it with acetone. Although with great difficulty, but it was possible. I took apart the box and made a ball out of it. How beautifully it shone and sparkled with all the flowers on the Christmas tree in the light of an electric garland!
Then I came across advertising booklets of some expensive imported auto cosmetics. The advertisement was printed on thick mother-of-pearl paper. I have never seen such paper before. There were few places without text and pictures on it, so even for a small ball of such booklets it took several :)

Now since beautiful paper and there are no problems with cardboard, so you can make a lot of beautiful and different balls.
To make a ball, you first need to draw or print out such a template.
 According to this template, cut out 20 identical circles from cardboard, thick foil or paper. The diameter of the finished ball is 2 times the diameter of these circles. For example, my first balloon is about 5.6 cm in diameter, and the diameter of the circles that make it up is 2.8 cm.
Bend each circle along the lines marked on the template with a dotted line (the lines form an equilateral triangle inscribed in a circle, all its angles are 60 °) so that you get a triangle with rounded parts bent to the front side.
Apply glue to these bent parts from the wrong side and glue 10 triangles with each other in one strip as in the diagram below. The edges of this strip are also glued together, you get a ring. This ring is middle part ball.

Glue the remaining 10 triangles with each other by 5 (see circles at the bottom of the same diagram). Glue a loop into the center of one of these circles, secure it from the inside with a piece of tape. This is the top and bottom of the ball.
Glue the circles to the ring, you get a ball.

The craft participates in the “Yolka-party” action in “Mom's Blogs”.
Enjoy your creativity!
Especially for blog readers, with sincere respect, Julia Sherstyuk
All the best! If the article was useful to you, please help the development of the site, share a link to it on social networks.
Placing site materials (images and text) on other resources without the written permission of the author is prohibited and punishable by law.