Christmas angel templates for cutting. Paper angels, white (description and stencils)
How nice it is to make New Year's crafts and gifts to your loved ones with your own hands, and for your children it is also doubly pleasant. Today, for the beauty of the New Year's room and for children in particular, let's cut out an angel. So, cut out an angel from paper.
A lot of beautiful crafts can be made from paper, in particular a Christmas angel.
In order to cut an angel out of paper, you will need:
- Colored cardboard, best of all golden or silver,
- Stencil,
- Scissors and stationery knife,
- Threads.
To begin with, we work with a paper angel stencil. If your printer allows, you can immediately print the angel itself on thick paper and just cut everything out there, but if the printer does not allow, transfer everything manually. I, in turn, first cut out a stencil from plain paper, cutting through all the necessary lines (Fig. 1), and only then transferred everything to cardboard (Fig. 2).


Already according to the drawing transferred to the cardboard, we carefully cut out the angel from paper. First, we cut everything with scissors, and then along the marked lines of the angel diagram from the inside, we cut it out very carefully with a clerical knife (Fig. 3). You need to be extremely careful when working with a clerical knife, it is very sharp. If you are doing this craft with a child, it is better to cut it yourself with a knife to avoid injury.

So, all the details are ready, now with the help of ordinary threads we tie the stars to the base of the angel (Fig. 4), I did not mention the stars in the text earlier, but they are clearly visible in the figures. Hooray, our angel is ready! It turned out to be very beautiful, sincere, pleasant and truly Christmas, hang it in the center of the room, it will perfectly fit into any interior.
Decorating the interior on the eve of Christmas with garlands of paper angels or individual figures helps to create a festive atmosphere in the house. Such crafts are easy to do with the children or by yourself, devoting this evening. All that is required for work is paper, scissors, glue and a little imagination.
An angel is one of the symbols of the Christmas holidays. It is customary to decorate the house with his figures on the eve of the holiday.
Crafts paper angels, photo 5 options


Paper is the most affordable material, and making angel figurines from it will be the easiest. It can be flat or voluminous angels made in different techniques.
You can make them using:
- napkins;
- standard writing paper;
- craft paper - colored, velvet or embossed;
- cardboard;
- blanks for quilling.


How to make an angel out of paper master class
To make an angel figurine out of paper, as in the photo below, you need:
- cut out a circle from thick paper using scissors with curly blades;
- cut it into 3 segments, so that one has the shape of an isosceles triangle, and the other is the shape of a wing;
- glue the wing parts to the triangle;
- Cut out a small circle from flesh-colored paper and stick it on top of the triangle. The angel is ready.
 Another version of the angel can be glued from colored paper. To do this, you need to prepare parts similar to those shown in the figure below.

It's even easier to make an angel by printing out the template below. Transfer it to cardboard, cut it out. Having made notches along the lines located on the back of the figure and on the wings. Fasten the wings on the back of the angel.
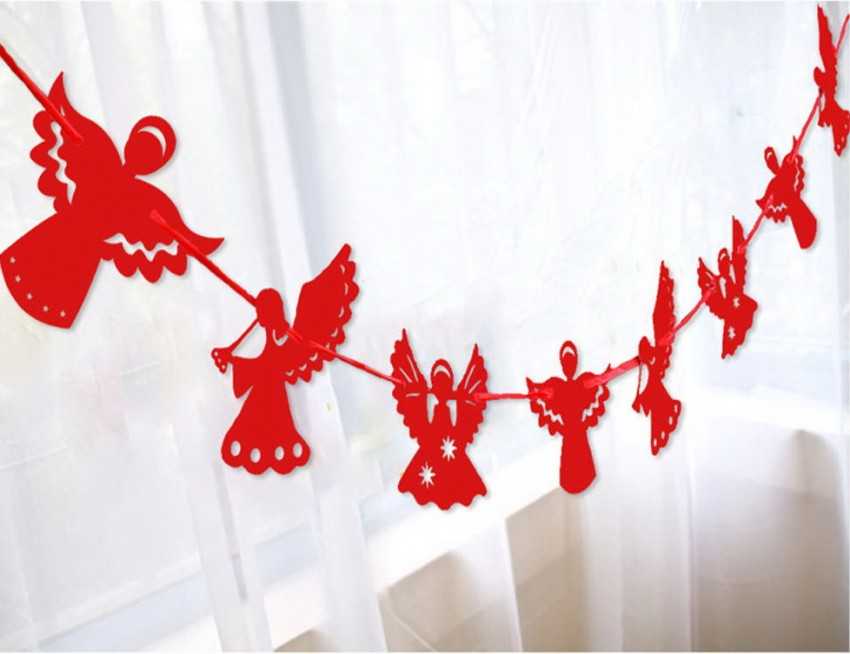
 You can make a cute garland yourself from paper figures of an angel, cutting them out in sufficient quantities according to patterns and stringing them on a thread.
 Another version of the garland that does not require stringing. It is enough to fold the paper with an accordion and transfer the drawing from the template onto it. Cut and stretch the garland.
 How to make a charming envelope in the shape of an angel, demonstrates the video below.
Paper angels templates for cutting, print and cut out a photo of 5 options
The process of making angels will become even easier if you use ready-made templates. To do this, they need to be printed on a printer using colored, embossed or plain white paper, and then cut along the contour. You can decorate a window or wall with individual figures, use them to create postcards and garlands.


DIY angel wings, step by step with a photo
Wings are an invariable attribute of an angel costume used for children's matinees, school performances, New Year's masquerades, as well as photo shoots. You can make them yourself by making a wire frame and covering it with a white cloth or cutting out a template from cardboard and pasting it with paper.
For the wings you will need:
- wire or 2 wire clothes hangers;
- a pair of white stockings or tights;
- white feathers of various lengths;
- hot glue;
- pliers;
- wide band.
The manufacturing process is not complicated and does not take much time
- Make the base for the angel wings using wire or strong hangers. To do this, you need to bend them with pliers, giving the desired shape. Fasten both halves of the wings together.
- Pull the stockings over the wire shape and fasten them. Instead of stockings, you can use a thin fabric.
- Using hot glue, fix the feathers, placing them in rows, and going from bottom to top. For the bottom row, use the longest feathers, then going up, use smaller feathers.
- Sew fixing straps of the required size to the wrong side of the wings, using a wide elastic band for this.
The diagram below for the phased production of wings for an angel will serve as a hint and help you navigate.

In the absence of real feathers, strips cut out in the form of feathers from paper or white fabric can be used to make angel wings, as shown in the photo below. If the feathers of the wings are cut out of fabric, they can not be glued, but sewn by hand with stitches to the base.


If the wings of an angel are a part. children's costume, they can not be glued with feathers, but decorated with beads and patterns made with paint or decorative glue.

 Another version of the wings for an angel can be made using a cardboard blank as a base, on which pre-cut paper feathers are glued on top.


Origami paper angels, detailed instructions with photos
Origami is the art of folding paper shapes. The photo below demonstrates the possibilities of creating angels using this technique.


 To fold the origami angel figure yourself, you can use the following scheme.
 To create such an angel, you need to take a square sheet of paper and fold it diagonally - you get an isosceles triangle. Fold this triangle diagonally again, and then unfold the last fold. The fold line seen on the part indicates the center line of the triangle.
 Bend the corners of the triangle to the center, forming a square.
 Turn the square piece over, folded corners down. With a pen, mark points at the top corner so that they are located between the edge and the center line.
 Bend the right corner, directing the edge to the intended point and releasing the previously bent triangle.
 Return the triangle to its original position and repeat the operation, but with the left corner.
 Make a crease by pulling the corner of the right triangle so that the left edge of the warehouse lays directly on the center line. Repeat the same on the left side.
 Bend the right triangle so that its bottom edge lies on the center line. Repeat the same on the left side.
 Bend the formed side corners, directing to the center, but not reaching it by 0.5 cm.
 Unfold the right corner and bend the side triangle inward. Do the same on the left side
 Turn the workpiece over and bend the right upper part so that the fold line runs from its top to the edge. Then the same on the left. In this case, it turns out that their free edges overlap.
 Bend the corners of the overlapping parts, aligning the fold along the center line.
 Taking the paper craft in your hands, bend the edges of the wings on both sides.

 Turn the workpiece over and bend the triangles below inward.
 Put the workpiece on the table, turn the wings up and bend, directing the lower parts of the wings towards the center.
 Lower the wings down. Turn the workpiece over. stretch the folds at the top of the workpiece, forming an angel's hood.
 Give volume to the figure with your fingers, spread your wings. The figure of an angel is ready.
 Using the origami folding scheme presented below, you can independently make another original angel figurine.

In the video below, you can watch the origami angel.
Paper angels stencils for cutting, print, 5 options
Using the stencils below, you can easily make a variety of angel figurines. To do this, stencils can be transferred to paper or immediately printed in the required quantity, and then cut along the contour. Such figurines are an excellent decor that can be used to decorate windows, create postcards and panels.


Colored paper angels, step by step with a photo


Quickly and easily make a stylized angel figurine, similar to the one shown in the photo below.
 To do this, you need a sheet of colored paper, glue, a pencil, a ruler and scissors.
 Using a ruler and a pencil, draw on the sheet 2 squares measuring 12 × 12 cm and 2 strips with a length equal to the length of the sheet and a width of 0.5 cm each. Cut them out with scissors. These are the details from which the angel will be made. Bend each square in the form of an accordion with a step width of 0.5 cm.
 Put both accordion squares together. Stepping back from the edge to cm, bend both parts, thereby outlining separating the wings from the angel's skirt.
 Putting one of the parts aside, glue the inner edge of the wing and skirt together at the remaining one. Repeat the same operation on the second part.
 The next step is to make the head of an angel. To do this, roll one of the thin strips into a spiral, periodically covering the strip with glue. When it is completely twisted into a spiral, take the next one and gluing it to the edge of the previous one, continue twisting the spiral. When a piece of a strip 10-12 cm long remains untwisted, make a loop 2-3 high, as can be seen in the photo below and fix it by gluing the rest of the strip to the twisted spiral so that a free tip about 5 cm long remains. as the glue dries, straighten the skirt and wings of the angel. The figurine is ready.


To make a volumetric figure of an angel with your own hands, you will need:
- 2 round napkins with openwork edges;
- 1 large round bead;
- 1 smaller bead;
- remnants of white threads;
- glue;
- scissors;
- needle.
Taking 1 napkin, glue a cone out of it. To do this, cut a small segment from the napkin, measure the gluing allowance along one of the edges, and bend it. At the part of the part reserved for the allowance, cut off the tip as shown in the photo below. Apply glue to the allowance, roll the part into a bag and glue it.

Cut the second napkin into 4 segments - 2 parts of the wings + 2 parts of the handles. To make angel handles, you need to roll each of the segments into a cone, glue them along the edge. Then sew them to the top of the large cone.
Cut off the tops of the segments reserved for the details of the wings.
From a large bead, make the head of an angel. To do this, stringing a bead on a wooden skewer, paint it with gouache or white acrylic paint.

Cut the threads into equal lengths, fix with knots at the ends.
String a small bead on the thread. Pull the thread through the top of the cone, string a large bead-head. Fix the bundle of hair threads by again passing the needle through the hole in the head bead, the top of the cone and the small bead. Tighten the thread, securely fastening all the details, fix it by tying the ends in a knot, cut off the excess.
Glue the wings.
Attach a hanging loop to the angel's head. The angel figurine is ready.
 You can make volumetric figures of angels by printing, coloring, cutting and gluing ready-made templates.


Do-it-yourself voluminous paper figures of angels can be used to create thematic compositions, as a decor for table setting or as Christmas tree decorations, if you attach loops to them.
How to make a three-dimensional paper figurine, the video below demonstrates.
You are in the Angel coloring category. Coloring page you are looking at is described by our visitors as follows "" Here you will find a lot of coloring pages online. You can download Angel coloring pages and also print them for free. As you know, creative activities play a huge role in the development of the child. They activate mental activity, form an aesthetic taste and instill a love of art. The process of coloring pictures on the topic Angel develops fine motor skills, perseverance and accuracy, helps to learn more about the world around us, introduces you to all the variety of colors and shades. Every day we add new free coloring pages for boys and girls to our website, which you can color online or download and print. A convenient catalog compiled by categories will make it easier to find the right picture, and a large selection of coloring pages will allow you to find a new interesting topic for coloring every day.
Today we will tell you how to make an angel out of paper with your own hands. Creating such a craft is really very simple, and thanks to step-by-step instructions with a photo and our template, your paper angel will be perfect.
Tools and materials Time: 1 hour Difficulty: 3/10
- free angel template (presented below);
- matte paper for scrapbooking frosty shades;
- glue snowflakes;
- ready-made borders for scrapbooking;
- silver paper with a mirror effect;
- glitter;
- scissors;
- glue.
A handmade paper angel will look amazing on your Christmas tree! This craft is so easy that you can easily include elementary and middle school children to make it! Learn how to create your own winter magic in a few steps!

Step by step instructions with photo
Well, if you liked our original paper angel, and you want to get the same one, let's quickly move on from preparation directly to studying the master class.
Step 1: cut out the details
Download the template below.
Paper Angel - Template

Print the template on plain A4 paper. Cut out all the depicted details and place them on matte frosted paper.
Trace the plain paper pieces onto the scrapbooking sheets with a pencil and cut out carefully.

Step 2: fold the paper
Fold the matte paper angel along the folds as indicated in the template.

Step 3: decorate the dress
Cut 8 pieces from the border piping and place them at the bottom of the dress on both sides.
Glue these pieces to the craft.

Let the glue dry. After that, cut off the excess paper around the edges after gluing the border edging.

Glue 3 glue snowflakes vertically on the top of the clothes on both sides. Attach snowflakes to 3D mats or use double-sided foam tape.

Step 4: attach the head
Attach a halo to the back of the head, then glue the head to the top of the angel. On the reverse side, fix the craft with tape.

Step 5: Attach the Wings
Secure the wings to the back of the angel using tape.
Finish off with silver glitter around the outline of each wing.

Paper crafts have always been very popular with children and adults. The availability and cheapness of materials, ease of manufacture is understandable even to small children, as well as a huge variety of types of crafts on various topics. We all remember very well the various airplanes and boats, bombs and flowers of the period of carefree kindergarten and school life.
It is difficult to even imagine a holiday for which there are no paper decorations. New Year with its snowflakes and garlands, birthday with voluminous inscriptions, caps and pipes, Easter and Christmas with festive napkins, stars and applications.

But among all the immense variety of paper crafts, there is one unique creation suitable for almost all holidays and celebrations. This is an angel who brings joy and peace.


Everyone's Favorites
Everyone loves angels, everyone loves angels. They are always welcome both on a New Year tree and when decorating a room for a birthday celebration. There is nothing to think about Easter and Christmas. Here, as they say, God himself commanded.

Even on weekdays, you must admit, a charming angel soaring carelessly under a chandelier or cornice will add tenderness and warmth to your everyday life and make you smile once again.

There are a huge number of varieties of these cute heavenly creatures. You just need to look at photos of paper angels on the Internet. Their number can make your head spin.

A huge variety: from angels of very complex designs, the manufacture of which takes several hours, or even days, and a master class is required, to very simple little angels, which can be made in a few minutes.


How to make an angel out of paper with your own hands?
First of all, you need to decide what kind of angel you will make. Probably, you should not start with complex crafts that require special skills. It is better to start with simple, but very cute angels.

To cut a simple angel out of paper, you do not need much experience and knowledge. Just take a sheet of thick paper and draw a cute angel on it. Cut out and decorate it. Glue a loop of string or ribbon to the top of the craft. Voila! A lovely creature is ready!

In order for the angel to please you for more than one season, it is better, of course, to make it from thick paper or stick it on cardboard.

Materials you may need to make:
- thick paper (drawing paper, cardboard);
- scissors;
- paints, pencils;
- multi-colored glitters;
- glue stick);
- beautiful ribbon or lace.

Volumetric angels
The next in complexity are voluminous paper angels. When making them, you already need to show some ingenuity. Here, probably, there will already be a clear sequence of actions, the implementation of which is necessary to obtain a result.

First of all, you will need to print a paper angel stencil on a printer or draw it by hand directly on the sheet that you are going to use. Then, carrying out strictly sequential actions, such as cutting, bending, folding, gluing, you will eventually give the angel the necessary three-dimensional shape.

In the end, it remains only at your discretion to decorate the angel and carefully glue a loop of string or ribbon to it.

To make these angels you will need:
- template, stencil crafts;
- scissors;
- thick paper, whatman paper (or any paper that you like);
- beautiful ribbon or cord for hanging;
- paints, pencils, crayons;
- multi-colored glitters;
- adhesive tape (transparent and colored, with drawings).


As mentioned earlier, there are many more ways and options to make an angel craft. There are complex and bulky designs that combine many paper elements and details that require extraordinary knowledge and skill from their creator. We have already considered two simple types of crafts that even a child can handle.

In any case, no matter what kind of paper angel craft you choose, it is guaranteed to be a wonderful time. You will have fantastic opportunities to decorate your personal angel in the way that your heart tells you.


The main thing to remember is that you are not just doing a craft, you are creating an angel. It is unlikely that anyone will dare to challenge your vision of the image, except for the one who saw a living angel with his own eyes or is one himself.

Photo of paper angels