Knitted top pattern. We sew tops and T-shirts - quickly and easily !!!! Preparation for work
Hello, I propose to sew a top on thin straps without a pattern.

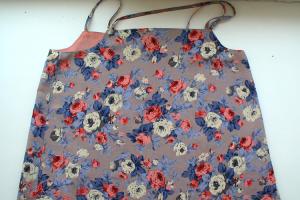
This is such a beautiful soft top.
I bought two leftovers for the top, 45 and 50 cm long. A printed staple for the top and a plain chiffon for the bottom, the chiffon is obviously longer.
Initially, I planned the top with four straps, but ended up using three.

Top pattern directly on the fabric
I have the same front and back in the top, as well as the height. Therefore, the front and back are identical, and I cut them both at once. I fold the material in half and again in half - in 4 additions. The double fold is the middle of the pieces.
The height of the rise from the armhole is 6 cm. The fact is that the top under my arm runs high, descending literally a centimeter from the armpit. But if someone prefers the armhole to be lower, then the rise must be made higher.
In general, it is better to immediately cut off less, and then add, if necessary.
Width at top: Chest circumference divided by 4. For example 92/4 = 23 cm. Again, if the armhole goes lower, approaching the widest point in girth, make an increase of 1 - 1.5 cm: 23 + 1 = 24 cm .

I simply measured the width of the rise on myself, attaching a ruler.
As far as the piece of fabric allowed me, I expanded the bottom.
I'll cut through the drawing with a smooth line. Side in a straight line.
I cut out, laying allowances.

I bring the bottom line to the side line at a right angle. Otherwise, the top will sag on the sides.

After trying on the cut out details and making sure that everything is in order and everything suits me, I fold the chiffon into 4 additions and cut out two more details from it.

To make chiffon obey well when cutting and sewing, it can be sprinkled with hairspray or starched
I leave the bottom of the chiffon longer.

Got 4 pieces.

Sewing
Top front line
I pin the straps to the front side of the shelf.

I retreat from the edge by the amount of the allowance.

On top I put a chiffon shelf. If suddenly the lower part has a front side, then impose meaningfully: the upper side will peek out from below.


I'm chipping away

I am machine stitching the top.

I cut out a corner. On the allowances of the armhole I make cuts.

Stitching. I turn off the allowances for chiffon, turn it over to the front side and make a line along the inner chiffon side at a distance of 1 mm.

The stitching is done to strengthen. I go as close to the corner as possible.

I iron the top. I make sure that the chiffon does not roll to the front side.


Upper back line
I also fold and connect the back of the top, with one exception: I leave the places under the straps unstitched.


Gently iron the unstitched corner.

Side seams
I connected the side sections with a French seam.

Chopped slices right sides out

I make sure that the connection points match exactly.

I'm grinding

I trim the allowances

I turn inside out and iron the seam

I stitch at a distance of 5 mm.


Where the cuts still got out, I cut them.

Bottom processing
inside out top

I fold the bottom twice and hem.

Top - a miniature sleeveless T-shirt, often with thin straps. This season, these products have become a real trend. Thanks to its laconic appearance, such a T-shirt looks good not only in a casual look, but also with a business suit. A handmade thing will ideally sit on the figure of the owner, favorably complement her image. Before you sew the top yourself, you need to choose the right pattern. A pre-studied algorithm of actions will help to avoid errors in the process.
Miniature sleeveless T-shirts are often worn during the warm season, so the material for sewing should be light. A summer top made of knitwear will allow the skin to breathe and will absorb moisture well. Models and patterns of such products are distinguished by their simplicity and conciseness. Top for evening outings can be made of silk, viscose. The beach version is sewn from cotton, linen.
Almost any fabric before cutting requires decatization - treatment with steam or water. This is necessary in order to prevent shrinkage of the finished product after the first wash. The decathing technique depends on the density of the matter. As a rule, the fabric must be wetted with warm water and left for several hours, after drying, iron. Exceptions include linen, silk and cotton fabrics - they only need to be ironed, without soaking.
accessories
To sew a top with your own hands, you will need the basic tools that are used when sewing. For work, you should prepare:
- sewing machine;
- iron;
- scissors (separately for fabric and paper);
- centimeter tape;
- pins;
- tailor's chalk;
- accessories for decoration (optional);
- threads of two colors.
Beginners should be aware that any product is sewn with several threads. At the cutting and basting stage, contrasting stitches are taken (for example, black stitches are superimposed on a white fabric). Machine stitching is given with threads in the color of the material. This is necessary in order to simplify the process of removing running stitches.
The pattern of the top for beginners contains three parts: front (1 part with a fold) and back (2 parts). For the edging of the collar, a figure 3-4 cm wide is drawn (rhombus, rectangle or oval), depending on the type of neck selected. The length of the element must necessarily correspond to the size of the armhole for the head.
The allowance is 1 cm at all seams in the product, except for the bottom, where it is necessary to leave 3-4 cm.
Required measurements
The key to tailoring a quality product is correctly taken measurements, regardless of whether simple patterns or complex ones are involved in the work. Basic Rules:
- measurements are taken on underwear;
- for a right-hander, the right side is measured, and for a left-hander, the left side, since these parts of the body are more developed;
- a pattern is always half of the product, so we must not forget that some measurements must be divided in half (girth of the hips, neck, chest, waist, back).
List of required measurements:
- Neck girth. It is measured in its lower part, a centimeter tape is laid from the side of the face.
- Chest girth. The tape is laid along the line of the shoulder blades and along the most protruding parts of the chest. The model must stand without holding their breath. The tape adheres to the body, but does not press.
- Front length. Measured from shoulder to waist at the protruding parts.
- Chest height. Length from shoulder to the most protruding part of the chest.
- Back length. Measured from the bone at the base of the neck to the waist.
- Length of the product. It is measured from the bone at the base of the neck to the end of the desired length of the product.
- Shoulder length. It is measured in the case when the desired result is a top with wide straps.
You cannot take measurements yourself, because the result may not be accurate. And in the art of sewing, any inaccuracy threatens that the product simply does not sit on the model, so it's better to ask someone to help.
You can refer to the size chart.
|
Dimensional sign |
42 | 44 | 46 | 48 | 50 | 52 |
| Neck girth, cm | 34 | 34,8 | 35,6 | 36,4 | 37,2 | 37,8 |
| Chest width, cm | 32,2 | 33 | 33,8 | 34,8 | 35,4 | 36,2 |
| Shoulder girth, cm | 26 | 27,4 | 29,2 | 31 | 32,4 | 40,6 |
| Bust, cm | 84 | 88 | 92 | 96 | 100 | 104 |
| Back width, cm | 33,6 | 34,6 | 35,6 | 36,6 | 37,6 | 38,6 |
| Waist, cm | 66 | 70 | 74 | 78 | 82 | 86 |
| Back length to waist, cm (including protruding shoulder blades) | 41,3 | 41,4 | 41,5 | 41,6 | 41,7 | 41,8 |

Sewing steps based on the model
Each model of a sleeveless T-shirt is individual and requires a special approach to work. Before sewing a summer top, you should study the algorithm of actions in detail. In addition, you need to prepare in advance all the necessary materials and tools.
Linen style with lace
For sewing a linen top, you can choose silk, chiffon, satin, light cotton. Basic rule: the fabric should flow, be light and delicate.
The lingerie-style top has thin straps.
We sew according to the following algorithm:
- Cut out a pattern from paper. Under the darts, it is necessary to sign the names of the parts, as well as mark the front and back sides.
- Fold the fabric in half. Attach the pattern to the fold, secure the paper with needles.
- Cut the elements from the material according to the pattern, leaving a 1 cm seam allowance on each side. You should get two front and two back parts.
- These parts must be folded wrong side to each other. Sew by joining them on the sides.
- Straps can be made from ropes in the color of the fabric.
- Turn one part of the product inside out and sew on the straps.
- Take the second part of the top, turn it inside out, thread the other part into it, chop it with pins from above along the perimeter of the product.
- Sew the top on a sewing machine.
- Turn the top inside out, pin a lace ribbon to the bottom of the product, stitch again.
Iron the resulting lace top. You can wash immediately, but it is better to do this before sewing. Some fabrics may shrink after washing.
 The French seam joins the front and back pieces.
  Turning details are duplicated with a thin doubler
  The patches are stitched together
  Straps
  With the help of a needle, the straps are twisted and ironed
  The facing and the main part of the top are folded face to face, straps are placed between them. The entire circumference of the top of the top is stitched
 Summer spaghetti straps
As a rule, patterns for tops for the summer are practically no different from patterns for lingerie-style products. The only difference is the material. Summer top is sewn like this:
- Trace on paper any T-shirt that fits your figure well and cut it out. In this case, it is necessary to select a material similar to the sample in terms of elasticity.
- Fold the fabric in half and attach the pattern to the fold. Fasten with pins, cut out, not forgetting to leave a seam allowance around the perimeter of the entire product (1 cm) and from below (3-4 cm). You should get 4 parts: 2 front and 2 rear.
- Sew the front and back pieces along the sides, putting them on the wrong side of each other. Next, thread one piece into another, sew along the perimeter from the wrong side.
- Process the bottom of the top: bend it twice at the same distance, flash it on a typewriter.
To create a women's top for the summer season, elastic cotton fabric is suitable. It should be light but strong. It is important that the jersey top does not interfere with air exchange.
 The pattern is created directly on the fabric.
  When cutting parts, allowances must be taken into account
  From the chiffon folded 4 times, it is necessary to cut two parts
  The bottom of the chiffon parts should be longer
  There are 4 parts in total.
  Straps are pinned to the front side of the shelf
  From the edge it is necessary to retreat by the amount of the allowance
  A chiffon shelf is superimposed on top
  Machine stitched on the top
  The corner is cut out. Cuts are made on the armhole allowances
  Stitching. Allowances for chiffon are turned away, turned over to the front side and a line is made along the inner chiffon side at a distance of 1 mm
  The top part is ironed
  The back of the top is folded and connected. Shoulder straps remain unstitched
  The side seams are joined with a French seam.
  Sections are cut right sides out.
  Allowances are trimmed
  The bottom is double tucked and hemmed
  Processed bottom
  The straps are inserted into the places intended for them.
  After adjusting the length, the straps pin up
 From an old t-shirt
You can sew a short sports top yourself even from an old T-shirt that fits in size. You should act according to the following algorithm:
- If the t-shirt has long sleeves, then they must be cut in a semicircle.
- The bottom of the product must be cut with scissors (straight line or semicircle). For decoration with ties, you can leave two stripes on the bottom on the front of the T-shirt, cut the rest short. The stripes should be placed as part of an unbuttoned shirt. Next, they need to be tied into a careless knot. This option for processing the bottom of the product is now popular.
This top is perfect for walking or playing sports. Now the trend is slight negligence and maximum comfort, so the sections can not be processed on a typewriter.
Simple no pattern
From an ordinary piece of fabric, you can create anything. But not everyone wants to take measurements and build patterns. There is a method of sewing an interesting miniature T-shirt without preliminary markings on the fabric.
Sewing algorithm:
- Take a rectangular piece of fabric. It should be wider than the shoulders of the model, and the length should be just below the waist. It is better to take a silk or satin fabric.
- Lay out the fabric on the table. Bend the upper corners to the middle, between them there should be a distance of 3-4 cm.
- Secure the fold line on both sides with pins. Trim the folded corners, leaving 1 cm from the location of the fasteners. The top of the product is the neck, it will be located under the neck.
- Sew the cut folds.
- Attach a thin elastic band to the neck from the inside, stitch.
- Next, fold the fabric remaining on top of the elastic to the wrong side (hide the elastic) and sew.
- Trim the bottom of the product to the desired length of the top.
- Attach a wide elastic band to the bottom of the T-shirt on the front side, and sew it from the inside out.
- Attach fasteners to the sides of the elastic elements.
- In the pocket where the elastic is located, thread the cord. Adjust the length to the size of the girl's neck.
How to decorate
To make the top unique and interesting, girls tend to decorate it with their own hands. However, it is worth remembering that the decor elements must be in harmony with the style and color scheme of the product.
Decoration methods:
- Sew beads of various sizes on the neck of the product, the closer to the throat, the more beads.
- Top with straps can be decorated with fringe, placing it near the neck.
- Sew lace ribbons to the straps and bottom of the top.
- Make embroidery on the chest or on the bottom of the product.
Top with thin spaghetti straps can be easily sewn by yourself. Following the instructions, even a novice craftswoman can cope with the work. Fashionable and stylish sleeveless T-shirts will be at the peak of popularity for a long time to come. A lingerie top worn under a formal jacket will add charm to the look, and in combination with a pencil skirt it will look elegant and fashionable.
Video
Greetings, dear readers of the blog site! Today I will tell you how, and you can download pattern size 44 or build a top pattern by ourselves.
I will not paint the charms of the top as a wardrobe item, its convenience and compatibility with various options for skirts, trousers and shorts. Specifically, I sewed this model from the remnants of the fabric from which I sewed the dressing gown with the smell of size 42 the day before (with a pattern for downloading).
The fabric for the top can be conditionally divided into two types:
- stretch fabrics (stretch)
- non-stretch fabrics (natural: cotton, poplin, linen)
This choice of fabric affects the choice of pattern:
- If the fabric stretches, then you can build a pattern with negative increments, or cut out a top using an existing tight-fitting T-shirt as a basis; for a top made of stretchy fabric, most likely chest darts will not be needed.
- A pattern for a non-stretchy top is built according to a pattern based on a chest tuck or a non-stitched pattern, a top with a tuck on the chest will fit the figure, a top without a chest tuck will be free, according to the principle of a man's shirt.
We select the desired pattern option, based on the fabric you have, and proceed to cutting and sewing.
If the size suits you, download the pattern size 44 and print it on A4 sheets.
Sew a do-it-yourself top step by step
For this top I needed:
- cotton fabric 0.5 m
- assembly elastic 1m
- threads in tone
- good mood!
The process of sewing a top is not difficult in my opinion, but I often spend more time than I could while I am finalizing the pattern. You already get the "cream" of the process in the description, so I never worry about sharing my patterns - they are tested on me!
I sew a top made of cotton, it does not stretch, so I make a chest tuck.
We cut out the details of the front and back, make out the chest tuck on a typewriter:

Cut out a strip of fabric for the ruffle.
Usually, in order for the fabric to lay down with a small fold, you need to take 1.5 lengths (that is, for example, the circumference of the top above the chest = 80 cm, then we cut out a strip of fabric 120 cm long).
The width of the strip for the ruffle is also desired, I made it 6 cm wide.

We sew the strip for the ruffle into a ring, process the lower cut of the ruffle with a double hem and iron it.
See also:
Then, along the upper cut, we make a machine stitch on the largest stitch, this is done in order to then pull one of the threads in the seam and evenly gather the fabric until the circumference of the ruffle strip decreases to the desired size.
Sew the frill to the top cut of the top:
We retreat 2 mm from the top edge of the top and lay a machine line to fix the ruffle around the entire circumference of the top.
We measure ourselves in the girth above the chest with an elastic band, then we sew the elastic band into a ring:
Now we insert the elastic between the ruffle and the main part of the top and make a stitch on the typewriter, creating a drawstring 1 cm wide. On one side (near the side seam), you will need to leave an unstitched segment = 2 cm (just in case, if you need to adjust the tightness of the elastic).
Now let's make the straps for the top:
This is such a beautiful top. Considering that it was sewn from the leftovers (that is, it could simply not exist, like products), I am especially in awe of such things created from almost nothing!
And in the next article I will tell you how I sewed an asymmetrical skirt, so fashionable this season (as in the photo above).
Sew with me, dear readers, send your work in the comments and write to me, I will answer and help!
See also a great video on how sew a top with a flounce on the shoulders, now I also want such a top for myself:


Hardworking - a bright light burns through life, lazy - a dim candle
Sewing tops and t-shirts is quick and easy. Part 2.
visibility 36123 views
Good afternoon. Today we will sew top on your pattern basis. - and I tried to “invent” just such a way to create a pattern that is understandable even to an “absolute teapot” and a hopeless lazy person (like me) - you should like this fun and absolutely unpretentious way to create your basic pattern.
And since for many of us the base pattern is already ready, let's start using it for its intended purpose, and start sewing tops. Answer to the question “Why not start with dresses?”- read in the previous article of the cycle "Sew tops - quickly and easily."
So, our first topic will be sewn in an absolutely classic style. That is, it will be a simple straight cut topic without any "bells and whistles".
Here are the tops of a straight silhouette:

But you will not be bored with sewing such simple topics. Because…
This lesson has three IMPORTANT tasks:
Task one- remember that there are several types of basic patterns - depending on what silhouette of the product we need (adjacent, semi-adjacent, straight)
Task two– TO CHECK WHETHER OUR BASIC PATTERN IS SUITABLE FOR US. Well, we need to make sure that we drew everything correctly and didn’t make a mistake anywhere, and that the thing made according to the pattern sits well on us and doesn’t squint anywhere and doesn’t pull.
Task three- sew a topic with a straight silhouette. And using his example, practice transferring the darts from the shoulder (from where it is drawn on the pattern) to the side seam area (where it is always on the clothes, i.e. just below the armpit.
Getting Started
The first thing we need is your base pattern. You have it. But WHICH she is?
Now I will remind you one thing. Remember that at the very beginning, when we were just starting to draw our base pattern, we had to decide WHAT DEGREE OF FITTING WE WANT TO MAKE THIS BASIS - and depending on this, we drew one or another width of the base pattern. This is how it looked.
And if we needed an adjacent silhouette, we added 0 cm, if it was semi-adjacent, 2-3 cm, if it was straight, 4-5 cm, and if it was a completely spacious dress, 6-7 cm.
What to do,
if your BASIC PATTERN is drawn with the expectation of an ADJACENT silhouette.
And you want to sew a topic of a DIRECT silhouette.
Let's say that when you drew your pattern, you decided at the very beginning that it would be a pattern for an adjacent silhouette (for sewing dresses molded to the figure). And now you need to sew a straight non-adjacent topic on it. How to be?
Answer 1- Spend 20 minutes and redraw the same base pattern, but with an allowance for a straight or semi-adjacent silhouette.
Answer 2- Or work with this pattern, but take knitted or stretch fabric for sewing (so that it stretches). And then it will be possible to cheat and turn the adjacent base pattern into a more spacious and wide one in a simple “clumsy” way - like in the picture below.
MODELING FROM THE BASIC PATTERN - THE PATTERN OF OUR TOP
What we do is we take our pattern, and in order not to spoil the basic pattern itself, we will perform all manipulations with its twin copy. To do this, we circle the pattern on a sheet of paper - and on this copy we will perform all the manipulations - we will turn the base pattern into a pattern of a straight silhouette top. Namely:
- transfer the tuck from the shoulder to the side seam (the tuck in the classic version is always hidden under the armpit.
- let's draw the silhouettes of the neckline (that is, we denote the desired depth of the neckline) and the silhouettes of the armholes we need.
- let's give the drawing a straight (non-fitted) silhouette - we cut the top of a straight silhouette.
TRANSFER OF THE DRAW.
Who has forgotten what a tuck is and why to transfer it. I remind you that we need a tuck so that when sewing a product in it, we get a natural bulge-capacity that matches in size with our chest. Remember, I told and showed how a flat figure becomes convex due to a groove? Here are the photos illustrating this process of creating a bulge on the chest thanks to the tuck on the shoulder.

But since the tuck on the shoulder is striking, all fashion designers came to a unanimous decision: after constructing the pattern, transfer this tuck to the side seam (under the armpit), where the tuck will not be covered by the hand and therefore will not be noticeable as if it stayed on my shoulder.
And here are the photos explaining how to transfer the tuck from the shoulder to the side seam line

So we took a copy of our pattern - on it, we did the necessary manipulations (as in the photo above), that is, we transferred the tuck to the side seam. That old closed tuck, you can secure with tape so that it does not open.
WHAT CHANGED ON THE PATTERN AFTER THE TRANSFER OF THE DRAW.
Look at the picture below - there I depicted a pattern with an old tuck and a pattern after transferring the tuck - they are side by side and they can be compared.

As you can see, our shoulder line is no longer broken, but even, and in its length it coincides with the measurement of our shoulder (you can compare). The armhole line has also changed for the better, it is now not so much curved, not so rounded - it has become more straight, more like what we see on our clothes. That is, the pattern after the transfer of the tuck has become more convenient for modeling - and this is very good. Because it is the modeling of simple tops of a semi-adherent silhouette that we will now deal with. Right in the same article.
WE DRAW THE CONTOURS OF THE NECK, ARMROMES AND SIDE LINES OF THE TOPIC
And now on this pattern we must outline the contours of our topic. That is, we must decide what kind of neck we want to see, how wide we want the straps on the shoulders, and how deep the armholes should be.
You can draw whatever you want within this pattern. The main thing is that our neckline should cover our chest, that is, it should be a couple of cm higher than the chest line. There are no restrictions in the width of the straps, in the size of the armhole too, it can be arbitrarily deep (the main thing is that you yourself like it).
Now it remains for us to give our topic pattern a straight silhouette on the sides - that is, we make it so that it is not fitted.
It's very simple - where we have a side bend at the waist on the pattern - you need to level it (so that it doesn't exist) just draw a straight (or very slightly curved) line from the armpit to the thigh. And that's it - here's a straight silhouette for you.
What you draw is what you get. For example, I will draw such a shape of the neck and armholes - and I will get such a topic.


Here is the finished pattern. Remember that there are no seam allowances on this pattern. We will draw them directly on the fabric when we trace the pattern with crayon or pencil (or if you want, you can immediately draw them on the pattern).
SEW TOP
Now you can sew the top itself:
1.) First, trace the pattern on the fabric. We put the pattern on the fabric, circle it with a pencil or chalk. On the details of the front from two sides we transfer the drawing of the lateral axillary tuck(we circle right along the edge of the tucks, naturally without seam allowances - it will simply be covered with a machine line).
2.) Cut out these drawn details from the fabric.
3.) On the details of the front, we immediately sew up the tuck on both sides. I hope this is clear how - we apply the drawn edges of the tuck to each other, sweep it with threads and then put it under the machine and sew it with a seam. Whoever doesn’t understand, let him take out any of his dresses or blouses from the closet and stroke how the tuck is closed there. So, we closed the tuck with a machine line - we take out the product from under the machine - and the threads hanging from the edges of the seam can simply be tied in a knot (or if the fabric is transparent, it is better to thread them into a hand needle and mask them with stitches in the seam and make a knot in the middle of the seam itself).
4.) Now we connect the back part with the front part - side and shoulder seams.
5.) We process the neckline, armhole cutouts and the bottom of the product.
How exactly to process, I described in detail in, or by. Everything is told there: what lines to scribble, and how to overcast, and how to work with knitwear without an overlock.
And that's all for today. In the next article we will sew
Olga Klishevskaya, specially for the site.
To set up printing of pattern No. 442 of A4 format, use "Test square No. 2 ″! The test square is located on the first sheet in the pattern file.
Top pattern. Top of a direct silhouette, average volume. Chest darts and a horizontal undercut at the front.Back with shoulder darts and an average seam in which the fastener on a band lightning is located. The bottom is multi-level: in front the length is above the hips, the back is hip-length. Cuts are made in the side seams.
The length of the product along the middle seam of the back in size 44 in height 164-170 - 60.0 cm in finished form(the neck is deepened by 1.5 cm).
Chest gain 5.0 cm (total volume 10.0 cm), waist gain 10.0 cm (total volume 20.0 cm).
Fabric consumption: width 140-150 cm, top fabric length 1.00 m - 1.30 m. Fabric consumption is given with a margin in case of errors when cutting and sewing.
Pattern details are given with processing allowances.
The degree of complexity of tailoring - “For beginners”
When buying a pattern, a file is attached with a description of tailoring and with the necessary consumption of fabric, materials and accessories.
The pattern in your order will be in two print options:
1. For printing on A4. You need to print the pattern on a regular printer on A4 sheets, then glue the sheets, cut out the pattern and you can sew!
2. For printing on a wide-format plotter. Pattern details are located on a sheet measuring 60 * 128 cm.
We were inspired to create this pattern by photos from the Internet. It was these photos that “inspired” us, because we do not pursue the goal of completely repeating what we saw: on the contrary, our goal is to create a unique product. The model of the product may differ from the photo from the original source, the exact image of the model is shown in the technical drawing.
Daria 11.02.2020 21:59:25
good afternoon, if the parameters are OG 91, OT 68, then what size is better to choose?
Administrator: Hello, size 46 will fit you
Victoria 05.10.2019 16:47:14
Hello! Is it possible to add sleeves to this top and sew a T-shirt for sleep from 100% cotton? Do I need to extend the shoulder line for this to sew in the sleeve?
Administrator: Hello, the pattern is made for fabric with no stretch or with a slight stretch, not for knitwear., pay attention to this.
The sleeve can be completed if you have the skills of designing and modeling. Whether it is necessary to extend the shoulder at the same time, you need to look at the fitting of the layout.
Natalia 06/25/2019 00:15:23
Liked the pattern! On the growth of 172, the type of figure "slender column" fit size UP TO 170! An awl without undercuts, trimming the neck and armholes with a thin oblique trim (all from the inside), instead of a zipper, a button with an eyelet. It came out great in a summer light yellow color. Thank you
Administrator: Hello, thanks for the feedback! Glad you liked the pattern! Wear with pleasure!
Natalia 05/21/2019 19:56:42
Good afternoon! Thank you for the opportunity to try your pattern, it will help me decide on the right size in the future. After looking at and reading the instructions for printing the pattern, I still didn’t ideally print it. The square corresponds to the size, but all the other sheets were printed with only one limit line, it is not clear how and where to glue
Administrator: Hello, if the frames do not go on all 4 sides of the sheet, then your print settings are violated.
You need to check the following parameters:
1. When printing, check the "orientation" setting. This setting should be “self-portrait / album”, because of the incorrectly set orientation, the margins of the sheet may move out.
2. Check if you have a check mark in the field "Select paper source by pdf page size", you do not need to check the box there.
3. If you are printing from a browser, please note that printing from a browser may not be correct. It is better to print the pattern by first downloading it to your device.
With the same settings, with which the test square is printed exactly 10 by 10 cm, with a letter and a number in the upper left corner and with margins on all 4 sides, you need to print a pattern. Then the pattern will be the correct size, with margins and numbering.
Detailed instructions for printing patterns are on our website -
Elena 09.05.2019 11:37:16
Good afternoon! This is the most interesting free top) thank you. As a fan of jersey, I sewed from it, it turned out well, but some places look thick, so it's better to sew from a suit. From myself I added a piping to the armhole. Of the shortcomings: the armhole is small, uncritically, and the chest tuck is located rather low.
Administrator: Hello, thank you very much for your feedback!
Margarita 03/30/2019 02:27:28
Hello! I downloaded the file, but it turned out to be empty. Only the test square for the plotter is opened
Administrator: Hello, the files are fine. Please try to download again. What device are you downloading on?
Margarita 04/04/2019 02:33:42
I download on the same computer as all the other patterns. The problem arose only with this model. Maybe because it's free?
Administrator: Hello, a free pattern is downloaded to an electronic device in a zip archive. Please check if there is a program or application on your device that allows you to unpack the zip archive. Usually such programs are in the office standard package, but if you can’t open the archive, then you need to check, maybe you don’t have it and you need to install it.
Zara 04.02.2019 00:48:19
Good afternoon. Can you please tell me if jersey is suitable for this model? Thank you in advance for your answer))
Elena 14.11.2018 03:26:58
the pants are really cool, do you plan to make a pattern on them?
Administrator: Hello, this model is not planned yet. Look at our pattern 238 - this is a similar model of trousers)
Julia Kolevatova 09/28/2018 22:08:47
Please tell us more about the processing of the neck and armholes with a one-piece facing. The description is unpleasant.
Administrator: Hello, in the description of tailoring, we give the following sequence of assembling the top and facing:
- Stitch shoulder and side seams
- Stitch shoulder and side seams
- stitch the product and turn around the neck
- turn out
- stitch the product and the facing along the armholes in two steps: first, fold the front sides of the armholes of the product and the facing from the shoulder to the side along the front - stitch. Then unfold and fold the front sides of the armhole of the product and facing from the shoulder to the side along the back - stitch. We'll have to crawl, it's not easy, but it's possible, and it turns out neatly as a result.
There are several ways to connect the facing with the base, you may like the method that we showed in our free master class on YouTube - https://www.youtube.com/watch?v=I1YaP9Hj14Q&t=245s&list=PLvRH25t1YWHnHYKwYk-532N4hdROpIoc2&index=8
Vera 02.08.2018 16:05:53
Good afternoon. Is it possible to match this top with a sleeve from one of your patterns .. I can’t build it myself. I'm just starting to sew. I sew according to ready-made patterns. Thank you.
Faith 08/03/2018 17:25:02
Irina Grigorieva 29.06.2018 20:14:08
The top is just amazing! Fit perfectly. I sewed as many as three pieces, both for trousers and skirts. I didn’t make a zipper, I made it on a button on the back. Thank you!
Administrator: Thank you! Wear with pleasure!
Balnur Kubasheva 09.06.2018 21:27:03
Hello. My daughter's size according to your size chart is 44, but the top turned out to be big. Why???
Administrator: Hello, what measurements did you use to choose the size of the pattern?
Balnur Kubasheva 13.06.2018 15:14:54
Og-88, Ot-76 given by my daughter, I chose a size 44 pattern, but it is large. How to be? At least it's a free pattern. And what about paid ones? We then have to pay twice, what would the size match??
Administrator: Hello, is the print correct? There is a test square on the first sheet in the pattern file, it should be 10 by 10 cm.
In general, the top is not oversized, it fits true to size. Could you send a photo for us to look at?
Balnur Kubasheva 11.07.2018 11:52:41
Hello. I sewed this top fits perfectly. The only joke is that according to my data for OG-102, OT-89, I took a pattern of size 48 and sewed it, it fits well. And from a pattern of the 50th size I sewed but the top is too big. I can’t send a photo “I’m not friends with a computer”, if I lived in Russia, I would send it by WhatsApp (I’m from Kazakhstan). How can I continue with other patterns?
Thank you.
Administrator: Good afternoon! This model of the top is free-cut, it contains large increases. For free-cut patterns, you can still choose size 48, but with small volume patterns, we advise you to be careful, as they may be small for you, and it is better to choose size 50.
In general, you need to focus on the increases included in the pattern
Svetlana 26.04.2018 13:27:12
Good afternoon! Tell me, what size of pattern 50 or 46 is better to take if I have OG 100 cup E, and OB 94, OT 74. I take all patterns from “burda fashion” 38-40 and make adjustments for large breasts
Svetlana 25.04.2018 05:41:33
The top turned out great, I didn’t have to change anything! Perfect. Thank you very much for the template
Administrator: Hello. Thank you very much!! Wear with pleasure!
Aya Sapar 19.04.2018 18:04:25
I have a height of 164; downloaded a pattern in the range 158-164 size 44; I sent off the top, but my shoulders are a little tight (my shoulders are wide)
Administrator: Hello, if the measurements differ from the standard ones, then it is better to first sew the layout and adjust the pattern according to the layout for the best fit.
Ruslana 26.01.2018 15:28:49
Good afternoon. Is it possible to use a thin fabric in this model, such as crepe chiffon?
Administrator: Hello, you can, but the shape of the product will not be the same as in the photo.
Julia 11.10.2017 12:13:40
It's a pity that I couldn't download the pattern, it says that the author of the file has configured it so that it is impossible to use the content on third-party applications. Other free patterns downloaded successfully.
Administrator: Good afternoon! Perhaps you are trying to open a pattern in an editing program, and our patterns are protected from editing.
Try opening the pattern in a regular PDF reader such as Adobe Reader.
Svetlana 27.09.2017 14:53:33
Hello, thanks for the pattern type and video tutorial. but there is a zipper in the top and how to connect it with the collar around the neck? explain. Thanks.
Olga Ivanova 08/09/2017 18:29:06
Hello. And by how much approximately (minimum) should the neck be enlarged if sewing without a zipper? Thank you.
Administrator: Good afternoon, You need to focus on the volume of the head in this matter.
Ksenia Prus 06/15/2017 12:27:19 PM
Good afternoon. can you do it without lightning? Will the head fit in, or make the cutout bigger? Thanks
Administrator: Good afternoon! If you want to sew this product without a zipper, you need to widen the neckline.
galina 13.06.2017 16:49:06
Good afternoon! Tell me, please, how to handle the corners of the bottom and cuts? Thank you!
Administrator: Good afternoon! You need to bend the bottom allowance and the cut allowance and stitch together, in the area of the cut corner. Before that, process the cuts of the bottom and cuts on the overlock. At the end, secure the bottom seam allowances with hand stitches. We also have a free master class showing how to process cuts.
galina 06/19/2017 16:50:51
Thanks a lot! Helped a lot! It seems to be a trifle, but I stopped work on the gift .. Thank you!
Vera 12.05.2017 14:04:06
Thank you so much for the pattern and instructions! I like the top very much! The result exceeded expectations, this is my first work, about 10 years have passed since school lessons! All seams are even, everything fits, everything is fine!
Administrator: Thank you for the nice feedback! Sew with pleasure!
Julia Remezova 11.05.2017 12:00:20
Good afternoon, I didn’t quite understand the sequence of sewing the product, regarding the facing of the neck, one-piece with the facing of the armhole. Maybe a mistake in the tailoring description? Thank you.
Administrator: Good afternoon! In the description of sewing model No. 442, one-piece facing is not mentioned, maybe you can write to us by mail and we will try to help you)
Tatyana Babko 04/24/2017 15:54:56
Good afternoon. Can you tell me if there is a one-piece facing in this product? If yes, then the shoulder and side seams are not ground down until they are turned over?