How to curl big curls. How to make the most beautiful curls at home? Roll on a finger
Gorgeous curls. This type of styling for the occasion and without looks great with both jeans and an evening dress. Curls, waves, curls will never go out of fashion and will become a worthy decoration for any hair. Today, there are many devices for winding hair without the help of hairdressers. You need to be able to cope with your own hair, this will save time and money. In this article, we will tell you how to make voluminous curls at home using simple improvised means: ironing, hair dryer and foil. And also you will learn a lot of useful tricks that will allow you to carry your chic curly burden to everyone's envy.

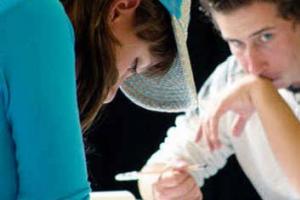
photo of curly hair
Some facts about curly and wavy hair:
- Curly hair or fluffy hair that is prone to frizz is dry and porous in texture. They have a flat, slightly compressed shape, due to which a spiral curl appears.
- Curly hair is almost always dull. The scales covering the hair, due to the numerous spirals, rub against each other much more often. They acquire a matte surface, which is why they often break off and split.

- Curly hair is very tangled, which makes it difficult to comb it. A comb with wide teeth or a massage comb will come in very handy here.
- Due to the fact that the hair is dry, it does not require daily washing.
- Due to its porous structure, such hair is capable of eating any cosmetic product that you would not put on it. They are always “hungry” and need extra food. It is advisable to apply a caring mask before washing.

- Any sharp movements with a towel through wet hair will injure them even more. If the curls are allowed to dry on their own, they will turn into a beautiful styling. The paradox is that the more you try to conjure over them, the worse the result.
- After washing, apply oil to the hair. It moisturizes, nourishes and makes them shiny. But if the oil is too simple for you, and you are not looking for easy ways, then choose care or styling products that do not contain alcohols and non-volatile silicone substances.

- Even curly hair needs to be curled when it loses its shape after washing. A conical curling iron with thermal protection will help here, which will make the curl as natural as possible.
- At night, it is better to braid your hair not in a pigtail, but in bundles. This will help maintain the shape of the curl and not wring the curls.
How to make voluminous curls at home, you will see in our photos with step-by-step instructions and videos from famous bloggers and celebrities.

Photo instruction
We begin to create voluminous curls:
- Before you start styling, you must thoroughly wash your hair. Foam will lie better on wet hair. If you want a cool volume, then without a special foam and - nowhere! We apply randomly, evenly distributing over all strands. The randomness and disorder of movements during styling will give the curls immediacy and naturalness.
- It is also better to apply a heat protectant in advance so that the hot air of the hair dryer does not damage the structure of the strands and does not destroy them. Then we begin to dry the hair with a hairdryer, before these lightly massaging a comb with wooden teeth, so that the hair at the roots becomes more active and rises. The main thing is that the roots are completely dry.

- When you dry the roots, the tips may still be slightly damp. It's time to structure them with a spray or hair salt. Now dry a second time, paying attention to the tips. In the process, you can slightly lift the roots with a hair brush.
- When the volume has become noticeable, it's time to start creating wavy hair. From the face, it is necessary to wind one strand onto a hot curling iron. Be careful not to get burned.
- Then you need to fix the shape of the curls with varnish, slightly distributing the strands with your hand to achieve a natural effect.

Photo by Maria Ivakova from the beauty blog
Turn on the video and repeat after Maria Ivakova. You can also try Maria's hair products and trust her expert opinion.
Curls without a curling iron
Most girls are very sensitive to their hair, so they try not to expose them to chemical or mechanical stress. Let's figure out how to make voluminous curls at home without curling irons, tongs and curlers. There are many methods on the net: using bandanas, paper, foil, hairpins, tying pigtails at night, etc. It's all too tedious and time consuming. But there is one easy way for long hair that only takes 5 minutes before bed:

- We wash our hair, dry it thoroughly and comb our hair. We apply foam or mousse to the ends of the hair so that the curls hold better.
- We divide the hair into two parts and create the desired parting. Then we divide each part into three more even strands so that our curls turn out to be the same in shape, and the hairstyle looks harmonious and beautiful.
- To prevent the strands from intertwining, they can be marked with an elastic band or a hairpin for convenience.
- We comb each strand up and begin to twist each in the direction from the face. From each strand you should get a twisted tourniquet.
- We try to raise the harnesses as high as possible so that during sleep they do not interfere.
- We wrap each tourniquet in kralk, securing it with an elastic band, and boldly go to bed.
- If during the night the bumps from the bundles fall a little, it's not scary. We unwind each and get beautiful curls. The waves should turn out elastic and clear. And now enjoy your reflection in the mirror!
To get more curls and volume, bumps can be made in larger quantities at your discretion.
There are many more tricks on how to make voluminous curls at home, the photo below shows step-by-step instructions for working with foil.
- To do this, we need additional tools: a massage comb, a pair of clips, varnish, an iron and food foil.
- We divide dry and clean hair into vertical partings from the highest point of the head. We fix the extra strands with clamps, we make partings either with a comb or with our fingers.
- We take a strand, twist it into a ring (lamb) and wrap it with foil. We do such actions with each strand throughout the head.
- We take an iron and press the foil for 5-7 seconds, no more.
- When the strands have cooled, remove the foil. The resulting curls can be broken with your fingers or combed with a massage comb. Next, we record the result.
If the hair is thick and very long, try to make the strands thinner. And if you want more volume, lift the lamb higher approximately along the line of the ear.
Curls in 10 minutes
To make voluminous curls at home without ironing and stylers, without harming the hair plate, it is not necessary to braid the bundles at night. Curls can be made quickly, armed with a hair dryer and a hairpin!

Let's get started:
- On clean and dry hair, we select sections of strands, even in a chaotic manner, and begin to wind. The main thing is that all strands should be twisted in the same direction: either on the face or away from the face.
- We create a tourniquet by twisting the strand around the base, and fix it with a hairpin or clip.
- We start heating the hair with a hair dryer for 5 minutes to give fixation. Then let them cool for 10 minutes and remove the clamps.
- Removing the clamps is the most important moment. Here we begin to shape the styling, creating voluminous curls.
So in just 10 minutes you will achieve luxurious voluminous curls.
Afro curls with an iron in 20 minutes
For many girls, it is not enough to wind curls or voluminous curls; they dream of an Afro-style hairstyle. This image can be used in everyday life, in photo shoots, at parties. You can be sure of one thing - it will radically change your appearance.

Stylish afro curls
For such ladies, there is a win-win way - creating afro curls with an iron and sushi sticks (or a pencil):
- We apply mousse to the hair, divide it into zones and wind each small strand on a stick or pencil.
- With a hot iron, we slowly go through the hair wound on a stick to warm it up and fix it.
- Do the same for the entire head. Hair should be placed as close to each other as possible.
- The thinner you take the strand, the smaller and clearer the curls will be. If you choose thick strands, then the effect will be like an ordinary curling iron.
- To make the hairstyle look natural, the hair must be distributed and fluffed a little with your hands.
- You can fix the result with mousse or varnish. The result will last about two days with proper care.
Curls from Gluck'ozs
Natalya Chistyakova-Ionova, known to everyone as Gluk'oZa, will tell us about creating curls for medium hair in her beauty blog. The girl became a video blogger in the field of beauty. In her short videos, Natalia tells her fans about the secrets of fashionable styling, shares her experience, and gives useful tips on personal care products in a very relaxed atmosphere at home. In many editions, the star does not hesitate to appear to the audience in a hairnet, with funny hairstyles or not made up at all. Natalia also talks about how to properly apply makeup and recommends her favorite skin care products and cosmetics.
In this issue, Natalia shows herself how to quickly make chic voluminous curls on short hair. At the same time, everything looks very natural and professional.

- Before styling, the hair must be washed and dried with a hair dryer, preferably upside down, so that the hair is already slightly raised at the roots.
- You will need hairpins and crabs so that the hair does not get tangled. You can also powder your hair a little at the roots with a professional tool.
- After powdering, we proceed to the pile. It is advisable to use a miniature hair brush and work through each strand carefully.
- It is better to use curling irons of different sizes so that the curls look natural. You can also work out small strands with a small curling iron.
- We wind with a curling iron one strand from the roots, without touching the tips.
- Try to hold the curling iron vertically and wind your hair away from your face. Do not leave the curling iron on one strand for a long time, so as not to burn.
- Especially carefully and carefully wind the upper strands, as they will always be in sight.
- Then lightly fluff the hair with your hands on each side, tilting your head. We sort through each strand, giving the hairstyle the desired shape.
- At the end, we fix the result with varnish also on each side of the head separately, covering the face.
Create curls with a curling iron on long hair
Let's start creating chic voluminous curls with a curling iron:

- Carefully comb the hair and separate the strands, each row parallel to each other.
- To begin with, you can use a corrugated curling iron to enhance the effect. It is necessary to corrugate as carefully as possible, creating a basal volume. We control the pressure on the curling iron so as not to burn the scalp.
- With the help of a styler, we comb the root zone of the hair along the entire length.
- Overhead strands can be attached to the base of the bouffant to create a greater effect or to obtain the desired shade of hair. It is desirable to use natural hair on hairpins.
- We wind the strands separately from each other flatly with a tape on a curling iron, and then cool.
- The main thing is to wind the hair away from the face. To do this, it is necessary to visually divide the head into 2 equal parts and wind it from the face to the left, and from the face to the right.
- After winding, we begin to disassemble the strand, using an aerosol dry or liquid varnish for fixing. The curl needs to be given volume by stretching up and to the sides.
- There is no need to use overhead strands at the top of the head. We wind the strands at the top to create volume in the upper occipital zone.
- We disassemble the strands in stages, moving from the bottom up. It is important to create a uniform volume without obvious gaps and gaps. Curls are ready!
In order not to burn yourself when working with a curling iron, you can use a heat-protective glove.
Be bold and confident, choose those curls or curls that are right for you. You can play not only with shape, but also with color without being afraid to express yourself!

Light and graceful curls attract attention, making the most ordinary hairstyle solemn and festive. Do not count how many styling options with curls came up with resourceful stylists and hairdressers! For a romantic evening, work or an ordinary walk, curls falling in waves on the shoulders, or messy curls chaotically framing the pretty face of the charmer, are suitable.
Is it possible to repeat the hairstyles of the hairdressing guru on your own without leaving your home. Everything is real, you just need to understand and learn how to make beautiful curls at home. Of course, a positive result still depends on the type of hair, their obedience and the taste of the person who will be styling.
Curls with iron
You are mistaken in thinking that with the help of an iron you can only straighten your hair exclusively. This most useful tool for hairstyles is able to give large curls in a matter of minutes. Curls will look natural, will last for a long time.
With the help of ironing, a curly hairstyle is done as follows.
- After combing the washed hair, dry it. If the strands are wet, the iron will burn them, break the structure.
- Separate a small strand. Stepping back a couple of centimeters from the roots, place the iron and lightly press the strand.
- Moving to the tips, run the iron along the strand, twisting the curl with the device in a spiral. The first curl is ready. Similarly, twist all the hair, divided into small strands.
- After all the curls are twisted, comb them using a comb with rare teeth, or separate them with your hands.
- Final touches: put the curls in the desired position, fix with varnish.


With the help of ironing, you can make large and medium curls. Do not apply a lot of fixative, otherwise the curls will seem weighted and unnatural.
It is important to wash your hair with shampoo several times before making curls. If the strands at the roots are greasy, the hairstyle will not turn out to be aesthetic. Rinse with air conditioner, balm is not worth it, otherwise the curls will not work
How to do curly hair with a curling iron
A curling iron is in every girl's treasured beauty box. It doesn’t matter if this styling device is modern with many useful and interesting features or inherited from your mother, you can complete a curly hairstyle in 20 minutes.
With a curling iron, curls are wound differently than with an iron. With the help of this hairdressing device, you can turn straight hair into small curls. It all depends on the diameter of the curling iron. Washed and dried head is ready to restore beauty? Then you should start doing your hair.
- To make it easier to use a curling iron, you need to divide the hair horizontally into 2 parts. Fix the upper curls, for example, with a crab or clips (you can invisible).
- Distribute the lower hair into thin strands. If you wind thick curls with a curling iron, the hairstyle will not work. Curls cannot be made. If the hair is naughty and heavy, cover it with foam before winding it.
- Grab the tip of the strand with a curling iron and wind it in a spiral, moving towards the roots. Hold the curl with a curling iron for no more than 20 seconds and release.
- Having twisted all the curls, remove the fixing hairpin from the strands of the crown. Curl the upper curls in the same way.
- Spray homemade curls with fixative. The hairstyle is ready.
How to use papillotes
What are papillots, women have known for a long time. With the help of small flagella, without any fixative varnish or foam, in just 10-12 hours you can turn the most straight and naughty hair into tight curls. The curls will not lose their shape until the next shampooing.
True, after combing the hair becomes very lush and voluminous. For this reason, after unwinding the bundles, stylists advise combing in some cases with specially selected combs with sparse teeth.

Modern papillotes come in different sizes. They are selected depending on the desired size of the final curl. Hair is usually twisted at night, and styling is done after waking up.
If there is no time to wear papillots for a long time, you can speed up the winding process up to 1.5-2 hours. Slightly damp strands are covered with foam, papillots are wound. Next, the head is dried with a hair dryer and its hot stream.
To make the hairstyle successful, instructions on how to use papillots will help.
- Dry the washed head with a towel so that the water does not drain. Scrupulously comb.
- Dividing the hair into small strands, wind (up or down) the hairpins, starting from the tips.
- Twist the ends of the hairpin with a figure eight, fixing it so that the strand does not fall apart.
- Wrap your head with a scarf and go to sleep.
- In the morning, gently unroll the papillot and style the curls. You can leave them loose, tie a tail or stab them in several places with beautiful hairpins, invisible hairpins.
Our great-grandmothers did not keep modern hairpins in a dressing table drawer. But tight strong curls they could afford. For this, women made homemade papillots with their own hands. Despite their primitiveness, the effect was amazing. The only inconvenience is that such beauty assistants significantly spoiled the hair structure.
Papillots were made from patches (you can use a regular bandage, gauze) and newsprint or magazine thin paper. From any matter, long ropes about 3 cm thick were cut. A strip of paper was wound tightly around them in the middle. Homemade papillots are ready to use. The tip of the curl was applied to the wound paper and wound, and then fixed with a fabric rope tied to a bow.
Sleeping with such papillots on your head is not very comfortable. Yes, and removing them from the head after a night's rest is inconvenient. But what kind of sacrifices will you make to appear to the world in all its glory.
Curlers for curls
Although various modern techniques have been invented for styling and curling hair, curlers will always be relevant. With their help, you can not only curl curls quickly at home, but also make a voluminous curly hairstyle without any hair dryer.
Curlers are made of various materials, come in different diameters. Thermal ones are rarely used by modern fashionistas. These curlers are uncomfortable. Before use, they need to be warmed up well, and after, experiencing terrible discomfort from touching the hot material, somehow gently wind them up. They negatively affect the hair, destroying the structure of the rod. Although, with thermal curlers, you can quickly organize beautiful curls on your hair.
Velcro curlers are held in high esteem by fashionistas. It's easy to work with them. Having chosen the desired diameter, it is easy to wind the curls. Curly hairstyle is not done as quickly as we would like, but the result is excellent.
Velcro curlers spin on dry curls to add volume to the hairstyle. If you want to achieve tight, but light curls, the hairstyle is performed according to the following scheme.
- After washing, dry wet hair slightly.
- Cover the separated curls with foam.
- Moving from the tip, wind the Velcro curlers, slightly pressing the hair against it.
- If the curl is long, you additionally need to fix the curlers with clips, crab.
- Now it's time for drying. Dry your head with a hair dryer, first exposing a hot stream, and then a cold stream.
- Having untwisted the curlers, carry out the styling and sprinkle the curls with a fixative.

How to blow dry curls
A hair dryer is also suitable for those who want to make themselves a curly hairstyle. True, with this device you need to learn how to work. If you can’t curl your hair the first time, don’t be upset. Professional hairdressers also do not achieve the perfect beautiful hairstyle on the first try.
To blow-dry curls, you need to purchase a round hair brush with fine bristles and a good fixative. After washing, comb and apply the product, distributing it along the entire length. Distribute small strands, wind one on a comb, trying to move in a spiral. It is important not to tangle the hairs, otherwise it will be problematic to remove the comb from the curl.

Substituting a comb with a twisted curl under a stream of hot air, dry the strand, then blow it with a cold stream. Carefully remove the comb. Similarly, dry the entire head, making light curls.
Safe way to curl your hair
Like it or not, a curling iron, an iron with a hairdryer and curlers seriously spoil the hair. Those who zealously protect their hair should try this safe way to get curls. You will need an ordinary elastic band that athletes wear during their training, or a braid for composing hairstyles in the Greek style. Everything is done in stages.

- Dry the washed head and apply a fixing mousse to the curls.
- Put on an elastic band or braid on your head so that all the hair is under it.
- Separate a strand from above and twist it several times, bringing it to the back of the head, around the braid or elastic band. In the same way we scroll all the hair.
- If the hair is obedient, quickly amenable to any manipulation during styling, the gum can be removed after 2 hours. But it is better to curl the curls like this, leaving them alone all night. In the morning, removing the braid, straighten the curls with your hands.
This way, how to make curls at home, is considered absolutely safe. Hair is not injured, resting, curl
Curly hair with lots of rubber bands
Another way to turn straight hair into beautiful light curls without using various thermal devices is worth a try. This will require a lot of rubber bands. If the farm does not find the right amount, you can cut them from a nylon sock.
Beautiful curls can be made by completing 4 points.
- Divide hair horizontally into 2 sections. Fasten the lower hair for now by tying a ponytail.
- Divide the upper part of the hair at the crown into 4 parts.
- Lubricate the curl with foam and start twisting a tight tourniquet out of it. As it twists, it will curl into a bun. Secure at the base with an elastic band. Twist all curls in a similar way.
- Wait until your hair is dry. Somewhere in 2 hours you can unwind the flagella. If there is no time to wait, you can dry the twisted buns with a hairdryer.
To comb curls, do not use a comb. It is better to go through the curls with your fingers. That's the whole setup. The hairstyle is gorgeous. Looks amazing on long hair.
How to make curls wavy
Fashionistas have their own secret of how to make curls wavy without spending a dime. The hairstyle turns out spectacular, festive, attracting attention. For curling curls, you do not need to use an ultra-modern curling iron or other universal device. By the way, girls can curl their hair this way, preparing them for a holiday or a matinee.
The whole procedure takes place after the head is washed and slightly dried. Hair must be divided into numerous thin strands. The more, the more effective the hairstyle. Next, braid each curl to the very tip into a tight pigtail. The lesson is long, monotonous, but the result will please.
With a lot of braids, you need to go through about 8-12 hours. It is better to braid them at night on the eve of the holiday. In the morning after sleep, it is enough to undo the braids, walk through the strands with a comb and do a light styling at home.

Air curls with the help of invisibility
With the help of invisible people, stylists make curls, conjuring over the hairstyles of brides. The method is very simple. As a result, the curls will turn out natural, delicate and airy, with a slight hint of a curl.
It is better to do curls at home before going to bed. After twisting and fastening them, at least 8 hours should pass if you do not plan to dry your hair with a hairdryer
Cover the washed curls with a fixative (mousse, foam), divide into many small strands. Twist each, winding it around two fingers, into a ring. Press to the head and fix with invisibility. Put on a shower cap and go to bed. If time is limited, resort to blow-drying. In the morning, remove the invisibility and lay curly curls.
Graceful curls with cocktail tubes
Methods of how to wind your hair cheaply and effectively at home have been invented by resourceful beauties. Every way is amazing. Sometimes it seems that this is impossible, but in practice everything works out well. For example, if you want to get temporary tight, heavy-duty small curls, you will need to collect about 20 pieces of plastic cocktail tubes, buy invisible and any fixative (lacquer, mousse).
Everything you need is collected, you can start curling at home.
- Comb and lightly dampen hair. Bangs, if any, stab, wind it up last.
- Separate a thin strand, moisten it with mousse. Starting from the root, wind in a spiral, pressing the curl onto the tube. Pain during winding, a feeling of tightness should not be felt.
- To prevent the strand from falling apart, stab it with an invisible one.
- Roll up all your hair. Spray with varnish.
- Leave for 1.5 hours, periodically drying the head with a hairdryer.
- Carefully remove the invisibility, remove the tube from the strand.
- Finally, straighten the curls with your fingers, lay in the desired position. The hairstyle is ready.
Young ladies who naturally got straight curls complain that curls curled with a curling iron or curlers quickly fall apart and lose their shape. In fact, the hair is not to be blamed. Everything can change if, while doing your hair, you follow the following rules:
- curl only washed hair (the more fat on the curls, the harder they are to curl);
- after washing, do not use conditioner, various rinses (smooth and soft strands unwind faster);
- small curls keep their shape longer, large curls break up without a strong fixative;
- until the curls are dry, it is impossible to remove curlers, plaits, papillots;
- curled hair is best combed with fingers, styled without a comb (at worst, you can walk through the curls with a comb);
- foam or styling mousse is used before the strand curls.
It is enough just to learn how to make curls at home. There are many ways, you just need to choose the option that suits you. Curls, curls, a wavy cascade of hair always look spectacular, fashionable, stylish. With this hairstyle you can appear anywhere. And, if the curls are fed up, it is easy to get rid of them by washing your hair.
Large curls have not lost their relevance for more than a dozen years. It is possible to make large curls on your own even at home. A curling iron, an iron, Velcro curlers and fixatives will help you with this.
The current popularity for large curls that girls are trying to do at home is a tribute to the fashion of the eighties. The collections include vinyl skirts and raincoats, large earrings, belts, makeup - shadows and contouring and voluminous styling.
In the eighties, girls of all social groups and ages did chemistry, bouffant and curled their hair in curlers - just to become the owner of a dream hairstyle.
Young girls copied Madonna. The older ladies looked like Joan Collins from Dynasty. It was her chic curls that lay symmetrically, it was clear right away, styling took at least an hour. Tina Turner, Madonna, Melanie Griffith and the most popular stars of the 1980s inspire hairdressers and girls around the world today.
Those whom nature has not awarded with chic curls, just dream of getting them. But it's not always safe.
Hair requires careful preparation: they must be washed and dried, while applying balms and masks is not necessary.

Then you should treat your hair with thermal protection or hot styling foam and do this before curling.
Use products designed specifically for hot styling. Also, experts advise applying medium fixation varnish to the curls, it will help fix the curls.
In no case do not wind wet or damp strands on an iron or curling iron. You will dry them out, depriving them of moisture and thereby ruining their appearance and condition from the inside.
Curl curl options
To date, there are four types of perms:

Depending on the end result, sticks are used (wooden or plastic sticks with an elastic band), but you won’t get large waves, a curling iron or an iron will help to create such a hairstyle.
Available tools for creating curls at home
What to do for those who do not want to injure their hair? There are also devices available at home to get Hollywood curls:
- Forceps of different diameters;
- Gafre;
- Boomerang curlers;
- Flexible tubes made of rubber or foam;
- Iron:
- curling iron;
The secret to bouncy curls is to take thin strands. Spray the finished hairstyle with a texturizing spray. Then selectively take a few curls and pull them from the roots to the tips, so the hairstyle will be sloppy like a young Madonna.
Curling devices at home
Making a curl with a curling iron

It is quite possible to make elastic curls with a curling iron at home, for this:
- I wash my head;
- Dry them completely;
- We apply thermal protection or mousse for hot styling;
- We divide into zones;
- We process the strands with powder for basal volume;
- We create a basal volume with the help of a gafre nozzle;
- We make a light bouffant at the roots with a thin comb and apply a little varnish on each strand (at the roots, where the bouffant is);
- Prepare a curling iron (the diameter will depend on the final result, the length and structure of the hair).
- We wind the curls from the face onto the curling iron and let them cool;
- We disassemble with our hands (do not comb);
- When all the strands are wound, we begin to stretch them (hold the strand by the tip and slowly stretch), creating additional volume;
- We treat each strand with varnish.
We create curls with an iron
It is recommended to create chic curls with an iron at home at a heating temperature of no more than 180 degrees.

Preparation is similar when wrapping with a curling iron, only the technique differs:
- We take a small strand;
- We clamp;
- We throw it over the side of the iron and evenly stretch it with a smooth sliding motion;
- Select small strands so that they scroll evenly
In just ten minutes you will get voluminous curls created at home.
Curly hair with curlers

There are also more gentle methods for creating elastic curls; curlers for large curls will help you with this. Most often, Velcro curlers are used for this, they create sufficient volume along the entire length.
- Preparation will not take much time, the hair only needs to be washed, applied mousse for volume and slightly dried, but not completely dried;
- Divide hair into strands;
- We wind the strand on curlers and fix it with a hairpin, such hairdressers use in their work;
- We dry the hair with a hair dryer;
- If time allows, you can walk with curlers so that the result is persistent.
After the time has passed, remove the curlers, fix the hair with varnish and enjoy the volume all day.
If you show imagination and use improvised means, then you can curl large curls without any problems, even at home.

First way
- On wet curls, apply a little hair foam;
- We collect all the curls in a large tail at the crown;
- We fix using a twister (wire in the fabric);
- After an hour (you can leave the twister for the night) remove it, dissolve the curls;
- We structure and, if desired, fix with varnish.
Second way
- Apply foam or gel;
- Weave a spikelet or a regular braid;
- We go with a hairstyle for a day or leave it for the night;
- We untwist the spikelet and get a stunning curl.
This method is perfect for thin hair, devoid of volume.
Third way
- Washed and damp hair is divided into strands;
- We wind each strand on a finger, creating a flagellum, which we fix with the help of invisibility;
- We repeat this manipulation all over the head and leave them for a couple of hours;
- We untwist the flagella and fix the final styling with varnish, if necessary we structure individual strands.
If desired, with the help of a comb for bouffant, add volume at the roots. Even disintegrating, the curl lasts for a long time and looks spectacular.
Fourth way
- We use the decoration for the Greek hairstyle;
- Then the hair is twisted and placed in a hoop;
- With the help of invisibility and varnish, we fix the curls;
- We control that the curls are the same size;
- After a couple of hours, we remove the bezel and you get a spectacular mane at no extra cost.
Fifth way
- Let's try to make curls at home without a curling iron using fabric ribbons.
- Prepare fabric strips of approximately the same size;
- Divide wet hair into strands;
- Wind each curl on ribbons and twist into flagella;
- The ends of the ribbons that you tie will help fix the hairstyle;
With such styling, you will have to stay overnight, and in the morning you will get amazing elastic curls. Do not damage the curls while doing this.

Creating large curls, any girl dreams of long-term styling, which is especially difficult to maintain in wet weather.
- In humid weather, do not dry your hair with a hair dryer at high temperatures, use a medium one;
- After laying, it is worth waiting 20 minutes and only then go outside;
- Lemon conditioner will extend the life of curls: we take lemon juice and water in a 1: 1 ratio, rinse the curls twice a week after washing our hair;
- Hair styling foam will extend the life of curls. Apply it to the entire length of wet hair.
Hair care after curling
Constant styling depletes our hair making them more vulnerable to environmental influences. That is why they just need extra care..
Herbal tinctures
It is useful to rinse curls with herbal tinctures:
- Nettles:
- Chamomile;
- burdock;
We brew these herbs and rinse our hair after washing.
Nourishing masks
Once a week, you can make a nourishing mask that will restore them from the inside.
You can cook it for a month, as it does not deteriorate:
- Aloe juice - a teaspoon;
- a tablespoon of honey;
- Castor oil (refined) - 1 teaspoon;
- Three drops of vitamins A and E;
- We mix everything.
- We retreat a couple of centimeters from the roots and apply a mask along the entire length of the curls.
- We do not rub into the scalp;
- Wrap the head (with the applied mask) with a damp towel (soaked in hot water).
- Apply the mask before washing for 40 minutes.
You can create curls at different lengths, they can be both elastic and voluminous, and more free. To do this, you will need a curling iron, iron, curlers or improvised means.
How to make big curls at home: video
We have selected for you a video on how to quickly make large curls in just a couple of minutes by following the instructions, while you can do it just at home.
Large curls, gracefully falling on the shoulders, are a sure choice of all recognized beauties. It is not easy glamorous and stylish, but also feminine and harmonious. You can curl your hair with any hairdressing electrical appliances, using curlers or improvised means. Each option has its own advantages and features. Below we will consider in what way you can easily wind large curls on long hair or on strands of medium and short length, because the principle of curling them is not much different.
How to wind large curls - a curling iron as a reliable and proven method
The technique of using a curling iron is quite simple and monotonous. If you need to get very large curls, you will have to take a curling iron with a large diameter and preferably a conical shape.
Wash and dry your hair immediately before curling. After that, start curling your hair:
- Apply mousse to the root area for sustainable volume.
- Divide all hair into two zones, making an even parting horizontally. Secure the upper strands with a crab or any hairpin with a clip.
- Now, from the lower mass of hair, separate not a thick, but a wide strand.
- Treat it with a fixative - spray, mousse, varnish.
- Wind the strand onto the body of the curling iron, hold for up to 12 seconds.
- When all the hair is twisted, lower your head down and spray generously with varnish.
- Then straighten up, use your fingers to style the curls into a beautiful hairstyle.

A little trick will help to save large curls on medium hair: as soon as you release the resulting curl from the curling iron, carefully fix it with a hairpin on your head. After it has completely cooled, dissolve it and only then spray it with varnish.
How to create big hair with foil and flat iron
Hair should be washed and dried naturally. You also need to prepare rectangular pieces of foil, the length of which matches your hair. And, of course, you need mousse and varnish.
The process of curling large curls is simple:
- Divide the hairline into separate strands that will correspond to the size of the desired curls.
- Spread the strands in turn with mousse, form rings out of them.
- Place each ring on the foil, cover the top with the other end, forming a pocket. Pinch all sides firmly so that the foil does not slip off.
- When all the curls are wrapped in rings, heat the iron.
- Warm each envelope well between the ironing plates, giving each ringlet about 15-20 seconds.
- At the end of this procedure, wait until the hair with the foil has completely cooled down.
- Then gently release the curls. It is better to start with the lower envelopes so as not to damage the upper curls.
- After that, you just have to style your hair and fix it with varnish.

To make the curls elastic and keep their shape much longer, you can warm them up with an iron for a longer time, especially if the hair is coarse. Thanks to the foil, such a long exposure will not be dangerous for the hair.
How to make large curls - curlers to help you
For large curls, curlers will need the largest size. You can use any of their types, for example, thermal curlers, boomerangs, plastic curlers. If you will be doing large curls on short hair, it is preferable to use Velcro curlers, as they will be easier to fix.

The process of winding strands on curlers should be as follows:
- Divide all hair into zones: crown, two side and occipital.
- Divide each sector into identical strands, fix them with clips.
- In the horizontal direction, first wind the strands on the crown and temples, then proceed to the crown, side and occipital zones.
- The strand should match the size of the curler. It needs to be combed with a comb, slightly raised so that it is perpendicular to the head.
- On the curlers, first wrap the ends, trying not to break the integrity of the strand. Then completely wind the hair to the roots and fix the curlers.
- In this way, wind all the strands. Then you can either blow dry your hair or let it dry on its own.
- The last stage is unwinding the curlers and fixing the curls with varnish.

Large curls after curlers often create a "doll effect". To give the hairstyle a more natural look, it is advisable to use two different diameters of curlers, which differ slightly from each other.
Secrets of Hollywood curls with a hair dryer
You can make large curls with a hairdryer with a diffuser or a brush for brushing. For medium and long hair, a diffuser with large “fingers” or brushing of the maximum diameter is suitable. For short curls, it is better to take a smaller brush or a diffuser with smaller “fingers”.
How to wind large waves with a hair dryer with a nozzle:
- Dry your hair with a towel after washing.
- Put a diffuser on the hair dryer, take any round brush and a fixative.
- Tilt your head forward a little, take a strand and put it in the hair dryer nozzle.
- Now, with springy movements, begin to dry the strand. At the same time, it should be well wound on the “fingers” of the diffuser.
- Dry all hair completely and mist lightly with a medium hold spray for long curls and a light hold spray for short hair.

To prevent overheating and brittle hair from hot air, use a heat protectant before styling.
Similar waves of large size will help to create a brush-brush. This method of curling is often used in the salon, but at home it is very simple:
- Moisten the hair with a heat protectant, then divide it into several sections using clips.
- Separate a small strand, wind it around the brush, warm it well with a hairdryer.
- Then unwind the resulting curl, quickly twist it into a ring, as if winding it on curlers, fix it with a hairpin until it cools.
- When all the curls are wound, dissolve them, fix them with varnish without gluing effect.

Use a blow dryer concentrator to keep your style stable and your curls smooth and not frizzy.
How to get soft waves according to the principle of winding bundles
This curling method will allow you to make gentle curls of large size with natural lines and the effect of slight negligence. For styling, you will need mousse, a few hairpins, a hairdryer or an iron.

- Spread shaping mousse through hair or spray with a fixing spray with extra thermal protection.
- Comb your hair, divide it into large strands. If you take a strand that is too thin, the curls will turn out small.
- Now twist each strand with a tight bundle, let it curl into a bagel, fix the ends with a hairpin.
- The resulting flagella can be dried with a hair dryer or left overnight.
- Then unroll the curls and, if necessary, spray again with varnish.

You can speed up the process of curling your hair using an iron: form a tourniquet, walk along it with an iron and fix the result with varnish.
Curling with a curling iron is fast and beautiful. With this simple household appliance, you can create many vivid images. For example, "Hollywood waves" are very popular now.
But the curling iron can not be used every day. From high temperatures, the hair loses its luster, becomes brittle and lifeless.
Do not curl your hair more than once a week.
1. How to choose a curling iron
Curling irons differ in coating. The safest for hair are considered ceramic. These curling irons are most often used by professional hairdressers.
Curling irons differ in shape. With the help of ordinary cylindrical flats of different diameters, you can get small or large curls. A cone-shaped curling iron helps create basal and playful curls at the bottom. Most cone flats do not have a clip: the tip of the strand must be held, but it does not break. Spiral curling irons make the same curls, and two- and three-barreled ones create a corrugation effect.

Curling irons differ in diameter. The larger it is, the less twisted the curl is. The minimum diameter that can be found in the store is 10 mm. The maximum is 50.

A large-diameter curling iron will not cope with hard, as well as thick, long hair. Large curls under the weight of their weight will quickly straighten up, leaving no trace of curling.
Small curling irons are designed primarily for short hair and curling bangs.
The best option for normal hair up to the shoulders and longer is a curling iron with a diameter of 19–25 mm.
Often the durability of a curl depends precisely on how correctly the tool is selected and the winding technology is observed.
2. How to prepare your hair
When curling with a curling iron, follow three rules:
- Hair must be clean. Curls on greasy hair will bloom faster than the curling iron cools.
- Hair must be dry. Curling wet hair with a curling iron is like roasting bread over a fire.
- Hair must be protected. Before winding on the curling iron, be sure to treat the strands with a heat protectant. It seals the hair scales, retains moisture inside and thus protects against high temperatures. Leave-in sprays are considered more effective.
3. How to curl your hair with a curling iron
Hairdressers advise dividing the head into the occipital, temporal and frontal zones and curling the hair in this sequence.

At home, you can act easier: fix part of the hair at the crown and curl first the lower and then the upper strands. Or, if the length allows, you can make a parting, divide the hair into the right and left parts and curl each.
Whichever option you choose, first separate a strand about 2 cm wide. The thicker the hair, the thinner the strands for curling should be.
If you want curls to last all day, spray your hair with hairspray or treat with beer foam before wrapping it on a curling iron.
Comb the strand and wind it on the curling iron. Twist the strand into a bundle if you want the curl to be tight, like a spring.
Try not to pull too tight and do not pinch the tip with the clamp of the device. To get spiral curls, hold the curling iron vertically. If you want more playful curls, set it horizontally or at an angle.
If you have very long hair, do not wind the entire curl on the curling iron at once: when the tips are almost burned, the upper layers will not even warm up. First, grab the middle of the strand with tongs and twist to the roots. Then curl the end.
Hold each curl on the curling iron for 10-15 seconds. Curling time depends on the power of the device and the desired elasticity of the curls. If the hair is healthy, the curling iron can be heated up to 200 ° C. Thin and weakened hair is best curled at a temperature of no more than 100 degrees.
Carefully remove the curl from the curling iron and lightly sprinkle with varnish.
So that another hot curl does not develop under its own weight, fix it with an invisibility until it cools completely.
Let the curls cool for 10-15 minutes. After that, you can comb them with a comb with rare teeth or fluff them with your fingers.
If necessary, lay the curls in and fix with varnish.
4. How to restore hair
To restore weakened hair, you can use one of the following masks.
- With kefir and aloe. Heat 1 teaspoon of castor oil and combine with 1 tablespoon of kefir, 1 teaspoon of aloe juice and 1 ampoule of vitamin E. Rub the mask first into the roots, then spread over the entire length of the hair. Hold for half an hour, then rinse with warm water.
- With egg and honey. Mix an egg yolk with 2 teaspoons of runny honey. Add ½ tablespoon of olive oil and apply the mixture to your hair. Hold for half an hour, then wash your hair.
- With banana and glycerin. Make banana puree with a blender. Add 1 teaspoon of glycerin and the same amount of almond oil. Apply the composition on the head: from the roots to the tips. Keep the mask for 40 minutes, and then rinse thoroughly.
How to make curls with curlers
Good old curlers are used both to create curls and to add volume. Curling curlers usually takes longer than curling irons. But the hair is not exposed to high temperatures.
And thanks to the variety of modern curlers, you can make new hairstyles at least every day. Here, for example, what effect can be achieved with the help of papillots.
However, due to the tension that is created during winding, the blood supply to the hair follicles may be disrupted. If you use curlers often, the hair may weaken and begin to.
1. How to choose curlers
Large and small, plastic and foam rubber, with and without clips - the range of modern curlers is huge. But each type has its own purpose.

Papillots, or boomerangs, are foam rubber or silicone sticks of different lengths, densities and diameters. Inside the wire, so that the strands can be wound and fixed in different positions. Suitable for hair of any length: the shorter, the smaller the diameter you need to take. The volume of curls also depends on the diameter.
Velcro curlers are cylinders of different diameters with many small hooks. Hair clings to them, and additional clips are usually not required. Velcro is ideal for creating basal volume on medium and short hair, as well as for curling the ends of long curls. But you need to be careful: such curlers can get tangled in the hair.
Spiral curlers are made of soft plastic and allow you to get spiral curls. To do this, you just need to thread the strands through the curlers using special clips.
Most curlers should not be left on for more than an hour.
Bobbin curlers are threaded wooden sticks that are attached with rubber bands. Bobbins are usually used for perming or for creating curls on very short hair.
Foam curlers are fixed with rubber bands or special plastic clips. The various diameters of these soft barrels allow you to wind hair of various lengths around them.
Electric and thermal curlers help to make an express curl, as they heat the hair. The former are charged from the mains, the latter need to be boiled in boiling water to melt the paraffin inside them.
Ideally, you need to have in your arsenal and combine curlers of various types and diameters.
2. How to prepare your hair
For curling on curlers, the hair must also be clean. However, they do not need to be completely dried: curlers are wound on wet hair.
So wash your hair, apply a heat protectant and lightly dry your hair with a hair dryer or let it dry a little naturally.
3. How to curl your hair with curlers
According to the classical scheme, winding hair on curlers starts from the center of the frontal zone and gradually descends to the back of the head. For this you need large curlers. After that, you can curl the hair on the sides on curlers of a smaller diameter.

Using a comb with a thin handle, separate the strand in the middle of the head. It should match the width of the curlers. The thickness will depend on the density of the hair: the more hair and the stiffer it is, the thinner the strand should be.
Moisten the strand with water if the hair is not wet enough. Then treat it with foam or hair mousse.
Comb, lightly stretch and wind the strand. Be careful not to wrinkle the tip. Usually curlers are placed perpendicular to the head, but you can experiment by winding them vertically or at an angle.
After winding the first strand, secure it with a clip, elastic band or hairpin (depending on the type of curlers) and proceed to the next. Try not to wrap too tightly: stretched hair causes discomfort.
With hair that does not take a curling iron and curlers, an iron can handle it. Make curls out of the strands, wrap them in foil and warm them up well.
When finished curling, dry your hair naturally or with a hair dryer. If you're in a hurry but don't want to damage your hair, use the low temperature setting.
Gently remove the curlers when the hair is completely dry. Straighten the resulting curls with your hands or a comb and fix with varnish.
Pros and cons of curling irons and curlers
And with the help of a curling iron, and with the help of curlers, you can make beautiful and very different curls. Both methods have advantages and disadvantages, which are illustrated in the following table.
| pros | Minuses | |
| curling iron |
1. It is not necessary to buy ten flats. It is enough to choose one according to your length and type of hair. 2. Due to high temperatures, curls form easily and last quite a long time. 3. Curling on a curling iron is fast. |
1. You need to try a few to understand which curling iron works best with your hair. 2. You can not curl often. 3. Difficult to use on short hair. 4. To minimize harm, you need thermal protection. |
| curlers |
1. A variety of curlers allows you to style hair of any length in different ways. 2. Some curlers can be left overnight. 3. Used on wet hair - wind up and go about your business until dry. |
1. You need a lot of curlers of different types and sizes. 2. Fiddling with curlers is quite long and troublesome (an exception is thermal curlers). 3. Frequent winding on curlers can weaken the hair. |
What do you prefer doing curls? Tell us in the comments what and why is closer to you.