How to tie a tie: step by step instructions, knots of any complexity. How to quickly tie a tie: the easiest ways How to tie a rag tie
Today, fashion trends do not cease to delight stylish business men, as a rule, such a male accessory as can give solidity to the image.
Unfortunately, not all men know how to tie a tie, which ones they are, so below you will find the correct step-by-step instructions for tying it with knots of all kinds.

This will be our starting point, from which all possible knots will be tied in the future.
Types of tie knots and the method of tying them
We offer to consider some ways of tying tie knots. The best option would be to learn how to tie at least a couple of knots from those presented.
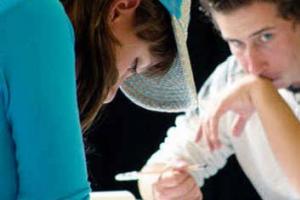
Tie a tie simple knot. First you need to put the tie itself so that the wide end is closer to the left hand, and the narrow end to the right.

Thus, overlap the wide end on top of the thin one, circle it around it, and therefore bring it out under the bottom to the right side.
Thus, the wide end should be thrown over, and go into the resulting rim. After that, it must be brought to the left side.
Those. you should bring the wider part of the accessory behind the other, making a full circle and turning it to the right, turning it into a loop around the neck.
Enter a wide part into a double loop, as a result you will have a simple knot. In order to make it more visible, you will add your own sophisticated touch to the overall business style.
To tie Double Windsor, it is worth throwing a business accessory with a seam inside.

Place the thin end on the left, and the wide end on the opposite side. Lay out so that the wide part of the tie is on top, passing it through a small loop, pull it forward.
Pull the wide part of the accessory to the bottom, and move it to the right. Pull so that the wide part is in front, but you need to do this with a loop, turning back.
If you did everything right, then there will be a knot, now on top of it you must draw a wide part of the accessory to the right side.
You can stretch a wide part through the loop that has formed, in an upward direction. In the front, a wide piece forms a small space.
Through this space, you should draw a wide tip, but so that you can tie a neat knot.
Deciding to tie an option double knot, you need to act in accordance with the following algorithm of actions:
Throw the tie with the seam inward, you need to do such actions so that the wide part is on the right side, put it on the narrow part, crossing them.

Wrap the wider end around the narrow end to keep the coil intact. The wide element will be on the left side.
Tighten it, but be sure that it is under the narrow part, and slide it to the right side - an eye is formed.
Here on top of it, you will need to get a wide part and turn to the left side, passing through the loop in the neck area.
Pass the wide part into the eyelet, and then tie it. Straighten, emphasizing the double tying.
To decorate your neck, a tie tied quarter knot, you need to throw the accessory with a seam inside.

Put a thin tip on top of the second. Pass the wide end to the right under the thin end.
Take the wide part to the left side, and then pass it through the loop around the neck, stretching it to the top. Don't forget to hold the knot.
That's all - tie, stretching the end of the wide part of the tie, as close as possible to the collar of the shirt, and pull the second part down.
Diagonal variant tying it will turn out if you throw a tie with a seam inside.

Lay the wide piece on top. Formed as a result of your actions - a crosshair.
Stretch the wide part from below, but it must be taken to the right side, and wrapped around the narrow part, but no more than 1 time.
It should come out so that the end with a thin tie is directed to the right side. Draw a wide part through the front of the knot, while throwing it through the loop on the neck, leading to the left.
Pass the wide part through the small eyelet and pull.
transverse knot. Put on the accessory so that the seam is inside.
Cover the wide part with the thin part. Take the thin part to the right side, leading it under the bottom of the other part - a loop will appear.
But it will be necessary to draw a wide end through it, after bringing it to the top. Tighten.

But to complement your image with a symmetrical knot Hanover, you need to throw a tie so that the seam looks out.

Cross both ends, but so that the wide part is the seam to the outside. Cover it with a thin piece, let it stretch to the right side.
Make a circle with it near the knot, but only once, now you can bring it through the top of the loop on the neck.
The wide part will necessarily go around the knot, from the left to the right side. Bring the wider part behind the loop on the neck, so that it goes into the knot.
Elegant knot Kelvin can be tied by wearing a tie with the seam out.

Cross both parts of the tie, only the thin part on top, and its direction was towards the right side. It is important to leave the seam outside.
Put the wide part on top of the narrow one, bending around it, so you complete a full circle and it will turn out that the larger part will tend to the left.
On top of the knot, lay again a larger tip, but from left to right. Take the wide part back into the loop around the neck, and then into the eye.
Oriental- cross the tips, but only so that the thin one is at the top and stretches to the right.
With a wide piece, go around the narrow end so that it looks in the opposite direction, pull it into the loop to the bottom. Tighten.

Villarosa method. Put on a tie so that the seam is inside. Cross the two pieces. The wide end is on top of the other.
Then pass it through the loop on the neck - from the bottom up.
Lower it down, then lift it to the top, and, aiming up, throw it through the loop around the neck.
Pass the wide end through the newly formed coil. Ready.

Tie up Onassis knot, you can, if you turn the seam on the tie down.

Cross the two parts, the wide one should be at the top, tending to the left side.
Bring it under the thin part in the opposite direction, i.e. to the right. After the wide end, bring it to the top, stretching it into a loop around the neck.
And when the ear appears, stretch the same tip to the bottom. Tie a knot by shaping the knot yourself.
But this is not the end, since it is worth taking the wide part to the right, throwing it into the resulting knot itself. Fix the knot again.
Tie tying method Prince Albert. The seam looks inward, cross the ends, wide at the top, it should go from the right side to the opposite.
Bring it under the thin part to the opposite (right) side.
Wrap it in the opposite direction and return it back again, you need to do this under the bottom of the thin part.
Repeat, but only to the left. The wide tip will be on the left side.
Pull the wide end through the loop at the neck and tuck it into the knot, passing through the loop at the top.
Do not be afraid of complex schemes, because everyone can learn how to tie exquisite knots on a tie, the main thing is practice.
Any gentleman should know how to tie a tie to look respectable and concise. An elegant accessory emphasizes the main concept of business style, focusing on the clear geometry of the cut of the jacket and tuxedo in general. There are over 80 ways to properly tie a tie to match the type of shirt and outfit you wear. To choose the ideal mousing option, it is recommended to decide:
- With dress code type. All types of tie knots are designed to complement an informal or formal image, and therefore differ in complexity, volume and final appearance.
- With the type of collar on the shirt, the shape of the cut of which affects the choice of textile accessory.
You can learn how to quickly knit regattas by watching a tutorial video or by reading detailed instructions. Fashion designers claim that this is not only a male skill. Having mastered the technology of creating spectacular weaves, you can in a couple of moments or a stole, which are considered an exclusive addition to an urban bow in the demi-season period of the year.
There are several options for tying a knot on a tie correctly, which do not require much effort and special skills. They are recognized as the basis of approved etiquette, allowing men to easily emphasize the conciseness of a non-trivial taste.
Node "Kent"
This is a kind of asymmetrical musing on a wide tie, which is suitable for representatives of the strong half of humanity with an average build.

The salient features of this method are:
- Ability to work with ties of medium length and width exceeding the 5 cm mark.
- A simple knot consisting of a single loop, which makes it possible to adapt a small tie for people of large stature.
Stylists say that the Kent knot looks perfect in tandem with T-shirts equipped with a narrow stand-up collar.
Node "Fourth"
This is a classic version that was very popular among our grandfathers. It can be tied in a minute, because it is single and uncomplicated.

The advantages of this type are:
- The usual way of weaving a loop, allowing you to create it in a minute.
- The correct geometric shape of the triangle, which is ideally combined with the avant-garde and everyday elements of the wardrobe.
The only drawback of the quarter knot is its routine, which does not make it possible to stand out from the general mass of people. But it can be used on ties of any length and width, which makes it versatile.
Knot "Prince Albert"
This is an incredibly beautiful, original and spectacular mousing, which resembles an unblown flower bud. It consists of several loops with pickup, so before creating it, it is recommended to watch a video tutorial or a master class with a detailed description of the technology.

It fits:
- for short men, because the revolutions take about 7-10 cm from the length of the regatta;
- for bright shirts decorated with floral prints, gradient transitions and contrasting piping around the perimeter.
It will look fashionable if a man complements a business ensemble with a metal clip and cufflinks, decorated with gilded plating.
Knot "Pratt"
This is an American knot that all famous politicians, Hollywood stars and successful businessmen use with pleasure.

It is a laconic half of a rhombus, which:
- tied with a fixation seam outward, due to which a wide and noticeable transition is obtained;
- does not hide the collar of the shirt, opening up unlimited scope for experiments on the image.
Designers advise to combine a tie with such a knot with plain suits in achromatic colors and polo, in which a triangular pattern prevails.
Knot "Half-Winzor"
This type of half-Windsor tie puff is used by Vladimir Putin, whose image is being created by a whole team of stylists and meters in the fashion industry.

It differs:
- a flat triangle, which is obtained in the process of its creation;
- elongated asymmetry of the free edge, which emphasizes its official style;
- versatility of use, which allows it to be created on ties of any length and width.
A regatta with such a knot can be worn under a formal or casual shirt, as well as at a festive reception or business meeting.
Windsor knot
Such knitting of a tie became popular during the life of the Duke of Windsor, who preferred it to all other weaving options. This double technique made it possible to create a correct triangular knot, which helped to tighten or adjust the diameter of the neck in one movement.

The only rule for creating a Windsor knot is that the accessory must be long so that in the end the tie can fall to the line of the fixation belt.
Knot "Cavendish"
This mousing is created by interlacing two quarter sections of the tie, so it looks very unusual and original. It is quite large, moderately voluminous, so designers recommend combining it with shirts and glamorous blouses, complemented by widely spaced collar sides. There is a special instruction that quite simply explains the process of creating the Caventish node.

To make it look as impressive as possible, choose a thin and light tie, decorated with pleating or partial glossy coating on the front side.
Knot "Oriental"
This type can only be used if the tie is thick. It is created in three steps, so even a novice guy who wants to impress can make it. Distinctive features of the Oriental node are:
- not a very tight method of fixation, which does not allow it to be created on narrow products;
- a simple and even triangle, which is obtained in the final, will not be able to decorate a solemn tuxedo, but it will look very succinctly as an addition to an office ensemble. Every man should remember that this type of knot should not be forgotten.

You should learn how to discreetly straighten your tie, because it can come loose at the most inopportune moment.
"Victorian" knot
This type of tie has become known as the “extra twist quad”, because in the process of its creation, the tongue of the tie is wrapped four times around the mousing being created, and then neatly tucked inside.

This trick gives the finished knot an asymmetrical shape that perfectly emphasizes the strict geometry of the cut of conservative suits and casual shirts, which are decorated with check patterns or contrasting stripes.
Knots that are suitable for thin ties
The thin tie is called “herring”, which is explained by the type of its cut and a width not exceeding 5 cm. They are used as an addition to a casual or office bow, unobtrusively emphasizing the elegance of the design of sweaters and cardigans worn over a plain shirt.
"Cross" knot
The first variants of such a tightening of a tie really looked like a cross, so their name came from there. The cross knot is quite dense, narrow and complex, so it is used exclusively by connoisseurs of the avant-garde or youth style. It visually increases the width of the tie and focuses on the shirt collar.

Node "Kelvin"
This is a diagonal and rather complex knot, which is created in stages and slowly. It was named after the physicist Lord Calvin, who worked on proving a practical theory about the way atoms are built and the key knots. Distinctive features of such a tie tie are:
- spectacular knot, which is sure to turn out if you read the instructions in detail;
- it will take more than one lesson to tie a Kelvin knot in a matter of minutes;
- the loop is ideally combined with winter and demi-season elements of the wardrobe, focusing on the conciseness of the modern dress code.

St. Andrew's Knot
It is believed that the great martyr Andrew was crucified on an X-shaped cross, hence the name of this knot. It is very cool, moderately voluminous and has a fairly simple creation mechanism. If you look at this mousing at an angle, its cross-shaped tightening method will be very noticeable, due to which the tie is very easily adjustable in length.

Designers advise using this type on textile accessories made of chiffon, crinoline, satin or organic silk.
Original ways to tie a tie with an interesting knot
A thin or thick tie can be transformed in a matter of minutes by tying it with an elegant knot that will accentuate the collar of a business shirt and harmonize with accompanying accessories. The scheme that any life hack offers allows you to learn non-standard ways of weaving knots on classic ties, adapting them to the youth or urban trends of the season.
Node "Eldridge"
This type of puff is used by the famous TV presenter Dmitry Dibrov, who is considered an expert in business style. The knot looks like a pigtail, and its diagonal way of creating in a winning light emphasizes the strict image of its owner.

The Eldridge knot is tied on elongated, solid-colored ties, then its quality and appearance are in harmony with the natural geometry of the cut of brightly colored shirts.
Knot "Trinity"
This is a modern way of tying a tie, in which the oblique line is pulled through the entire knot. It is very festive and elegant, so it is suitable for a corporate photo, going to a restaurant or a secular party.

If the owner of the tie has a short neck, then such a knot will visually lengthen it and the overall picture of the tuxedo will be exclusive, respectable and complete.
Knot "Van Wake"
The world-famous artist Lisa van Wijk, who combined practical and aesthetic aspects in one knot, was the author of this exquisite way of tightening a tie. It is characterized by an elongated shape, wide execution and smooth lines that soften the business style.

Unlike other knitting options, this knot looks advantageous on textile accessories decorated with geometric patterns.
Knot "Balthus"
If you need to create a small node, then immediately pass by. Here is the most voluminous and wide way to tighten a tie, which lovers of eccentric looks will appreciate.

It will look perfect on accessories made of silk, and learning how to create it can take more than one hour.
Knot "Cape"
This is a very attractive, openwork and sophisticated knot that a beginner cannot master the first time. He very gently emphasizes the luxury of an expensive tuxedo, and is also able to distinguish any man from the crowd of “men in black”.

It cannot be used on striped ties, but watercolor designs are ideal.
"Diagonal" knot
This is the most extraordinary and complex knot that will make a man a real star of a trendy party. It is asymmetrical and consists of two layers, so it is ideally combined with shirts in which the collar has a wide turn-down part. It is customary to complement it with jewelry clips, which are decorated with glossy polymer ceramic inserts.

The bow tie
In the case of a bow tie, everything is also very simple. Detailed instructions on the photo and video:

If you want to feel confident in any situation and attract the admiring glances of women, then you should familiarize yourself with the key points of combining a tie with strict things. The main rules are:
- Ties with patterns and appliqués are combined with shirts decorated in a minimalist style. An ideal choice would be a solid color model with straight cuffs and a front placket.
- Monochromatic accessories complete the main concept of the style that dominates the decoration of combined shirts. They will "calm" and "balance" a shirt with a camouflage print, a themed pattern or contrast overlays. They are usually tied under a turn-down collar.
Don't forget to choose the right shirt for your suit. It should always be a tone lighter than the jacket, if made in a similar color. For bright shirts, casual models of trousers and jackets made from textured cloth or thick textiles are perfect.
42,754 ViewsFor some, he is an annoying nuisance. Someone cannot imagine themselves without this stylish accessory. One tie and almost a hundred ways to tie it beautifully. It is enough to master a few - and you will always be irresistible.
The formal business suit of the modern man is inseparable from this stylish accessory. If the place where you work, informal style is quite acceptable, then there is no need for a tie. So, there is no need to think about how to handle this attribute. But often such knowledge is very necessary for a man. Again, not only work you are alive, there are also leisure hours.
Of course, you can opt for jeans and a T-shirt even when you go on a date. But for some, elegance is more important than comfort. A real man will prefer a beautiful suit with a stylish accessory. This is where the ability to properly tie a tie becomes very important.
History of the tie

According to one version, humanity owes its appearance to the warriors of ancient China. A piece of cloth around the neck served them as protection from piercing winds.
According to another, the Romans: the speakers tied scarves around their necks, thus warming the ligaments on the eve of the upcoming performance, the legionnaires were passionate fans of these scarves, which protected their skin from friction with armor.
Another version tells of Croatian mercenaries with neckerchiefs used during battles to distinguish friend from foe.
For the first time, the concept of "tie" ("cravate" - in French) was applied during the time of Louis XIV, when men wore lace neckerchiefs. There was even a position - Cravatier - this man served as a supplier of these products to the king himself.
And already mass popularity came to them by the end of the 17th century, when not a single dandy and dandy of Europe could do without a dozen scarves in his wardrobe. And then it became fashionable to wrap neckerchiefs several times. The men with their chins lifted up looked slightly haughty now. Special clubs were also created where anyone could learn how to tie such a scarf beautifully, as well as wear it correctly.
With turn-down collars from English aristocrats, the first ties, the progenitors of today, came into fashion. Visitors and participants in equestrian competitions, members of yacht clubs now had to compete with each other in newfangled accessories.
At the same time, a whole science of the correct tying of a tie was born. Books were published with stories about how to create the most extraordinary "knots" around the neck.
Russia learned about the tie in the time of Peter the Great, as about the neckerchief from the German "hals" - neck and "tuch" - a scarf.
But only in 1924 saw the light of the tie familiar to modern man in two or three parts. And today a huge number of technologies for tying ties are known, and the fashion for tie knots does not surprise anyone.
Model selection

Going to work, an event or a date, first decide which of the many models will be the most appropriate. Unless, of course, you have more than one tie for all occasions.
Today, ties are presented in a wide enough range so that the choice can be a problem:
- Butterfly
This tie looks great with a tuxedo. Black color is a classic, but a confident man can choose any color.
- Dotted
Be careful with large peas. Small ones are universal.
- Club
Appropriate in an informal setting. Can tell with his drawings about the owner's hobbies, draw attention to his person.
- plain
It should be combined with the colors of the suit, shirt, even shoes.
- Striped
With him, choose a shirt with a suit in plain colors. He will make it clear what a serious and straightforward owner he has.
- Printed
To work, to a meeting, he is quite suitable. Do not opt for especially cheerful patterns.
- Dark
Put on a light shirt, feel free to head to a business meeting. A jacket a tone darker will give it a special elegance.
- Bright
The usual choice of a young man. For an older generation, you can only go out in this at a resort when you put on a light light suit.
How to tie a tie

Over the years, new techniques for tying ties came into use, more and more original, their shape changed. What is there to do? Fashion!
Some methods were quite simple, others required skill and skill. Someone easily masters this science. Someone fails to tame this little piece of cloth. But it is simply necessary for too many men to comprehend this art step by step. Moreover, each of them will put on a formal suit at least once, he will definitely need this accessory. Of course, you can rely on a woman who is nearby (mother, wife, girlfriend), she always succeeds.
But you are a man. Are you really not able to "tame" this "monster"!
However, learning how to tie a tie is not enough. You need to know how to choose the right one, with what and where to wear it. If you want to know, it's a whole science.
Although there are a hundred different ways to tie this stylish piece of men's wardrobe, there are very general recommendations that anyone should know if they are going to go out in appropriate clothes:
- If you have a wide face, complex knots are most suitable for you, if it is elongated, thin classic ones.
- The soft seam behind is a confirmation that the work is handmade and the product is of high quality. The sewn accessory from three different pieces of fabric speaks of the same. Because when sewing economy options, two are used.
- Try to tie a tie around your neck; this should not be done in your hands.
- Ties are dark with a small pattern - a classic. If the case is informal, bright models with large patterns are quite suitable.
- The classic does not allow any folds. Wide ties - the will of the owner.
- The general rule is that the more complex the knot, the thinner the material, and its wide side should remain flat.
- A tie should be selected darker than a shirt by a tone and lighter than a jacket. Mandatory requirement - the color of socks and shoes must also match
- Width. Classic - less than 10 cm. For large men, wider ties are appropriate.
The most popular ways
Among the many different options for tying this elegant accessory, there are simple - but strict, complex - moreover, elegant.

The general rule for everyone (with rare exceptions): when a beautiful knot is tied, the tie is threaded into the collar so that the narrow end is on the right and the wide end is on the left.
Simple knot, or "Kent", or "small"
This is a way for all occasions. The knot is light, it is better to knit it on thicker and denser silk fabric. And it will look more impressive on a shirt with a narrow collar.
Kent step by step instructions - photo and diagram:
- The wide end of the tie is turned over so that the purl seam is at the top.
- Narrow impose on him.
- The wide one is wrapped around the narrow one.
- stretch it under the knot that has formed.
- Now you need to pull forward and pass under the top layer.
- Tighten the knot and you're done.


Watch the video:
Quarter or "Four" or "Four in hand"
The method belongs to the oldest. Known since the 19th century. It is known that two hundred years ago, members of a gentlemen's club called "Four in hand" tied their ties in this way. They are credited with this invention.
This knot is slightly asymmetrical in shape, and even looks casual. But that's how it should be, that's its charm. And the shirt is chosen so that it closes the collar of the knot.
In addition, it is one of the easiest quick ways. So it is better to start training for beginners with it.
It can be tied on ties of any fabric and of different lengths.
Quadruple step by step instructions - photo and diagram:
- The wide and narrow ends are brought together crosswise so that the narrow one remains at the bottom.
- A wide one stretches under it and starts up again from above.
- Then it is threaded into a loop at the neck and pulled up.
- A funnel has formed below, and the wide end is pushed into it.
- And now they pull the tie, holding the knot with your hand.
- It remains to correct it and pull it closer to the throat.


Prince Albert or "Double Knot"
Despite such a sonorous name, there was no evidence that any representative of the royal family tied a tie in this way. Only now the name has long and firmly entrenched, and the knot is a variant of the English classics.
As a rule, an elongated and thin tie made of light fabric is used. The knot is asymmetric, compact, easily unraveled. But, although it is especially suitable for a short man, he himself should not be short. And it looks impeccable if the collar of the shirt is extended or with buttons.
Prince Albert step by step, with a photo and a diagram:
- The wide end of the tie is superimposed on the narrow end.
- It stretches under it twice and is displayed to the right.
- From below it is brought out into the neck loop, and then into the upper ear.
- It drags on.
Another quick option is possible, when the wide end is threaded under both ears. The knot is double with a fold.


"Windsor", "Windsor knot", "Double Windsor"
This elegant knot was named after Edward VIII, Prince of Wales. The Duke of Windsor is considered by many to be the creator of the knot. But this statement is wrong. Nobody knows who was the author of it.
But the knot is voluminous, complex, beautiful and it is better to tie it on a narrow thin tie without a pad.
The knot is classic, beginners master it quite easily. Even the oldest habitual tie will be transformed with this knot, it will look expensive and stylish.
Windsor step by step, with a photo and a diagram:
- The wide end, first superimposed on the narrow one, is wrapped around the neck loop and stretched from above.
- It is directed from below to the right, it is pulled through the neck loop again, wrapping the narrow one first to the left, then to the right.
- The wide end from below is pulled into the neck loop and lowered into the ear.
- It remains to straighten it and tighten it tighter.


Watch the video:
You should be aware of some of the intricacies of this node:
- its width can change, this is directly affected by the length of the tie, as well as its ends, which can be interchanged when tying;
- the width of the collar also matters, the knot is massive, voluminous and will look most successful when the corners of the collar are at a considerable distance from one another.
"Half Windsor" or "Simple Windsor"
Another universal node. It will look great with any shirt, but it is better if the corners of the collar are set wide apart. It is preferable to knit it from fabrics lush and dense, like wool. Asymmetrical and very compact.
Half windsor step by step photo and diagram:
- Again, the ends of the tie are brought together crosswise so that a wide one lies on top.
- It turns around, stretches into a loop and stretches under the narrow one.
- Once again, under the narrow one, it turns around and winds up in the neck loop.
- Drops into the ear and tightens.
Now it's done.
This knot will look equally elegant if it is slightly straightened or knocked down until wrinkles appear.


The bow tie
Appearing in the distant 1700s, it is still used today. And with the invention of the tuxedo in 1886, he clearly found his place. The elegance and nobility that a bow tie gives to this outfit leave no one indifferent. The success of this accessory is ensured by the fact that it is already on sale in a tied form.
But there will always be craftsmen who prefer to tie a tie individually. The pro will certainly tell the beginner that it is most convenient to do this ... on the leg. It will be quite easy to repeat the whole procedure on the neck.
Tie a bow tie in the same way as a bow - step by step with a photo:
- They wind it up behind the bow, and advance the loop into the knot behind the bow.
- It remains to tighten the knot at both ends.
- They put it on the neck so that the left side is a couple of fingers shorter than the right.
- Both are folded crosswise so that the long one lies on top.
- It must be brought into the neck loop.
- The shorter part is laid in the form of a bow, and the long one is lowered from above.
- They wind it up by the bow, and advance the loop into the knot behind it.
- It remains to pull both ends and the butterfly is ready.


Elastic band tie
A very convenient option, especially for students. It doesn't have to be tied. Young clerks will also appreciate it.
There are many other equally common knots that have been known for centuries. This:
cross knot
“Cross knot” (“Square” or “Christensen”), which for some reason is called Italian, even though it was invented by Swedish designer Amanda Christensen a hundred years ago. The knot is quite complex, designed for narrow ties sewn from thin fabrics. He will hide in a man all the shortcomings of a thick neck.


Eldridge
"Eldridge" - a knot, of course, non-standard, but quite spectacular. It is unlikely that on the first try you will be able to tie it. This invention from Geoffrey Eldridge is only ten years old. But in this short time he gained both popularity and his admirers. There are not very many knots that are tied when the wide edge is on the right and short, and on the left is long and narrow. Eldridge scheme:

American
"American" or "Pratt" - a knot that will never untie itself, the creation of which was announced by two Americans. The only difference is that when John Shelby talked about how to tie it on a local TV channel (1989), Jersey Pratt had been tying his tie for thirty years. American diagram and photo:


Trinity
Trinity is an original knot consisting of three elements. He is one of the few that is tied when the wide edge of the tie worn around the neck (on the right) is shorter than the narrow one (on the left). Its peculiarity is that it is customary to remove the end under the collar of the shirt, and not under the wide part of the tie. Trinity scheme:

Watch the video:
Diagonal
“Diagonal” or “Diagonal” is an elegant knot, but complex and unusual even for a specialist. It looks great on cashmere and silk ties in light shades. And for the first time it was described in the "Book of Ties", 1985, by the authors D. Mosconi and R. Villaros. Diagonal diagram and photo:


Van Wijk

New classic
A new classic is a particularly elegant knot in the form of a narrow triangle. He was especially appreciated by the Italians. With seeming simplicity, you are unlikely to get an impeccable result without a fair amount of training. New classic step by step photo:

- The Cape Knot

Your ability to tie a tie perfectly can be devalued if you do not know how to properly care for it.

- Untying a tie, putting it away for storage, is a must. So you get rid of unnecessary folds.
- Ties are stored only in a hanging position.
- It is not ironed or washed. Do this and you will ruin it. If your tie is wrinkled, just twist it with a “roll”, all the creases will straighten out overnight.
So you keep the beauty and quality of your ties.
The most successful color combinations
When choosing a business suit and accessories for it, it will not be bad at all if you stick to combinations of those colors and colors that will make your suit stylish, elegant, and therefore will undoubtedly deserve the approval of others:

A few valuable tips:
- it is better if the size of the knot and the collar match;
- pattern on the shirt and tie - the jacket is plain, matching the color of the accessory;
- tie with a pattern - one-color jacket and shirt;
- a light plain jacket - a medium-tone shirt, and a dark tie;
- jacket and tie with the same pattern - plain shirt;
- with a pattern jacket - a tie and a shirt of the same color;
- a stripe on a shirt - polka dots or a stripe on a tie.
Why is it interesting for women

Today, no one is surprised that the question of how to tie a tie beautifully is asked by the beautiful half of humanity. It's not about trying to help your men, although this is also the case.
This accessory is at least considered masculine, but the girls have long chosen it as their own. Ties are boldly put on in the office for work or for a party. It served as an adornment for Madame de La Vallière as a neckerchief at the court of Louis.
Strict ties have been in women's fashion since the First World War. They were seen on George Sand, Marlene Dietrich loved them, and many fashionistas picked up the baton. Among them, ladies, businesslike and free, as well as subtle and feminine natures.
If such wisdom as tying knots on ties turned out to be beyond your power, review the video and photo instructions step by step, tie a tie on it, and then remove it over your head, after loosening the knot. And now, if necessary, put it over your head, just do not untie it.
Better than a beautiful tie can only be a properly tied tie. Even the most elegant and well-matched tie in color and pattern can be clumsily tied in such a way that it will spoil the whole image. To avoid this situation, you need to learn how to properly tie a tie. This is not the most difficult art and you can learn it quickly by following the step-by-step instructions.
Basic Rules
In tying ties, as in wearing them, there are immutable rules. In order to look solid and not cause others to feel that something is wrong with him, a man should take into account not only techniques, but also tie tying rules.
- The knot should not be tight, but the tie should also not hang. Many men do not like to wear ties due to the feeling of a noose around the neck. To do this, it is worth relaxing the knot a little and after a while you will get rid of the feeling of discomfort.
- The tie is not tied on a jumper or T-shirt, only on the shirt collar.
- It is recommended to tie the knots not on the neck, but in the hands, on the neck the tie is only tightened.
- The wide end of the tie should not be higher or lower than two centimeters from the waist. To do this, stretch the tie under the collar so that the narrow end hangs down to half the length of the wide one.
- To make the knot harmonious, it is necessary to take into account the width, fabric and texture of the tie. A huge number of ways to tie a tie were invented taking into account the fact that not every knot is suitable for ties made of different fabrics, different widths and varying degrees of fabric slip. So, the most versatile knot for any type of tie is the “Four-in-hand”, knitted, woolen and thick ties are best tied with “Kent”, and narrow and flat ones with “Victoria” or “Prince Albert”.
- In addition to the look of the tie, the type of event you are wearing your tuxedo should also be considered. A simple or classic knot is great for everyday wear in the office, but for a formal event, it is better to choose a more elegant knot.
Tie tying techniques
Types of tie knots are comparable to knowledge of Albanian - they are not used in everyday life, but if there is an opportunity to show off, then there will be no competitors. Every man appreciates a woman who is able to create an impeccable tie knot on his neck with a slight movement of her hand ... appreciates and is secretly a little afraid.
There are many techniques for tying a tie, but the article shows the most basic and easy for beginners to learn: a simple knot, classic, Windsor and Pratt.
Simple knot: step by step instructions

This knot is the basis of the foundations, the simplest method that fathers pass on from generation to generation. The easiest way is also called "quadruple" or "four-in-hand" because it is done in four movements.
 The easiest quadruple knot: step by step instructions.
 Procedure:
- Position the tie around your neck so that the wide end is on the left and the narrow end is on the right.
- Throw the wide end over the narrow end and wrap underneath.
- Turn over immediately.
- Bring the end of the tie in and up, straighten it and slide it down.
- Adjust in height and tighten.
Easy classic knot: step by step instructions

The lightest of the classic knots is called the "half-windsor". This is the first step towards truly intricate tie knots. A tie tied in this way is perfectly worn in everyday life, but inspires respect in society: a light classic with a twist.
It ties like this:
 Easy classic knot (half-windsor) instruction step by step
 - Position the tie around your neck so that the wide end hangs below the narrow end.
- Throw the wide end over the narrow end.
- Pass the wide end under the narrow end.
- Insert the wide end into the neck loop.
- Drag down and to the right.
- Overlap wrap the resulting loop.
- From the bottom left, pull the wide end inward into the neck loop.
- Insert the wide end into the resulting pocket.
- Tighten the tie at the bottom end.
Windsor knot

Classic "Windsor"- the simplest of the most complex, looking dignified and solid due to the voluminous tie loop, which is done with a few additional turns. Such a knot works great on ties made of thin fabric, on a dense one it will look too pretentious. In addition, it is better to tie medium-width ties with a Windsor knot: on too narrow and too wide it will look clumsy.
Instructions for tying a tie with the Windsor knot:
 Windsor knot step by step instructions
 - Wrap the tie around your neck.
- Throw the wide end over the narrow end.
- Pass the wide end through the loop.
- Pull it down and to the right.
- Pass the wide end under the narrow end.
- Repeat loop.
- Pull the wide end down and to the left.
- Wrap around the narrow end.
- Pass the wide end of the tie through the neck loop again.
- Tuck the tie into the pocket.
- Tighten.
Knot "Pratt"

This knot was invented by Jerry Pratt, an employee of the US Chamber of Commerce, which is why the knot is also called "American". It is sometimes found under the name "Shelby". Such a knot is very popular in America due to its versatility and elegance, which made it popular both in office life and at social events.
The Pratt knot is tied in the following way:
 Knot "Pratt" - step by step instructions
 - The tie is thrown over the neck with the seams outward, with the wide end on the right, the narrow end on the left. The left end is extended to the level of the navel, the main movements are made wide.
- Pass the wide end under the narrow end to form a cross.
- Pass the wide end from this position under the collar of your tie.
- Wrap under the collar and pull out to the left.
- Shift the wide end from left to right, forming the front side of the knot.
- Pass the wide end through the collar loop again.
- Pass the wide end into the pocket.
- Tighten your tie.
Thus, there is nothing complicated in tying ties. The basic movements are simple and vary among themselves in the number of revolutions. With these simple instructions, you can easily learn how to tie a tie with the most classic knots.
It turns out that a tie can be tied in countless ways. And not everyone will be the same. Size, shape, and symmetry can vary significantly from knot to knot. Wide ties often require the use of small knots, such as Four-in-hand or Simple(simple) node. Thin ties tend to look good with large knots, such as Pratt or windsor. Each node has a special character. Prince Albert struts with exquisite elegance. Kelvin challenges. Murrell grins like a Cheshire cat. Van Wijk twisted like a flower bud. knots Eldredge And Trinity the tie is folded in fancy origami. Each node serves its master differently. Experiment. Find your crown knot.
Visual Comparison of Nodes
Let's take a look at some tie knot options to see how they differ from each other.
To make it clear, we use ties of the same material, thickness and width. In this way, the unique characteristics of each node can be assessed and the difference between them can be seen.

The smallest of the knots is the Simple Knot, also known as the East Knot. The largest knot is Balthus, and the longer your tie, the larger you can tie the knot. Windsor is an almost perfect triangle. Four-in-Hand - noticeably narrower. Prince Albert peeks out from under the bottom with the second girth. Some knots, such as Kelvin and Four-in-Hand knots, are noticeably asymmetrical to one side. Trinity has a rounded silhouette, while Van Wijk has a cylindrical shape and the longest of the knots.
Tie a tie
1. Simple knot
also known as Eastern. A simple knot contains the fewest possible steps and is very easily recognizable. Despite its simplicity, this knot is rarely worn in the West, but remains popular in China. The millet knot is tied, but it is not so easy to untie. This knot is suitable for wide ties, and for tall guys - less length goes into the knot, and the tie does not look cut off.

How to tie. Scheme

2. Four-in-hand
named back in the 19th century in honor of the Gentlemen's Club of the same name "Four-in-Hand". This is the reigning tie knot champion. Its popularity stems from its simplicity and versatility. It is easy to tie. Slim, tapered, gently asymmetrical shape. Easily untied.

How to tie. Scheme

3. Prince Albert
The knot is a variation of the Victoria knot. There is no evidence that the knot was actually worn by its namesake, Prince Albert, husband of Queen Victoria.
In the knot, the active end is passed through two turns. The first turn should be peeking out at the bottom of the knot. This is a slightly asymmetrical knot and should be pulled tight. Slim and smooth.

How to tie. Scheme

4. Kelvin
bears the name of Lord Kelvin (William Thomson, 1824-1907) - mathematics and physics. Like a simple knot, Kelvin is tied from the inside out. It is a flexible and neat knot similar in size to the Four-in-Hand, but slightly fuller and more angular.
How to tie. Scheme

5. Half Windsor
half from Windsor. Although closer to three-quarters of the size of Windsor than half of it. An extremely versatile knot. Medium size, almost symmetrical when tied correctly. Best used on ties of medium thickness.

How to tie. Scheme

6. Pratt
Jerry Pratt, inventor of the Pratt knot, worked for the US Chamber of Commerce. For many years, D. Pratt tied his tie with a knot of his own invention, but this knot gained wide popularity when TV presenter Don Shelby began to appear on TV screens in ties tied in this way.
The Pratt knot is versatile, elegant, mid-sized between Four-in-Hand and Half Windsor.

How to tie. Scheme

7 Windsor
named after the Duke of Windsor, although the wide triangle is actually due to the Four-in-Hand knot and the extra tying and density of the tie. Windsor was invented as a way to imitate the duke's style. There are several derivatives of Windsor, all with the same name.
Windsor presents a symmetrical and strong triangular shape. Fits well with a wide collar.

How to tie. Scheme

8. Eldredge
an unusual, complex and attractive knot that includes 15 separate steps. It was invented by Jeffrey Eldridge in 2007 and gained notoriety in 2008. Unlike the vast majority of nodes, in Eldredge the active working tail is thin. Once completed, the small end is hidden behind the collar of the shirt. The knot is large (larger than Windsor) and creates a tapered fishtail or braid effect.

How to tie. Scheme

9. Trinity
just like Eldredge is a relatively recent innovation. Has similarities with the Celtic Triquetra. The main working tail is thin. The knot is tied loosely at first, and pulled tight at the very end. The Trinity is round in shape, slightly larger than the Windsor knot and visually very original.

How to tie. Scheme

10 Murrell
Invented by Brent Murrell in 1995, as opposed to the classic Windsor. When completed, the thin tail of the tie lies in front of the wide ponytail, creating a layered look. The Murrell knot is triangular, small but wide. A unique and rather cute knot.

How to tie. Scheme

11. Van Wijk
the incredibly tall and cylindrical knot was designed by artist Lisa van Wijk. This is an enlarged copy of Prince Albert, with the addition of a third turn of the active tail. When tied correctly, it is a long and narrow knot. Creates a striking & unique spiral shape.
How to tie. Scheme

12. Balthus
invented around 1930 by the artist Balthus (Balthasar Klossowski). It is the largest node (significantly larger than Windsor). When performed properly, the knot is wide and tapered. Due to the large number of wraps, the tie will be very short.

How to tie. Scheme

Of course, the list of nodes is not limited to this list. We'll keep getting to know each other, but next time...
Subscribe to the RSS feed so you don't miss anything!