Paper ballerinas. Ballerina snowflakes for the new year, mobile, ballerina templates
To make the New Year's snowflakes shown in the photo, we need A4 paper (it is extremely difficult to cut snowflakes from sheets of a smaller format, since there are very thin and elegant patterns on the templates), a pen or pencil, scissors and a desire to create.
Folding snowflakes according to the schemes
We take a blank sheet of paper, mark the trim line so that we get a square, and cut off the excess part of the paper with scissors.
Before the New Year, I want to decorate the house and do it somehow unusual. The best option for an original decoration may be to use accessories of your own making. For example, if you make snowflakes with your own hands, hang them around the house, the festive mood is guaranteed for a long time.
Paper snowflakes are made from white or colored paper, and you can hang them on a Christmas tree, as a garland, or simply as a pendant.
Snowflakes can be single or assembled from several different ones. The ballerina in a snowflake skirt, which gracefully dances on a thin thread, looks especially original.
Such pendants, descending from the ceiling, can be made not only double, but also triple, and even more. It all depends on the size of the finished snowflakes, the length of the thread and the place where they will hang. For example, such garlands can be hung over the desktop of a small length so that they do not interfere. And along the curtains, you can make a composition of snowflakes from ceiling to floor.
To cut a snowflake, you need to take a sheet of A4 paper. It is folded diagonally, and the excess strip of paper is cut off to make a regular square. The square must be folded diagonally several times so that the fold lines can be clearly seen. The corner from which the snowflake will then be cut out is folded as shown in the figure. You can cut out any pattern for which there is enough imagination.

Such a snowflake can become a beautiful and unusual skirt for a ballerina. By making several different snowflakes, you can dress each ballerina in her own individual outfit.

Ballerinas can also be different, for example, a balancing girl on one leg.

Or a gracefully curved dancer with her arms up. It is convenient to use such a figure, because you can stretch a thread between her hands and hang it in the right place.

Another version of the ballerina to diversify the garland with different girls.

Each figure can be carefully transferred to a sheet of paper or printed out the existing templates. The sizes of ballerinas can be of any size, but it is most convenient to place them on an A5 sheet, then two girls will fit on the landscape page.
You can cut out the same ballerinas of a simplified design. This option will look good on a garland. However, it is better for girls to make skirts from different snowflakes, otherwise completely identical models will look boring.

If you make ballerinas from multi-colored paper, this will add brightness and expressiveness to the decoration. And you can hang them on an ordinary rain, preferably not very thick, but long, so that at least 6-8 ballerinas can fit on it.

If you hang such a garland along a wall, curtains or on a Christmas tree, the room will sparkle with new colors, and New Year's magic will be felt around. To make the ballerina symmetrical, you only need to cut out its half on a sheet of paper folded in half. The skirt, which is part of the girl, is needed so that the snowflake skirt does not fall off.

You can cut out the snowflakes themselves by folding the sheet in a corner, as usual. To do this, you also need to take a square as a basis. Small scissors and a little mischief and imagination will help cut out funny and beautiful paper patterns.

To put on an openwork skirt on a ballerina, you need to keep it folded in half, then it will fit into even the smallest hole in the center of the snowflake. And then you can beautifully straighten both the ballerina and the snowflake.

For convenience, you can print the ballerina template, as shown in the figure. Although drawing it by hand and cutting it out will also be a very simple task.

Do not limit yourself to decorating your home with only purchased blanks and garlands. A little imagination and effort, and the house will plunge into the magical atmosphere of the New Year holiday.
You have probably seen the world-famous ballet "The Nutcracker" by P. I. Tchaikovsky and the magical dance of the ballerinas "Waltz of the Snow Flakes", which means you will understand why today we will draw your attention to the art of dance before the New Year holidays. There is still time to decorate your cozy corner and make it original and fabulous for the New Year.
Elegant snowflakes
We bring to your attention to embody the "dance of snowflakes" in paper ballerinas in a pack and admire the endless beauty. It is so beautiful and easy that you can watch without taking your eyes off, admiring the flight of a snowflake, just like a beautiful dance of a ballerina for a long time.
Let's, on the eve of the New Year holidays, try to combine two beauties and express them in paper!
Snowflake ballerina in a tutu

Cut out snowflakes

Cut out blanks
A real snowflake is always polygonal. The figure shows the sequence of how to fold the paper correctly.
Fold a square sheet of tissue paper in half.
Calculating by eye, divide the angle into 180 degrees, and then into three equal parts, or 60 degrees.
Mark the middle of the rectangle and fold it as shown in the photo.

How to fold paper (napkin) for cutting
It is important that all lines match exactly.
Fold the resulting triangle in half.
Cut out all excess along the edge of the paper.
Wire ballet dancer

Very beautiful and fragile paper ballerina

The beautiful ballerina is ready!
Ballerina garland

You can decorate with such ballerinas tinsel, hang it on a chandelier, above the doorway

Ballerinas on tulle

Hang ballerinas at different lengths and the dance of snowflakes will change
In the afternoon, against the background of the window, the silhouettes of sun dancers in tutus look amazing and very beautiful. And all you have to do is:
- cut out the figures of the dancer;
- cut out a snowflake skirt;
- Dress a beautiful woman and attach with pins to tulle.
Festive atmosphere guaranteed!
Hi all! Watch my video tutorial for you how to make
SNOWFLAKES BALLERINA OWN HANDS. Snowflake ballerina stencils for cutting download right here.
Did you like Snowflakes-Ballerinas from the video? Then let's get started. 😉
To make such beautiful Snowflakes you will need:
- paper
- stencils (download to print right here)
- scissors
- thin thread
I use graceful silhouettes of ballerinas and, at the same time, easy to cut out.
See for yourself.


If you like the silhouettes of these ballerinas and want to download and print them, CLICK DOWNLOAD .
Snowflakes Ballerinas
Stencils for cutting
For your convenience, download files are presented in different formats: .doc and .jpg.
I also want to clarify, as in the video, that stencils with one ballerina on the entire A4 sheet are suitable for LARGE ballerinas. I don't usually use these.
I like to cut out ballerinas from stencils with two silhouettes on an A4 sheet. You saw the result yourself in the video.
- Have you printed ballerinas?
Then let's continue.
2. Cut out the silhouette of a ballerina.
3. Take a sheet of paper and cut out an ordinary snowflake.
Or unusual - it's up to you. 😉
Be sure to make a hole in the middle of the snowflake. Please note that this hole should fit your ballerina's waist in size. Approximately (by eye).
4. Carefully put the snowflake on the ballerina, as we put on the skirt.
5. Use a needle to draw a thin thread.
I do this at the top of the silhouette's head (middle).
That's all. Do-it-yourself ballerina snowflakes are ready. Decorate the space around you with them. And if your children are not as small as mine, running in the frames of the video, then they will help you with great pleasure. Or they will make such snowflakes of ballerinas on their own. 😉

I hope the snowflake ballerina cutout stencils downloaded from this site will help you create such a graceful beauty quickly and easily.
Leave comments. See you in new articles and video. 😉
Happy New Year to You and Your Beloved Children! 🎅🎄
Your Natalia May.
Paper ballerina is one of the most common Christmas decorations. The graceful, thin figure looks original and fresh among the spruce branches, evoking associations with Andersen's fairy tale about a paper dancer and a steadfast tin soldier. Also, these beautiful figurines can be part of a hanging composition, which is attached to a chandelier or ceiling on thin fishing lines. The slightest breath of wind, and the lovely ballerinas will spin in a mesmerizingly beautiful dance. In our article we will tell you how to make this wonderful toy craft. Despite its elegance and sophistication, making it is quite simple and does not take much time.
To make a paper ballerina, we need paper and scissors. For the silhouette of a ballerina, it is best to take thick paper, or thin double-sided glossy cardboard. Draw the silhouette of a ballerina on a sheet of cardboard and cut it out. If you are not sure of your artistic abilities, you can download and print a ready-made ballerina template from the Internet. Then, using carbon paper, tracing the printed silhouette, transfer it to cardboard. Can be cut. Silhouettes of ballerinas are shown in the photo below.
Ballerina figures templates

№1

№2

№3

№4

№5

№6

№7

№9
After you have decided on the choice of the silhouette of a ballerina and made it, we proceed to the manufacture of a ballet tutu. In this case, it will be in the form of a snowflake. Snowflake templates and a pattern for cutting can be seen in the photo below. It will be more convenient to cut small elements of snowflakes with a paper knife on a soft plastic rug.
Snowflake cutting pattern and templates for it


№1

№2

№3

№5

№6

№ 7

№8
When the snowflake is ready, we make a cut in the middle of it, equal in width to the waist of the ballerina's silhouette. Carefully thread the figure into the slot. The snowflake ballerina is ready. We attach a fishing line to it and decorate a Christmas tree or a room.
Colored ballerina in fan tutu

To make such a ballerina, we download a ready-made photographic image of a ballerina from the Internet. Using a graphic editor, we make a mirror copy of the image. This is necessary in order for the figure to be double-sided.

This is what the printed image looks like.

Cut out both images and glue. While the silhouette of the ballerina dries, we make a ballet tutu. To do this, we need two identical pieces of paper. We fold them with an accordion, then bend them in half and glue the sides in contact. We get two assembled semicircles.

Gently glue these semicircles to the waist, and glue the adjoining edges. The tutu is ready. To give it splendor, you can additionally glue more pleated skirts made of corrugated paper, but smaller. The ballerina is ready. We fasten it to a thread or a thin ribbon, and hang it.
Performing creative work to decorate the “Snowflake Ballerina” from paper for windows or interiors would most logically be called one of the types of application. This type of creativity does not lose its popularity for many years, but only improves and takes on new interesting looks.
What will this work give us? Of course, enjoyment, visual satisfaction. For children, it will help improve the ability to use scissors, develop sensory and fine motor skills, train perseverance, develop fantasy and imagination. The snowflake-ballerina will become an original highlight of the interior or help decorate the New Year tree.
Let's start the lesson
We bring to your attention a step-by-step master class on making crafts that will appeal to both school-age children and adults.
Materials needed: white paper, white cardboard, scissors, PVA glue with a brush, thread or fishing line.

Let's start doing crafts. The first necessary element, of course, is the ballerina pattern. For children, the task can be simplified by bending a sheet of cardboard and drawing a silhouette according to a template or by hand.


Adults can take ready-made templates or patterns for cutting out a ballerina. We will provide examples below.


Having decided on the method of preparing the ballerina, we draw and cut out the silhouettes. The ballerinas are ready.
Now it's the snowflake's turn. She will act as the most beautiful dancer's tutu skirt. From white paper, cut out a square with sides of ten centimeters.

Bend the square twice as shown in the photo.


From the resulting small square, you need to make a triangle - we make a diagonal bend.

We apply the snowflake scheme to the resulting triangle and circle it. The drawing can be arbitrary.


Below are examples of snowflake patterns for cutting.


Cut along the contour and unfold. The snowflake is ready.

We make a straight cut of the snowflake to the middle. We dress our skirt on a fragile dancer.

Lubricate the edges of the incision with glue and glue. Let the piece dry. Snowflake ballerina is ready.


We attach a thread or fishing line to the hands of snowflakes-belerins. Snowflake-ballerina made of paper is ready. It will be nice if you mount them at different heights. It is convenient and practical to fix them with transparent adhesive tape.

To give individuality to such a ballerina is very simple. You can combine techniques or simply decorate it with a bow, use colored or corrugated paper. You can liven up the silhouette of the dancer by outlining the face or adding pointe shoes. Most importantly, do not forget: each work is unique in its own way.
Napkin dancer
Another option for performing a paper dancer can be a napkin ballerina. It is unlikely that there will be a person who can pass by such an original little thing. It is difficult to imagine, but its implementation is very easy and exciting.
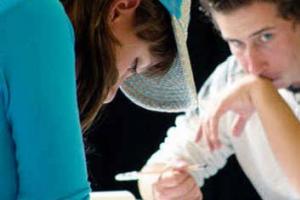
To make a ballerina from napkins, you need: wire, napkins, PVA glue, brush, water, scissors, white thread.
An example of a step by step implementation. Randomly twist the silhouette of a person from the wire. Cut off excess metal. Doll size may vary. Depends on the desire and size of the napkins.

Separate the layers of napkins. What happened, cut or tear into pancake ribbons. We dilute the glue a little with water and begin to wrap the silhouette, liberally lubricating it with a sticky liquid.

This is what should happen at the end of the previous stage.

We take a whole napkin. We fold it as shown in the photo, pressing the bends well.

We open the napkin. And again we disassemble the napkin in layers.

We collect each layer into an arbitrary triangle and twist it. We do not press the ends, we leave them lush.
We repeat the procedure described in paragraphs 4, 5 and 6 many times.

Let's start forming the ballerina outfit. We glue it at our discretion. The blanks should be placed tightly to each other and in several balls - this way the dancer will look more airy and beautiful. We begin to form the outfit from the skirt, and then move on to part of the torso.
When the workpiece has dried up a little, we take a white thread and tie the dress around the girl's waistline. Napkin ballerina is ready. You can safely use it in the decor of your home, office, medical or educational premises. Due to the fact that its frame is made of wire, each such doll can take on various dance elements and poses.

Such a craft can take both a school-age child and an adult. Using imagination, various materials for manufacturing: different types of napkins, threads, ribbons, trimmings of fabrics, tulle, paints, beads, pearls, sparkles, paints, you can create a real masterpiece. It will look good in a composition, for example, with beads on a fishing line or balls of thread. Do not be afraid to experiment, everything will definitely work out!
We will show some examples of works, original solutions and decorative design of rooms made of paper ballerinas.


Video on the topic of the article