Vytynanka patterns flowers. Window decoration for spring in kindergarten
The development of the child in the first years of his life occurs through sensory perception. And the more harmonious and beautiful the world around him will be, the more talented, sensual and happy the baby will grow up. One of the areas of creative activity is the joint decoration of windows for spring in kindergarten.
Do not be afraid to involve children in the spring decoration of windows in kindergarten, worrying that the decoration will not come out as neat as we would like. After all, kids are interested in the very process of creating beauty, and not just admiring the consequences of someone's activity. Therefore, we stock up on the necessary equipment and start creating!
How to decorate windows in spring in kindergarten?
Most often, ordinary colored double-sided paper is required for decoration. It has a wide palette of colors and is suitable for a bright variety of decorations. Most often these are spring flowers, grass, the sun, forest dwellers - animals, birds and insects.
If the teacher does not have artistic abilities, all kinds of stencils for spring decoration and window decoration in kindergarten will come to the rescue. They can be found on the Internet or purchased at a specialized needlework store.
 |
 |
|
 |
 |
|
 |
 |
 |
In addition to paper, you can use with which you can create a unique masterpiece in the form of spring. The advantage of this material is its painless peeling off from glass in the future. Vytynanki look very original - openwork stencils for cutting. They are made of thin paper and glued to glass.
Do not forget that you can decorate not only glass, but the entire window opening, as well as the window sill. If you make fasteners at the top, it will look beautiful like a flowerpot with artificial paper primroses, and on the windowsill there are toy symbols of spring - birds, flowers and trees. Since it is in the spring that the biggest Christian holiday, Easter, is celebrated, you can add an appropriate note to the spring composition.
 |
 |
These cutting templates are intended primarily for making window decorations. At the same time, such carved paper decorations are great for decorating other parts of the interior. The main thing is that the paper used should contrast with the surface being decorated. For this purpose, you can use not only white paper (classic), but also colored paper.
Which rooms can be decorated with decorations from the Happy Spring Festival set? Yes, almost any. Paper decorations cut out according to our templates will perfectly fit into windows of various sizes.
And the magical theme of the composition, the central element of which was the Spring Fairy, is the best suited for children's institutions. And do not be surprised later that your windows will simply attract the attention of everyone around. :)
Perhaps even your festive decoration will be awarded at some municipal, regional or corporate competitions (yes, this has already happened).
And it doesn’t matter at all how much paper cutting experience you have. Graceful and at the same time quite simple shapes can be cut out even by beginners using an ordinary clerical knife.
For example, fragments of the composition are placed in three window openings 60 cm wide and 135 cm high. However, you can easily vary the dimensions of the composition by adjusting them to the size of your window, for example:
- reduce the size of elements by setting a custom scale less than 100% in the print / cut settings;
- reduce the area of the composition by reducing the number of elements used - the best solution for small windows;
- expand the composition by adding additional elements (drawn by yourself or from other sources) - for especially large windows or shop windows.
Dimensions of large elements of the composition:
- Fairy Spring: 46×82 cm;
- trees: 51×78 cm And 51×70 cm;
- flower corner: 50×33 cm;
- the inscription "Happy Spring Day!": 52×27 cm;
- the inscription "March 8": 36×20 cm.
Composition:
1. A set of templates in the format PDF- for cutting by hand:
- simple and compound templates for cutting out elements of a festive composition on A4 sheets (simple - templates that fit on one sheet of A4, composite - glued together from several fragments on different sheets of A4);
- templates for cutting out composition elements on four A1 sheets (templates on A1 sheets are intended for large-format printing on whatman paper (this can be done at the nearest copy center), which will slightly reduce the production time);
2. A set of templates in vector formats DXF, SVG and FCM (for ScanNCut Canvas), STUDIO3 (Silhouette Studio Document)- for cutting on a plotter:
- templates of large elements of the composition, prepared for cutting on sheets of paper of the format A4 and sheets 30×30 cm(large elements are divided into fragments of appropriate sizes);
- solid templates of all elements of the composition;
- instructions for making window decorations.
Add the template set in the desired format to your shopping cart.
Flowers, one of the wondrous creations of nature, are appropriate at different moments of life, including when creating various kinds of decor or crafts (such as, for example, vytynanki (pull out from Ukrainian - cut out). Stencils and templates will help create simple and complex cute and useful crafts.The benefits of paper cutting for a child are undeniable.
Flower stencil for cutting, how to make a stencil from a printed vytynanka template
Stencil (dense material (wallpaper, plastic, etc.) with slots that form one or another pattern. You can simply circle the corners of the sheet with a simple pencil. This is a simple process, but it requires care and patience.
To transfer the pattern to the surface, firstly, you need to stock up:
1. paper or a piece of wallpaper;
2. scissors or a clerical knife;
3. pencil, eraser, ruler and marker;
Secondly:
1. click on the picture you like;
2. choose a suitable template for the flowers;
3. download the template for yourself and print it (it can be roses, poppies, daisies, etc.);
4. cut with scissors or a knife;
5. Apply the stencil on fabric or paper and fill with paint, spray or even putty, and enjoy the beautiful result.
Next, decide on the size of the picture. Outline the area on the sheet, then without going beyond these limits. Decide on the size of the stencil - make it so that it is 5-10 cm larger than the area of \u200b\u200bthe picture, then it will be convenient to work with this form.
Then draw a grid, dividing the inner area of the future drawing into equal intervals. In this case, the pattern will turn out to be symmetrical and proportional, and this is the main task of the vytynanka.
Decide on the direction of the pattern - a sinusoid drawn from the lower left corner will become a guideline along which you will then apply the pattern.
BY THE WAY: If you are not an artist, and for the first time you decide to do flower protrusion, take templates with simpler shapes. After cutting them out of thick paper, apply to the base and circle with a pencil. So that the stencil does not break through, and it is more convenient to cut out the details, try to arrange the flowers arbitrarily and not very close to each other.

If you did everything as planned, circle with a contrasting marker each line that needs to be cut. And then you can easily orient yourself during cutting. And then cut out the pattern along these lines with a clerical knife.
REMEMBER: Start with large parts and from the top. And if you have to work with a large stencil, put something under the base.
If all the details are cut out, start using the stencil, securing it with masking tape, for example.
Important Tips
- The stencil is soft, rather, it will be disposable. Although, if you use spray paint, then it can do the job more than once. But rigid stencils, say, from cardboard, wallpaper, x-ray film, etc., last longer.
- The paint will not flow under the paper if you use a foam sponge or roller when painting the surface with a template and do not allow excess paint.
How to make voluminous paper flowers from a printed template, step by step
Firstly, you can create different flowers. Yes, a rose may seem difficult to work with. But it only seems!
To make a voluminous paper rose, stock up:
1. thick cardboard
2. corrugated paper
3. with a simple pencil,
4. scissors,
5. thick wire,
6. green floral tape,
7. adhesive tape,
8. glue.
Step by step making one flower
Step 1. Print the selected template and apply it to thick cardboard.

Step 2. Cut out the paper petals in the form of a heart (there should be 15 of them) and in the form of drops (5 pcs.).

Step 3. In order for the petals to take shape, the hearts should be slightly stretched to the sides, and the drops should be twisted with a pencil.

Step 4. Wrap 2 pieces of wire with floral tape, these are future stems.
Step 5. Glue a piece of corrugated paper to them like a core.
Step 6. To create a bud, you need to stick drops and hearts with adhesive tape.

Step 7. After cutting out a sepal from green corrugated paper, fix it at the base of the flower with adhesive tape.

Step 7. It remains to cut the leaves and fix them to the stem.
Useful video
Templates for large flowers
These paper flowers will decorate the interior, decor and can be a good gift.
Template Options


 Flowers from A4 paper templates
Indeed, simple or complex stencils and patterns can be created from a regular sheet of paper. And then create real compositions.
Template Options


Leaf patterns for vytynanka flowers
It can be leaves of various colors - roses, chrysanthemums, daisies and many others.
Template Options


Basket with flowers Grade 2 vytynanka templates
In the second grade, children can easily build flower baskets according to the vytynanka pattern. There are as many options as there are basket shapes, colors, and designs.
Template Options


Flower patterns on the wall
Create a fairy tale of chic flowers with your child by using flower patterns on the wall. It can be either compositions, or only flowers, accompanied by some kind of inscription. But first, decide on the material from which the template will be made, how to mount it on the wall, it will be a standard template or adhesive, textured, etc.
 The stencil is applied not only to a clean wall. You can "revive" plain wallpaper by applying with the help of stencils and patterns. It is enough to put them on the wall, circle and paint over inside the contour.
Template Options


Autumn colors patterns
The leaves are very beautiful in autumn. Transferred to the walls in this or other way, they will create a special atmosphere.
Template Options


Patterns of pleated flowers
Fantasy and patience will allow you to create real works of art with your child, giving ordinary things an unusual appearance.
Template Options


Useful video corrugated flowers
Patterns of different colors of vytynanka
Learning the world in this way, children will get acquainted with the types of flowers, and with the methods of making vytynanok, etc. Flowers can be not only from the store, from which it is customary to collect bouquets, but also field flowers.
Template Options


Flower vase template
Vases come in different shapes. They can be "painted" with a knife. In a word, to create a product no less beautiful than the flowers for which the vases are made.
Template Options


Templates for bulk flowers
Combine business with pleasure with your child by creating this kind of paper flowers. And by joint efforts you will decorate the interior, furniture, ready-made accessories, gift wrapping or postcard. Here are some options for making such flowers.
For this you need to stock up:
1. materials (plain, colored or corrugated paper, drawing paper, etc.), from which soft ones will go into small parts, and dense ones into large ones;
2. high-quality scissors;
3. glue (universal, silicone, PVA - the thicker the paper, the stronger it must be fixed);
4. schemes and templates;
5. material for frames (wire).
Volumetric flowers can be made of corrugated paper, on the wall, in the form of postcards with volumetric flowers inside, etc.
Template Options


 Volumetric flowers video
These flowers in your performance will become an original interior decor or a nice gift for any occasion.
Vytynanka templates for applications
With your own hands, a child under your guidance can create delicate and delicate works as gifts timed to coincide with a variety of events. By cutting out flowers or patterns from them, the back of the scissors can add volume. Then, fixing the work on colored paper, fix the sheets at a distance from each other. Here's what can be done.
Template Options


Creating flowers with a child, and it is beneficial to do this at any time of the year, especially in the cold, you will get a double benefit. First, bring joy into your home. After all, even if they are not alive, they are very beautiful and, by the way, more durable than their real counterparts. Secondly, keep your child busy with useful work, during which he will learn the world, and develop, and bring joy to others.
Natalia Fomenko
Dear colleagues!
Never cut so big vytynanka but I really liked it...
Let's get started.
materials:
Paper (A4 format, with printed templates,
Stationery knife,
PVA glue,
Pastel crayons.

We start by printing templates.

Since the image is large, we will cut it out in parts.
As always, cut out the middle first, and then only the outline.


When cutting out the outline, leave a small strip for gluing.

Later we will remove it, but for now it will serve us.
Certainly hard work...
When the templates are cut out, we proceed to the assembly. For me, the assembly turned out to be a more time-consuming process than cutting.

We glue the templates very carefully, remove the auxiliary strips and get vytynanka size A1(whatman).
Vytynanka we decided to decorate the mirror in the music hall, but leave it pure white against the backdrop of bright tulips…. Toning was done So: spread the finished work on the newspaper, grind the pastel and rub it with your fingers. The work is dirty, but the result is worth it. Tried toning with a sponge - the result is not the same.

Here is the result of our work.


Related publications:
Purpose: to continue acquaintance with the technique of "grattage". Tasks: - to teach the sequence of work in the technique of "scratching"; - promote.
On the eve of the New Year, everyone is preparing for his meeting. Especially children! Therefore, I am sure that decoration is most carefully done precisely.
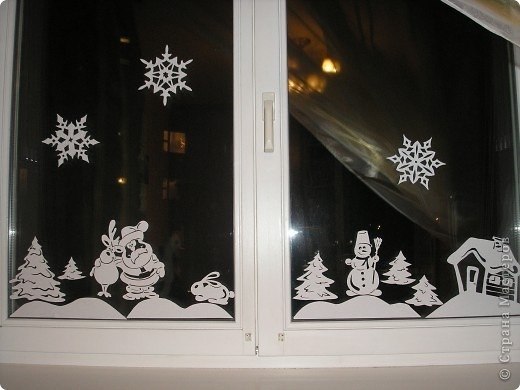
On the eve of the New Year, they decided to decorate their windows with bulges for their group in kindergarten. First I found a pattern of drawings (and there are a lot of them on the Internet.
I want to introduce you to paper plastic - these are different types of paper work: quilling, origami, modular origami, trimming, paper sculpture.
Very soon the New Year of the Monkey 2016 will come according to the Eastern calendar. Production of New Year's gifts, souvenirs and ornaments with.
PANEL SPRING To make a panel, you need: - a frame, - 2 sheets of A4 paper, - yellow and green crepe paper,.
Master Class. Vytynanka "House for the Snow Maiden". Master class with step by step photos. Vytynanki is the art of paper cutting. These are amazing.
New Year's vytynanki have become an indispensable attribute of this holiday, along with, garlands and. They are most often cut out and glued to the windows, while creating a fabulous atmosphere. But we will not be limited only to this idea: let's see which vytynanka templates can be used for, which ones are suitable for decorating a festive table, and which ones are for creating. In fact, the scope for the use of protrusions is limitless!
In addition to the most fabulous ideas for decorating a house with vytynankas for the New Year 2020, "Cross" will tell you in detail:
What are vytynanki
Most often, vytynanki are cut out on, so we will rely on this topic. So, what can be attributed to the silhouette, and what to the symmetrical protrusions.
Silhouette:
- figures for numbering the coming year
- symbol of the coming year ()
- winter compositions
- and Snow Maiden
- animal figurines
- heroes of fairy tales
 Even such simple protrusions on the windows will look very elegant:


From simple pictures cut out by stencils, you can make complex compositions, full-fledged plots:


People with great experience cut out plots of incredible complexity:


What materials and tools will be useful in the work
We are pleased to publish on the pages of the online magazine "Cross" a list of everything that may be needed and help in the process of cutting, as well as for gluing.
- a printer or copier
- white A4 paper, colored printer paper, not too thick whatman paper, kraft cardboard
- stationery knife small size (the sharper the blade of the knife, the easier it is to cut, and the smoother the protrusion) or a knife for artwork (paper cutter), for example, by Mr.Painter or Erich Krause.
- base for cutting(dummy mat, cutting board, piece of plywood, in extreme cases, a thick stack of newspapers or magazines that you don’t mind ruining)
- scissors(regular and manicure are useful, as well as with a very sharp nose)
- pencil
- tweezers
- box or package for paper waste
- box (preferably with a lid) for storing finished protrusions
- glue or double sided tape laundry or other soap
- sponge or tassel

Vytynanka from kraft cardboard

Artwork knife

Layout mat for cutting
YOU WILL USE
The vytynanka picture will fit perfectly in the box from under:
Even the simplest ones will become more elegant if they are decorated with cut out plots on a topical topic:
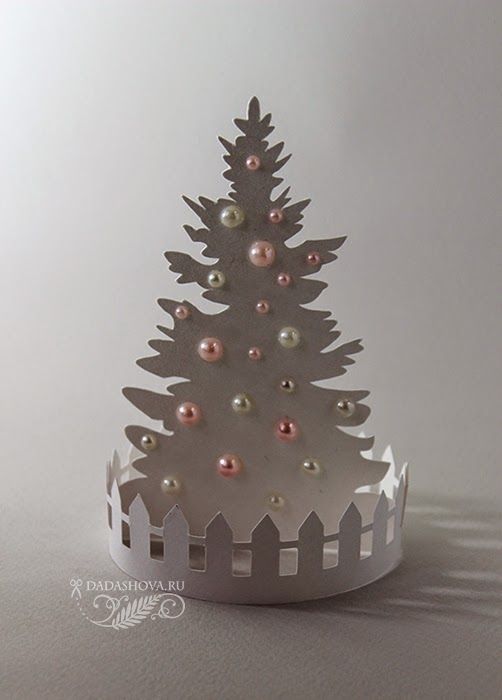
Vytynanka cut out of very thick paper or even cardboard:
- decorate mobile
- chandelier or lamp
- suitable as
In order to make such New Year's balls, cut out a New Year's vytynanka from paper or cardboard, and then stick it on cardboard of a different color.
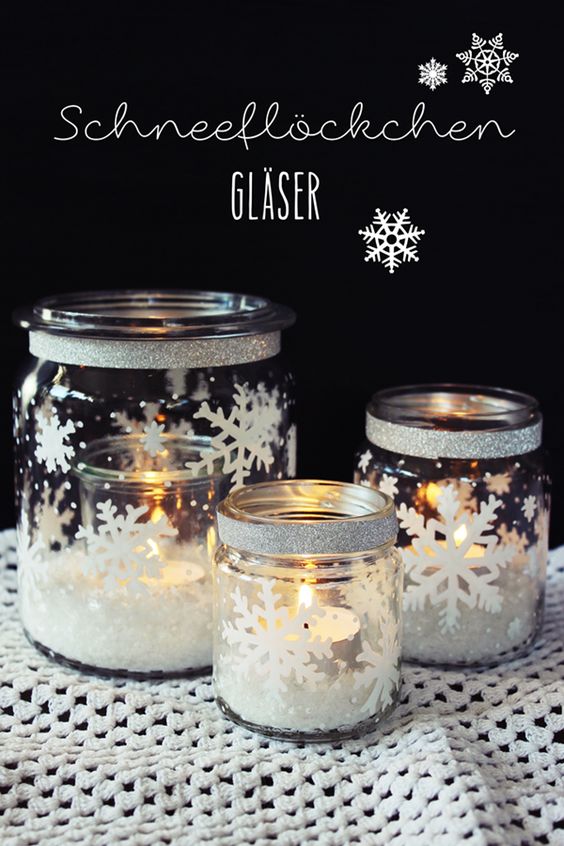
Can serve as decorations in the table setting:
And the illuminated city will literally enliven any window sill! To make such a city on the window, place snowdrifts below, some into which houses can easily fit,. ,