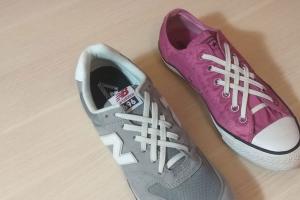
Like lacing a sneaker. We tie the laces inward so that the knot with the bow is not visible
Ekaterina Malyarova
Sneakers have long gone beyond gyms and treadmills, becoming an element of everyday looks. Naturally, after fashionable sneakers, fashionable lacing of sneakers came into our lives to add even more glamor to looks with sports shoes. And this effectiveness lies not only in the bold color combination of shoes and lacing, but also in the very options for tying them.
What types of sneaker lacing are there?
When deciding how to fashionably tie laces on sneakers, first decide what type of shoes your sneakers or sneakers are. There are several of them, the most common options are:
- with 4 holes;
- with 5 holes;
- with 6 holes;
- with 7 holes.
Naturally, the more holes, the more room for imagination, but most fashionable sneaker lacings are universal and suitable for all types of shoes.
Sneaker lacing grid
The lattice is a very interesting and unusual option; it looks especially cool with two-color laces on sneakers. However, this option is only suitable for shoes with 6 holes.

Tying is quite simple - we thread the lace into each hole and cross it at a right angle, resulting in a beautiful lattice. However, you need to be careful to ensure that the drawing is clear. This version of lacing sneakers looks good with both single-color and multi-colored ties. This type of tying is especially convenient and spectacular in shoes with a wide tongue.

Lace up sneakers with cobwebs
One of the most original options, it doesn’t lose its shape for a long time, even during washing, and it looks cool. Provides good fixation of shoes on the foot.

The tying scheme is not the simplest; you need to thread the laces into the second holes (from the inside) and thread them externally into the first ones without changing sides. Next, we cross the laces and thread them into the third holes from the inside. Now we insert the laces under the first loops formed, and insert them into the fourth holes (from the inside), cross them and repeat further. Each subsequent cross lies on top of the previous one!
Double multi-colored lacing of sneakers
Two pairs of multi-colored, preferably contrasting, laces are used. The method is quite simple to tie - we thread the first lace into the first holes, cross it and thread it into the third. We repeat the same process with the second lace, threading it through the second hole and crossing it into the fourth. We continue to cross, threading the first lace into unpaired holes, the second into paired ones. The more holes, the more impressive the lacing looks.

Wide crosses
This method looks very impressive, but is not the most practical. This way you can lace up your shoes for walking or casual looks, but adjusting them is quite difficult.

We insert the laces into the first holes, cross them and thread them from the inside into the fourth pair of holes, another cross and thread them into the third pair of holes from the outside. Now we draw the ties under the entire lacing, insert them into the final holes inside and tie them.
We tie the laces on sneakers with a hexogram
The lacing is spectacular and unusual; however, it cannot be tightened too much, so the fixation of the leg will be very loose. However, you won’t often find such lacing, so you are guaranteed the title of original! It is best to tie according to the diagram presented below; a verbal description of the process can only confuse.

Lacing sneakers with a pass
This option is designed for people with high insteps who experience discomfort when wearing shoes with the classic type of lacing for a long time. Lacing is quite simple, we start with the first holes from the inside, after the cross - the second ones from the inside, then the cross into the third holes, into the fourth, but without the cross and on the same side, then again the cross and thread the fifth ones inside, and again the cross and insert it from the inside into the final holes - done!
Lacing up hiking shoes
This lacing is designed for comfortable walking or cycling; it does not cause discomfort, even when wearing the sneakers for a long time. The pattern is simple, however, there are two types of tying knots:
- On the inside. This option is suitable for hiking; the bundle and body shirts will not cling to tall grass and branches;
- On the outside - an option for cyclists, it prevents the bows from clinging to the elements of the bicycle, pedals and wheels.

We tie the laces on sneakers with a ladder
This is one of the most reliable lacing options; it provides rigid fixation of the leg, so it is ideal not only for sports shoes, but also for skates. This lacing option is also popular among the military, for example in the USA it is still a mandatory type of lacing for boots in some units.

Tie securely
Every owner of at least one pair of sneakers is concerned with the question of how to tie the laces on their sneakers so that they do not come undone. This is true in everyday life, and especially during sports. Since in the latter case this can even lead to injury! So:
- A classic knot, if it is securely tightened, will not come undone. For greater reliability, tie the “ears” of the bow again;
- We tie it inside; knots hidden in shoes are untied many times less often, so they are more reliable and convenient;
- Surgical knot - use it for 100% reliability, since medicine does not disdain it, then it will suit you too! The tying pattern is not the most complicated, but even wet laces will not untie themselves, but can be easily untied by hand.

Spectacular lacing with proper use of lace colors is an easy way to update an already tired pair of shoes, as well as the opportunity to “make friends” with sneakers with any look, from sporty to evening!
Shoes have long been considered an indispensable accessory for the perfect look. Therefore, in addition to the original design of the model itself, it is important to be able to wear this element correctly. And if the sports variation also has laces, then their neat lacing can become a separate highlight of the image.
Depending on the number of holes, colors and your own preferences, you can experiment in any way.
What patterns are most in demand among fashionistas?
Classic way
The traditional method of fixing popular shoes on the foot is familiar to many: the “cross-on-cross” principle is known to everyone. This algorithm is simple to implement, can be combined with almost any style (including male and female) and is universal.
Reference! This is very convenient - it is not at all difficult to repeat a light weave in a short period of time. This lacing format is especially common in sneakers.
The detailed algorithm of the circuit looks like this:
- The lace is threaded through the bottom rings and goes outward from two edges. At this stage, the same length is adjusted on both sides.
- Next, the ends are overlapped and then re-passed from the inside to the outside through the hole on the opposite row.
- A similar action should be duplicated on the second lace. The first “intersection” should form, which should be corrected if necessary so that the center of the intersection is clearly in the center.
- Now such an operation should be repeated until the very end. When the holes run out, you need to tie a knot, and then complete the pattern with a classic bow.
The well-known cross lacing is practical precisely because it does not cause confusion when performed because it is located on the outer wall and does not rub the leg when walking.

Without a bow
If we move away from classical techniques, then the main nuance - the bow in the finale - can be removed from the instructions altogether. But so that the missing part does not spoil the entire fixation of the lacing, we will have to partially reconsider the implementation of the entire technique.
One of the interesting replacement methods is called “Lines” and is implemented using the following method:
- The central movement implies a “snake”, specially passed through one hole.
- The left end must be laced from the wrong side into a ring on the same side, and from the front - to the right side.
- Use the right lace to skip one hole and repeat the second step again.
- Next comes dubbing again from stages 2 and 3, maintaining symmetry.
- The final step is to tie the ends from the inside out, where it is important to secure the lace so that it does not unravel during movement.
This option looks especially impressive not on classic (convex) ones, but on flattened ones.

- With any of the selected ends you need to repeat the “snake” indicated in the version with lines, but now it is worth fixing in each hole.
- We pass the second end using a similar technique perpendicular to the first row, forming a grid: from top to bottom, a full-fledged strip is formed, which goes either under or above the initial row.
- Using a similar method, we design the adjacent row, and so we bring it to the end, and in the end we fix everything inside and connect the ends from the inside out.
The main principle remains unchanged - this is a symmetrical design and attempts to carefully hide the bow.
Reference! With open feet, such a presentation of shoes will not go unnoticed and will definitely provide comfort.
The best ways to lace sneakers are shown in the video:
So that they are not visible
A more complex alternative further reduces the space allocated for decorative weaving. Minimize weaving and carry out basic manipulations away from the eyes - this is the main rule of the next method.
One of the variations involves such a popular scheme as “straight lacing”, which is performed in the mentioned sequence:
- The initial cord is fixed through the lower rings and taken inside the substrate, symmetrically relative to the sides.
- One edge is directed upwards from the right, appears from the top hole and is threaded into the left one.
- Then the ends involved in the process go up and end up outside, but each through a separate hole, are threaded onto the opposite row and then go up.
- From now on, the lacing stretches along the axis of the shoe until one of the laces reaches the last hole.
- The finishing touch is to pull the second tip through the final ring at the top. Therefore, this format will only work with a paired number of rings.
The video shows how to tie shoelaces using the straight lacing method:
The presented type of lacing is characterized by the absence of an inconspicuous diagonal arrangement of seams inside the shoe.
Another lightweight version of the stylish design is also suitable for models with a paired number and is even known as “Light lacing”:
- The tip is threaded through the bottom rings and pulled through the middle of the shoe on both sides.
- One of the edges of the lace runs along the entire length and appears immediately from the hole on the left side at the very top.
- At the same time, the second end should be directed into the upper hole, thrown to the opposite line and again pulled up through the inner wall so that it subsequently remains outside.
Reference! A significant disadvantage of this process is that the final laces are of different lengths due to the specific technique. Therefore, the considered option is not suitable for everyone due to problems with fixation.
A different shade (from 2 colors) can simplify the procedure and decorate the final result.

How to lace beautifully in a complex way?
Problems may arise when deciding to try out more intricate variations. Truly complex schemes, although they seem very impressive, require attention, effort and time to implement.
So unique "Ladder", useful for tying long shoelaces. In addition to visual magnetism on sports shoes, this one looks especially striking on high-top models.
You can make the mentioned pattern using the following algorithm:
- The lace stretches through the lower rings and ends up on the outside of both sides.
- Next, the ends that you hold in your hands should be lifted into the next upper holes.
- The ends are connected to each other and follow a vertical line to the opposite row of lace, after which they are directed into the next hole at the top.
- There they cross again, follow the vertical lacing and then again diverge in different directions. This way they are woven into the overall row and create a strong tie, thereby fixing the shoes more firmly on the foot.
Lacing in "Checker."

The display of the scheme can be seen already in the name, but not everyone can technically repeat the principle, which is simple at first glance. A free space is formed along the edge, which simply cannot be designed as tightly as possible - it was invented specifically for loose shoes.
Step-by-step instructions will help you learn it:
- You should start with two different-colored sets of laces, preferably wide ones.
- One color is required to be done in the style of “straight light” weaving.
- In a different tone, proceed to the bottom row, stretching it in waves to the very top.
- Next, both shades need to be wrapped around each other and duplicate the wave format downwards.
- It’s worth continuing this type of lacing as long as the length of the lace allows, then fix the edges inside (the bow doesn’t fit here either).
How to tie sneakers using the original “Checkered” method is shown in the video:
By number of holes
In addition to dividing into decorative techniques and individual elements, lacing can be distinguished by holes - the complexity of weaving directly depends on them. Many variations can be repeated only for even-numbered versions, others will look more original only on unpaired analogues.
Therefore, it is worth taking into account the classical schemes.
With 4 holes
The minimum set significantly limits the imagination for the implementation of original patterns.

A popular way out of the situation is to draw a cross outward:
- To do this, it is advised to thread the lace through the lower rings, then take them out, and then cross them again and tuck them into opposite holes.
- It is better to follow a clear algorithm: if you start on the left side, continue to stick to that side so that the final drawing seems correct and even.
With 5 holes
The generous volume gives more space to realize a beautiful look. After all, five rings are the most popular set of sneakers. Lacing is perfect for such shoes "Knot".
It's easy to repeat:
- It is worth inserting the lace into the lower holes from the inside and carefully pulling it out, while simultaneously aligning it along the length to avoid twisting into a spiral.
- Afterwards, you should cross the ends, intertwining them, and again place them on different sides.
- Then all that remains is to take each one out separately and make a knot from the outside.
With 6 holes
If you choose blanks of medium thickness, you will certainly be able to achieve the desired pattern. The method seems "Store lacing" for shoes is very similar to the knot technique, but still requires care during the process.

The main secret here is how gracefully the two ends fit together:
- First of all, the laces follow inside and are pulled out, then they are pulled into the upper rings and returned back, after which each edge clings in a loop to the adjacent one and goes up again.
- The specified pattern is duplicated right up to the very edge.
Reference! An important advantage is hidden in the fact that it can significantly shorten the length.
With 7 holes
Anyone who wants to radically decorate their shoes knows about the ideal option, which is called "For racers". It was invented deliberately so that particularly complex models would not unravel and would fit tightly to the leg.
Step-by-step instruction:
- This method can be implemented by stretching the lace diagonally and carefully pulling it out of the upper right and lower left rings.
- The desired pattern will be obtained after the top lace goes down in a zigzag technique to the central part of the sneaker, and the bottom lace, in contrast, rises to the central zone.
Lacing has long ceased to be a simple addition to shoes.

The skill of beautiful weaving has become a separate art, and all kinds of patterns number about a hundred variations.
The most popular of them are worth taking note and using them to dilute your usual image.
Modern fashionistas and fashionistas today cannot do without trendy sneakers, sneakers or sneakers. Read on to learn how to lace your sneakers beautifully.
Sneakers have become an all-consuming trend; you can already wear them with any clothes, even classic ones. Flowing skirts and formal dresses today are paired with low-cut white sneakers or trainers, and this combination has not surprised anyone for a long time. Lacing options from the manufacturer may become boring after a while and you can easily re-lace your favorite sneakers.
Types of lacing sneakers
You can lace any shoes using one of the following methods:
- Traditional crossover
- The lace is passed through the holes closest to the toe and comes out on both sides at an equal distance.
- The laces intersect and are inserted from the inside out through the next pair of holes.
- The action is then repeated depending on the number of holes. This type of lacing is usually offered by manufacturers.

- Crosses above and below. In this method, you alternate inserting into the hole, this way you get beautiful crosses.
- Straight lacing. One end of the cord passes through all the holes like a snake. It looks neat, but in use it is quite difficult to tighten the sneakers.

- Lacing with butterfly. The pattern is very similar to lacing with a cross over and under, but in this case there are no crosses at the bottom; instead of a cross, the lace rises vertically into the next hole.

- Military lacing. A mirror image of the butterfly lacing, only the lower crosses remain, and the “over” crosshair is replaced by a vertical transition of the lace to the next hole.
Lacing sneakers with 6 holes
Six holes is the standard number of holes for athletic shoes. This is the amount that allows you to fix your leg as correctly as possible, which is important when playing sports. There are about 4,000 lacing methods and you can probably come up with even more.
To diversify the lacing of your sneakers, use multi-colored laces or a decorative weaving method, which will be discussed below.

Lacing sneakers with 5 holes
For lacing 5 holes, various methods are suitable, for example, saw lacing.
- Pass the lace through the bottom holes so that the ends are inside the sneaker.
- Pull the right end of the lace through the hole that is located above it, and pull the left end diagonally into the third hole from the bottom (the second hole is occupied by the right end).
- Pass both ends strictly horizontally to the holes on the left side of the shoe and repeat the steps.

Lacing sneakers with 4 holes
Some sneakers and boots have only 4 holes on each side for lacing. These are mainly summer shoes that are laced mostly for decorative purposes.
There are several lacing options for you:

Lacing Nike sneakers
Nike annually introduces many different versions of sneakers for any occasion. The distinctive features of these sneakers are the wide laces and the letter N or swoosh on the side. You can use any of the methods described to lace these shoes.

If you don't like the bow that finishes the lacing, you can hide it under the tongue of the sneakers or use a surgical knot:
- Make a loop at the end of the right lace.

- Pass the left lace through the loop, but do not tighten it.

- Pass the end of the left lace into the hole between the working end of the right lace and the loop, so that you get 2 similar loops.

- Now we tighten the knot tighter.

Slip-on sneakers
Slip-on sneakers can be classified as sports slippers, which are common among people involved in water sports. Another option for slip-on sneakers is slip-ons. The popularity of this simple shoe has been growing for several seasons. The sporty “mood” of these sneakers is obvious and at the same time they go well with casual and even dressy clothes.
Slip-ons sit on the foot due to rubber inserts on the sides and perfectly hold the foot.

Sneaker lacing pattern
There are a lot of lacing patterns, different intersections and colors are used. For example, decorative lacing called “World Wide Web”:
- Thread the lace through the penultimate (counting from the bottom) pair of holes, so that the ends of the laces are inside the sneaker. The lacing will move first to the bottom, to the toe, and then rise back.
- Pull the left end of the lace obliquely and thread it through the hole on the right side, which is located one division from the first horizontal section.
- The next step is to stretch the lace diagonally again, skipping the nearest division. If you have 6 holes in your shoe, then you should hit the hole closest to the toe.
- Pull the end of the lace vertically into the next hole located above it and repeat 2 crosses again, eventually the left lace should go into the hole farthest from the toe on the left side of the sneaker.
- Repeat the same steps with the right end, just mirror them.

For those who are not afraid of difficulties and are eager to stand out from the crowd, here are a few more diagrams that show the lacing sequence. It may not work out the first time, but the main thing is not to despair, having gradually mastered various techniques, you will be able to quickly and easily combine them and come up with something of your own.


Lacing sneakers without tying
The idea of modern designers allows you not to bother at all with tying your shoelaces by using elastic laces. This small device is a rubber band (or silicone cord) about 3-4 centimeters long, with blocks attached to the ends. You can create any design using such a simple device, and also combine several colors.

Original lacing of sneakers is a simple and budget-friendly way to add some zest to your look. experiment, change, stay stylish and fashionable!
Video: Beautiful lacing of sneakers
How to tie your sneakers laces beautifully
We all want to stand out among the crowd and show our excellent style and taste. To do this, it is not necessary to dye your hair green or radically change your appearance in any other way. In this matter, your individual self and creative approach are important.
Diversity of sneaker lacing ideas and opinions
Even if there are no such ideas yet, we can come up with one original one. Pay attention to shoes, in particular sneakers. What methods do you know for tying shoelaces on sneakers? But without thinking twice, you will say that they are the ones your mother taught you. If you are intrigued by this question, go online and ask “how to lace sneakers” and you will see a different number of lacing methods offered by sites. Why is there such a discrepancy? The fact is that everyone’s shoes are different, and the number of holes can be multiple or non-multiple.
Lacing 6-hole sneakers has many options. For freedom of movement, lace so that 1-2 holes remain free. This method is suitable if the new shoes you bought turned out to be a little too small. Otherwise, you should tighten your laces tightly in order not to lose your sneakers while running.
When buying sports shoes, we must pay attention to the fact that the model does not always fit perfectly to the foot. But if you know how to lace any type of sneaker, then you can safely choose any model of sneaker you like and adjust the wearing comfort using laces. Some of the methods below are also used for lacing 5-hole sneakers.
So, we present to you a list of original lacings that people came up with for different types of shoes:
And for those who are in no hurry, we offer the following ways to tie laces on sneakers beautifully.
Straight European ladder lacing. In this case, one lace goes into the lower holes and comes out on both sides. Then one end comes out crosswise through the top hole, and the other end crosses up through one hole.
Straight lacing is very popular. The diagonal crosshair is missing and half the length of the lace is hidden inside. Such lacing is possible for sneakers with six holes, but with five it will not work.
Lacing for thickets is the reverse version of the direct one. Provides greater tightness to the sneakers. Very practical for those who like to walk in impenetrable forests.
Roman lacing is very original, since the pattern is not continuous, but broken.
Long diagonal lacing is for those who have nowhere to put their long laces.
Showcase (store) lacing is similar to regular cross lacing, but the ends are hidden, and it seems as if they are not there at all.
Lacing with a ladder - looks neat and attractive. To lace your sneakers like this you need very long laces.
Butterfly lacing - for short laces. At the same time, crosses are visible on the outside, but on the inside the laces run vertically and are hidden inside.
Knotty lacing is very original. Each time the ends of the lace cross, they intertwine two or three times.
Double cross lacing using ligature is very intricate. And it requires strong laces. First, draw the lace through the bottom holes inward, then two pairs of holes are left unused. The holes go to the fourth pair. Then they cross and the ends are inserted into the third holes. Then the lacing is done according to this pattern until the very end.
Intertwined and twisted types of lacing are distinguished by the fact that there are no intersections of the ends, but they are intertwined in the middle.
My greetings to everyone! Laces are an important detail that affects safety when walking and running. Therefore, you need to learn how to lace them in such a way that you can automatically perform this procedure. See how you can tie the laces on your sneakers to make walking and running comfortable.
Lace tying options
More recently, this detail was usually tied, without variations. But time does not stand still. Each person has different physiological characteristics, so the usual lacing method is not suitable for everyone.
Various methods of this procedure have been developed that are suitable specifically for your foot. Young people fell in love with it for its convenience. Having several pairs of similar shoes, young people try to lace them in the most unusual way to make them fashionable and beautiful.
Options with a bow
Let's look at how to make lacing with a bow.

- First, pass the cord through the lower rings from the inner side, make both parts equal in length - A (orange) and B (red).
- Then draw segments A and B through the hole opposite from the outside.
- Cross the cord so that part B is over part A and both parts are on the sides, as in the photo.
- Again, pass both parts into the rings opposite from the outside, intertwine as indicated in the previous step, only now A should be above B.
- Bring to the top holes on .

- Pass the cord through the lower holes from the inside, also make equal parts - A and B.
- Pass both parts under the loop, intertwine so that half B is over A.
- Pull each piece through the second blocks from the bottom, then weave again as described above.
- Repeat steps 2 and 3 up to the top holes.

- Pass the cord from the outside down through the second rings from the top, forming two equal pieces of lace - A (orange) and B (red).
- Cross the cord so that A is over B.
- Pull each part through the 4th ring from the top from the outside.
- Weave both parts again so that B goes over part A.
- Pass both parts into the last lower blocks from the outside, then into the second holes from the bottom on the inside.
- Taking the next step, pass each piece into the empty holes at the top. First in the 3rd, then in the first.
Read also
Hello everyone. Scandinavian walking with poles, one might say, “burst” into the lives of many of our compatriots...
Other options
The next option, called tie it correctly, following the picture.

Give your leg a new look.

The original version of lacing with a bow called , easy to repeat if you follow the picture.

Read also
How should you wear a headscarf and scarf this fall? Do you know what scarves are in fashion now? And how beautifully to tie a scarf or...
Thin ties can be laced in the form of a rope.

- Pass the cord through the rings at the bottom from the inside, make two identical parts - A (orange) and B (red).
- Intertwine the pieces with each other, making a full turn.
- Pass each of them into the second hole from the bottom on the inner sides and do this until you have laced everything.
Wide lace ornament
Wide ties can create an original mesh and decorate a sports one.

- Pull the ties through the bottom blocks from the inner side of the sneaker, you will get 2 parts - A and B.
- Make a binding so that A is over B, then thread each piece through the 4th rings from the bottom from the outside.
- Next, pass both parts through the 5th hole from the bottom opposite from the inner side.
- Weave each part together again (step 2), then thread it through the second holes from the bottom from the outside.
- Next, place both parts into the 3rd hole from the bottom opposite from the inner side.
- Weave both parts again, following the order of the previous weaving, thread the ends of the cord through the upper blocks from the inner side.
You can make a weave from a two-color tie.

Read also
Hello. Have you seen the artists have a red thread on their arm? Why do they wear it? Today we will find out why it is needed and how...
How to lace without getting untied? There are many ways, such as "chessboard".

For this method, you need to prepare 2 cords of different colors - orange (A) and red (B). These laces should be long, or even better, wide.
- Let's start from the bottom left. Pull part A through each hole of the shoe to the top, as shown in the photo.
- Intertwine B with A.
- Next, tuck the ends of each part inward. This is an option without a bow.
The next option is simple, it can be done according to the drawing.

On sports sneakers, when you need to quickly secure it with one hand, use this method. Make one knot at the tip and lace according to the pattern. When you need to secure your sneakers, pull the second end of the tie. In the picture it is blue.

Star on sneakers
Star lacing looks very bright and unusual. Take thin or flat ties and get started.

- From the bottom, use the blue end of the tie to go up, changing direction once.
- We first lead the yellow or right tip diagonally to the left, then goes down one hole.
- With this end we make a horizontal segment, go up one hole, and make a horizontal segment in the opposite direction.
- Again we go down to the hole below, then lead diagonally to the top. It turns out to be an even “star”.
But military men and athletes do it this way.

The tie, which is designed for skates, rollers and any other shoes that require rigid fixation of the foot, looks unusual.
- Go in with one tip on top.
- Then draw a loop.
- Make one row with loops, then repeat.
- At the end, do the same, only from the inside.

On running shoes you can see 2 holes for ties, located slightly above and further than the top blocks in the main row:
- we lace crosswise, leaving the top two pairs of holes;
- We pass the end of the right tie through the top hole on the left;
- then immediately through the remaining lower one, also on the left, we get a loop;
- we do the same on the right;
- take the ends of the laces and thread them through the opposite loops;
- tie with a double knot.


Sports sneakers must be tied on the foot. Untie it too, without removing it.
It is important for cyclists not to get caught in the ties so that they do not come undone during training or competition. The picture makes it easy to learn how to attach cycling shoes.
Decorative way -
This technique is suitable for high-top sneakers that young people like to wear. We start with the gray segment - the middle of the cord. Following the diagram you will get a successful way of lacing high.
"European" lacing
She'll do for high shoes. In Europe this is one of the most popular techniques. The originality lies in the fact that one lace must be passed through both holes at the same level.

- The cord is threaded from the outside to the inside into the lower rings.
- One side of the tie (yellow) comes out through the top rings.
- The other side (blue) goes one ring higher.
- Continue until the end of the holes.
Tying method for girls
The most popular and simplest technique is lacing high boots.

Secret: the ties are intertwined at the top, then pulled through inside.
- Pass the cord from the outside to the inside, pull it through.
- Inside, pull it up, skipping one “floor” of rings.
- Pass the strings through, crossing on the outside.
- Repeats from bottom to top.
To better understand the different lacing patterns, watch the video.
Lastly. I am sure that you will not be tormented by the question: how to tie the laces on your sneakers. Try different options to have a new pattern on your leg every day.