How to move a mask in Photoshop How to copy a vector mask to another layer in Photoshop CS6? Copying a Layer Mask to Another Layer
This article describes the creation and use of masks in AE and is intended for those who are taking their first steps in mastering post-processing and image compositing. You will learn how to create, edit and animate the shape of a mask, learn about the basic principles of the functioning of the described tool. All of the following assumes the use of AE 6.0 and above. The author of the article relies solely on his own experience and apologizes in advance for the possible inaccuracy of the wording in comparison with the textbook descriptions of certain properties and functions.
First, let's define the purpose and main properties of masks. So, the mask can be closed (closed) or open (open).
A closed mask is a geometric figure of arbitrary shape, the first point of which coincides with the last one. By applying such a mask to a layer, you make the area of the image that lies outside the mask transparent.

You can invert the effect of the mask, that is, make the area inside the shape transparent. To do this, you need to open access to the mask parameters by clicking on the triangle to the left of the layer name on Timeline, and then on the triangle to the left of the word masks- the main properties of the mask will open.
Note: to speed up access to the properties of the mask on the Timeline, just press the "key" twice M"When a layer is selected, the properties of all masks located on this layer will be opened.
By checking the box " Invert”, you will reverse the effect of the mask.


Thus, you can exclude some objects from the image (having previously decided how to fill the resulting voids), or remove everything except the element of interest in the picture (for example, separate the object from the background).
There are several ways to create a closed mask.
but) by the main menu command
In this case, you will get the default rectangular mask around the entire perimeter of the layer.

in Tools tool Restangular mask tool or Eleptical mask tool and simply stretching the frame over the image while holding down the left mouse button. It is easy to guess that with the first selected tool, the mask will turn out to be rectangular, and in the second - oval. If you need to create a square or round mask, you must hold down the key Shift when stretching the mask creation frame on the image.

from) Selecting from the toolbar Tools tool pen, draw a freeform mask. This way of creating masks is completely identical to drawing curves with the tool of the same name in Photoshop. On the toolbar Tools tool Pen has a dropdown list: actually Pen, as well as two similar instruments with signs + And - . It's quite simple - the tool Pen+(Add vertex tool) adds new points, and Pen- ( Delete vertex tool) deletes the existing ones. Angle tool ( Convert vertex tool) converts an existing mask point from a corner state (that is, when the mask line has a break at that point) to a Bezier curve state, where the shape of the mask as it passes through the vertex can be edited using vectors. A small addition: the top of the mask can have two states - selected and not selected. You can move and perform other actions with vertices only when they are selected. To select a vertex, just click on it with the cursor. You can select vertices one by one by holding Shift, it is also possible to select multiple vertices using a stretchable box. In order to select the entire mask, that is, all its vertices, just click on the parameter mask shape on the Timeline.


In the image above, the top left point has been converted from angled to bezier using the tool Convert vertex tool. A second click on that vertex would bring it back to its original state. Please note that this particular vertex is selected in this case, and looks like a shaded square, while all other vertices are not selected and look like a square frame. If you select several vertices and click on any of them with the tool Convert vertex tool, then all selected vertices will undergo changes.
Thus, in order to leave only the car on the existing image, it must be circled around the perimeter with a mask exactly. For these purposes, it is advisable to enlarge the image up to 200-400% (keys And > ) in the window Monitor and expand it to full screen. The more points there are, the more accurate the selection of the object will be, but a large number of vertices also has its drawbacks, which you will learn about later.


Consider the main properties of the mask, available both on Timeline, and in the main menu of the program Layer>Mask.

next to the name Mask1 there is a yellow (default) square. This is the line color of your mask. In most cases, the yellow color looks quite contrasting in the image, but if you try to create a mask on a similar color or just a white picture, you will see that it would be nice to change the yellow color of the mask to, for example, black. To do this, just click on the yellow square described above and specify the desired color in the dialog box that appears.
In the same line, a little to the right, there is a drop-down list of interaction modes for masks with the image and with each other. By default, any new mask has a mode of operation Add. We will not dwell on each of them in detail, we only note that if you have several masks on the layer, then when they intersect, it is advisable to change the mode Add on the Intersect and experiment with the flag Invert to achieve the desired result. Mode None disables the effect of the mask on the layer and is used in another form of using masks, which will be discussed below.


Mouse click on a parameter shape opens a dialog box with the coordinates of the overall mask container and the ability to select (change) its shape. The author of the article cannot recall a single case when this window was useful.

Mask Feather responsible for blurring the borders of the mask. If you are separating the subject from the background, for example, then blurring 1-5 pixels will help smooth out the inaccuracies of your mask and give realism to the combined image, because in normal shooting, the edges of objects are rarely as sharp as the mask allows you to make. It is possible to choose the direction of the blur - along the axis X, Y or along both axes, which is useful when adding decorative elements to an image. Default blur direction X And Y linked, and in order to be able to adjust them separately, you must uncheck the lock.


Mask Opacity is responsible for the opacity of the part of the image that you left visible with the help of masks. mask expansion allows you to narrow or expand the contour of the created mask.

All of the listed options allow animation. It should be noted one more possibility of editing the shape of the mask. Clicking ctrl+t with the mask selected or by double-clicking exactly on its line, you can access editing the so-called overall mask container. With it, you can rotate, move or scale the entire mask shape.

Now let's look at how to animate masks. An animated mask is a mask whose shape (and/or other parameters) changes over time. It should be noted separately that the parameter mask shape reflects not only the change, in fact, the shape of the mask, but also its position in 2d space. That is, if you simply drag the mask to a new location without changing its shape, then this action is also fixed by the parameter mask shape. Like the vast majority of animations in AE, mask animation is usually implemented using keyframes.
Let's say you need to separate a passing car from the background in order to insert it into another environment.

The car is moving, so we need to animate the shape of the mask. So, in the first frame, we outline the object with a line using the tool Pen, forming a closed mask. In order for all further changes in the mask shape to be fixed by the program automatically, the first key frame must be set manually. To do this, simply click on the clock icon next to the parameter mask shape.

Now if you change the shape of the mask in any frame to Timeline, then a keyframe at that location will be created automatically. Let's move five frames Timeline. The object in the frame has moved - accordingly, it is necessary to correct the shape of the mask. Here it becomes clear that the abundance of vertices in the mask is not very good for solving our problem. (In the above example, the original image is placed under the layer with the mask for clarity).

In this case, the object of interest to us does not change its shape, but simply moves in the frame, so we can try to edit the shape of the mask in every 5th frame. (When separating from the background an object that constantly changes shape, such as a gesturing person, you will have no choice but to edit the shape of the mask in each frame).

Thus, the shape of the mask will change from one keyframe to the next. Just in case, check whether the shape of the mask and the shape of the detached object match between keyframes, and adjust the mask if necessary. Don't forget, vertices can be dragged in groups, converted to Bezier, new ones can be added, and unwanted ones can be removed.
Note: If you try to delete some vertex anywhere except the first keyframe, you will see a warning, the essence of which is that the vertex will be removed from the entire mask animation process, that is, its removal will entail an unexpected change in the shape of the mask. To prevent this from happening, it is necessary in the window Preferences, on the tab General uncheck the box. This will fix this issue and the vertex will only be removed on a specific keyframe.


After the shape of the mask will exactly match the shape of the car throughout the animation, it remains to coordinate the perspective and make a shadow from the car. Anyone who follows the described process to the end, it will become obvious how painstaking and lengthy it is. It should be noted that in professional work such a technique is used extremely rarely - only when there is no possibility to replace or reshoot such a scene, taking into account subsequent keying. And not at all because it is long or difficult - just the most thorough separation of the object using a mask is obviously worse than shooting with chroma key and then separating the object by color (keying). The so-called combined keying is more often used, when part of the object is separated from the overall image by color, and part is separated by masks. This is a topic for a separate article, so this decision will not be affected here.
Of the vast scope of closed masks, we will focus on the effect of any filter not on the entire image, but on that part of it that is highlighted by the mask.
So here's the original image. It is assumed that one soap bubble will glow, rays will come from the second, and lens glare will be simulated on the third. Thus, we need four identical images - one for each ball and one more, the original one, as a substrate (if the same filter were applied to all soap bubbles, then two images would be enough). To duplicate a layer on Timeline just select it and click Ctrl+D.

It is necessary to create a round-shaped mask around each ball. In the figure below, all masks are made on the same layer for clarity, but in fact, if we want each soap bubble to “behave” differently, then each mask must be drawn on a separate duplicate layer, having previously selected it. The fourth layer remains untouched.
Note: If you are working with a multilayer composition, then before you start creating a mask, be sure to check which layer is currently selected, and, if necessary, select the desired one. The mask is drawn on the selected layer.

In this case, a static image is used, and the masks do not require animation. If you use video, then the masks must be animated in accordance with the movement of soap bubbles. In the tasks of this article there is no description of the use of filters, so only the principle will be described. If you turn off the visibility of the bottom layer, you should get such a picture. Moreover, each ball is a separate layer.

The principle of this method is that the filter is applied only to the part of the image selected by the mask. When using the original, untouched image as a substrate, a combined image is obtained, where the effect of filters is limited by the regions of the masks. In this case, each layer with a separate ball was applied respectively BCC Glint, Trapcode Shine And Sipphire Glow.
The parameters of these filters are also animated, and when using a video clip, the picture would turn out to be quite spectacular.

Now let's look at what is open mask. It is, in fact, just a trajectory that does not in itself have any effect on the image. Unclosed masks are used when applying some filters, as a way to use an effect action. An example would be a filter Stroke, which forms a line on the image along the path of the mask, plugin reflex- video image morphing, also in its action based on open masks, animated text, the animation path of which passes through an open mask, and some other filters.


Any open mask can be turned into a closed mask by checking the box next to the command closed main or context menu. In this case, a line will appear between the two extreme vertices, and the mask will turn into a closed one, that is, it will begin to affect the image. The reverse transformation is also possible, when the closed mask turns into an open one, only two vertices must first be selected, and when the checkbox is unchecked closed the mask will open between them.

Any mask can be copied to the clipboard and pasted into another layer. If you want to copy all the mask parameters, you should select them on the Timeline before copying. If only the mask name is selected, only its shape will be copied. A mask can be locked by placing a padlock to the left of its name. This function is indispensable when there are several intersecting masks on the layer that require editing. Duplicating a mask is done in exactly the same way as duplicating a layer - Ctrl+D.
Finally, an example of one of the non-standard methods for applying a mask will be given. If you copy the mask form to the clipboard (namely, the form - the highlighted line mask shape) and paste it into the selected parameter Position another layer, then the last layer will be animated along the mask path with the number of keyframes equal to the number of vertices in the mask.
Of course, within the framework of one article it is impossible to reflect all aspects of the functioning of such a flexible tool as masks in the compositing process. Therefore, if in the process of reading or practical use of masks, you have any questions or difficulties, the author of the article will gladly give additional explanations to the site. Good luck!
user1676691
How to copy a vector mask to another layer in Photoshop CS6?
I am trying to follow a set of instructions and am trying to copy and paste a vector mask into a gradient layer. For some reason when I just do cmd c and cmd v for the gradient layer nothing happens.
Here are my instructions:
Method 1: Overlay Color on a Gradient Layer
- Create a gradient layer. Choose a light gray and dark gray stop color. You can customize it later.
- Create button vector mask
- Copy the vector mask and paste it into the gradient layer (Select the vector mask > Ctrl + C > Select the gradient layer > Ctrl + V)
- Click Layer > Vector Mask > Current Path.
- Go to Blending Options and apply Color Overlay in Color blend mode.
- Now you can try colors by simply changing this color.
Answers
Mark Edwards
Things have changed a bit in Photoshop CS6 from CS5.
To move command and drag the layer thumbnail from one layer to another.
To copy vector mask from layer to another, hold option-command and drag the layer thumbnail from one layer to another.
The same method works with groups too, so you can move or copy the vector mask to and from groups.
If you want to copy only part of the vector mask, you will have to edit or copy the paths themselves using the path selection tool or the direct selection tool.
Also note that although the thumbnails in CS6 look very different from CS5, where the color swatch appeared to the left of the mask, they behave very similarly. CS6 just has a different thumbnail preview and a few keyboard shortcuts.
© 2014 website
Layers are the foundation of Photoshop. Any, no matter how serious manipulations with the image, as a rule, involve the use of layers and masks. Without understanding the concept of a layered image, you simply cannot really edit your photos in Adobe Photoshop, and if you can, then this process will be painful and unnatural.
What are layers?
Layers in Adobe Photoshop can be thought of as sheets of transparent film stacked on top of each other. An image can be applied to each of the sheets, so that the images on top overlap the images below them. The parts of sheets free from images remain transparent and underlying layers are visible through them. In general, if you look at the stack from above, you get a kind of single complex image, made up of mutually overlapping elements of separate layers that complement each other.
Layers are needed so that several images can be combined into one, and also in order to be able to edit each layer independently of other layers in a multilayer image.
Working in Photoshop, we repeatedly create new layers, merge existing ones, duplicate, move, change the order of the layers and their transparency, in a word, we do everything that may be required when editing a photo with layers.
Obviously, any file opened or created in Adobe Photoshop contains at least one layer. Usually this layer is called Background, ie. background or background.
Technically, many actions in Adobe Photoshop can be performed directly on the Background layer without resorting to additional layers, but even in such situations, I still prefer to create a copy of the main layer and work on the copy, keeping the source intact, and only if the result is completely satisfied, I allow myself to merge the layers together. This approach is more convenient and safer. And why, in fact, turn Photoshop into Paint?
Layers palette
The Layers palette is usually located at the bottom left. If you don't see it, press F7.

Consider the main elements of the layers palette.
Each layer has a small colored icon. To the right of it is the name of the layer. By default, new layers get the standard names (Layer 1, Layer 2, etc.), but you can always rename them to your liking by double-clicking on the layer name.
A black-and-white icon can be placed next to the colored layer icon. layer mask, responsible for which parts of this layer should be shown and which are hidden. If there is no layer mask, then the entire layer is visible. The layer mask is the most important tool when working with layers, and therefore we will return to this issue later and talk about masks.
To the left of the layer icon is an eye icon, symbolizing layer visibility. Click on it - the eye will disappear and the layer will become invisible.
To make a layer active, just click on it with the mouse. To select multiple layers, use the Ctrl/Cmd or Shift keys.
To create a copy of the active layer, press Ctrl/Cmd+J. To merge selected layers, press Ctrl/Cmd+E. If only one layer is selected, it will be merged with the underlying layer. Ctrl/Cmd+Shift+E merges all currently visible layers. To merge together all the layers of the document in general, you should go to the Layers menu and select Flatten Image.
Layers can be dragged with the mouse and thus change their relative position. The keyboard shortcuts Ctrl/Cmd+] and Ctrl/Cmd+[ move the active layer one position up or down, respectively.
The following settings are located at the top of the layers palette:
Layer filtering allows you to display in the palette only those layers that meet certain criteria, and hide all the rest. You can filter layers by type, by name, by style, and so on.
Via layer lock (Lock layer) You can partially or completely prohibit editing a particular layer.
To the right are the settings boxes. Opacity (Density) And Fill (Fill) responsible for the degree layer opacity. The default values are 100%, i.e. the layer is completely opaque and visible in all its glory. 50% will mean that the layer is half transparent and the lower layers show through it. At 0%, the layer becomes completely transparent and invisible. There is only one difference between Opacity and Fill: Opacity adjusts the opacity of the layer along with all styles and special effects applied to it, while Fill acts only on the pixels of the layer itself, without affecting the styles.
The Background layer differs from other layers in that its opacity is always 100% and is not adjustable. In addition, the Background is permanently protected from being moved. The blending mode for Background is always Normal, because there are no other layers under it and there is simply nothing for it to be superimposed on.
There are seven buttons at the bottom of the layers palette:
Link layers. Links (but does not merge) the selected layers. Linked layers remain independent layers, but when you try to move them, they move as a whole.
Add a layer style (Add a layer style). Allows you to apply various special effects to the layer, such as: shadow, glow, outline, etc. When processing photos, styles are rarely used and are mainly used in graphic design.
Add layer mask (Add layer mask). Adds a mask to the selected layer. By default, the mask is white, i.e. the content of the layer is fully visible. See below for more on masks.
Create a new adjustment layer (Create new fill or adjustment layer). Creates an adjustment or fill layer for non-destructive editing. See below for more on adjustment layers.

Create a new group (Create a new group). Creates a new empty group. To combine existing layers into a group, select them and press Ctrl / Cmd + G. To disband a group, press Ctrl/Cmd+Shift+G. Groups are useful when a document contains many layers and there is a need to arrange them somewhat. In addition, masks and styles applied to a group automatically affect all layers included in the group. In other respects, groups are similar to linking layers.
Create a new layer (Create a new layer). Creates a new layer. You can also use the keyboard shortcut Ctrl/Cmd+Shift+N. The new layer does not contain any image and is therefore invisible.
Delete layer. Deletes the active layer. You can use the Del button.
Why are masks needed?
The layer mask is needed in order to selectively and reversibly hide from view (in other words, mask) part of the pixels of the layer. For example, when working in the HDR technique, I use several photos of the same scene, taken with different exposures, then insert them into one file as separate layers, and use masks to indicate which elements of each of the shots should be present in the final image.
![]()
The mask is a black and white image of the same size as any layer. The color of the mask encodes the transparency of the layer. White color means normal visibility of the layer, black color means its absolute transparency. Different shades of gray correspond to different degrees of transparency - the darker, the more transparent. Thus, if the mask contains areas of white color, the corresponding areas of the layer retain their original density, and where the mask is painted black, the image will become invisible, and the underlying layer will show through it. The areas marked in gray on the mask will be only partially transparent.
To see the mask in its entirety, just hold Alt / Option and click on the mask icon.

The mask created with the Add Layer Mask command is filled with white all over, i.e. leaves the layer fully visible. Clicking on the mask icon and pressing Ctrl/Cmd+I will invert the mask and turn it black. In this case, the layer will completely disappear from sight, i.e. will be masked.
If you want to hide some part of the active layer, create a white mask, select it by clicking on it, take a black brush and paint over the areas you don't like - they will disappear, as if you had used an eraser. However, unlike the eraser, which actually erases part of the layer, the mask does not destroy the layer itself, but simply hides it. At any time, you can take a white brush and restore any part of the image. This approach is called non-destructive (non-destructive) editing.
It is often necessary to apply an effect to only a small part of an image. In such cases, I duplicate the working layer (or create an adjustment layer), modify it in the way I need (for example, increase the contrast, sharpen, shade or lighten the image), then hide this layer with a solid black mask, and then show the effect with a white brush where needed.
Of course, editing masks is not limited to just painting on them with a brush. You can use any tools. Very often you have to resort, for example, to a gradient fill, or create a mask based on an area selected according to the principle of a color or brightness range. Sometimes one of the color channels serves as a template for the mask. In a word, there are countless ways to create masks, and I will not even try to list them all. Just keep in mind that if you wish, you can create masks of a very complex shape if the artistic tasks in front of you require it. There are even special plug-ins for Photoshop (for example, MASK PANEL), which partially automate the creation and editing of complex masks.
Adjustment layers are needed for non-destructive editing of an image. Instead of applying curves, levels or some other tool directly to the layer, you create a special adjustment layer and work with it. The adjustment layer itself does not contain any image, but rather an instruction on how the program should modify the image underlying the adjustment layer. The advantage of this method is that you can repeatedly return to the adjustment layer and freely change its parameters without fear of spoiling the image. The adjustment layer can be turned off, its opacity can be changed, and if desired, it can be completely removed without any consequences for the photo. It is also convenient to be able to copy the adjustment layer and paste it into another document, thus applying the same settings to several photos at once.

Adding a new adjustment layer is carried out through a special Adjustments palette, or through the corresponding button in the Layers palette, or through the menu Layer > New Adjustment Layer.

Each adjustment layer is automatically provided with a mask that allows you to control the area affected by the adjustment layer. It is only natural that different areas of the edited photo may require the intervention of different tools. With the help of several adjustment layers limited by masks, this is quite feasible. Adjustment layer masks are no different from ordinary masks and are edited using standard methods.
When an adjustment layer is merged with the underlying layers, the correction being made is rasterized, i.e. the changes are finally transferred to the real image and become irreversible. In this regard, you should merge layers only when you are completely satisfied with the result and do not plan further changes.
Thanks for attention!
Vasily A.
post scriptum
If the article turned out to be useful and informative for you, you can kindly support the project by contributing to its development. If you did not like the article, but you have thoughts on how to make it better, your criticism will be accepted with no less gratitude.
Do not forget that this article is subject to copyright. Reprinting and quoting are permissible provided there is a valid link to the original source, and the text used must not be distorted or modified in any way.
user1676691
How to copy a vector mask to another layer in Photoshop CS6?
I am trying to follow a set of instructions and am trying to copy and paste a vector mask into a gradient layer. For some reason when I just do cmd c and cmd v for the gradient layer nothing happens.
Here are my instructions:
Method 1: Overlay Color on a Gradient Layer
- Create a gradient layer. Choose a light gray and dark gray stop color. You can customize it later.
- Create button vector mask
- Copy the vector mask and paste it into the gradient layer (Select the vector mask > Ctrl + C > Select the gradient layer > Ctrl + V)
- Click Layer > Vector Mask > Current Path.
- Go to Blending Options and apply Color Overlay in Color blend mode.
- Now you can try colors by simply changing this color.
Answers
Mark Edwards
Things have changed a bit in Photoshop CS6 from CS5.
To move command and drag the layer thumbnail from one layer to another.
To copy vector mask from layer to another, hold option-command and drag the layer thumbnail from one layer to another.
The same method works with groups too, so you can move or copy the vector mask to and from groups.
If you want to copy only part of the vector mask, you will have to edit or copy the paths themselves using the path selection tool or the direct selection tool.
Also note that although the thumbnails in CS6 look very different from CS5, where the color swatch appeared to the left of the mask, they behave very similarly. CS6 just has a different thumbnail preview and a few keyboard shortcuts.
Instruction
To work with a layer mask, you need it. To do this, there is the Add Mask Layer command, which is located at the bottom of the Layers palette. After executing this command, Photoshop creates a mask for the active layer. A rectangle appears next to the image thumbnail in the Layers palette. The white color for the layer mask is the opaque areas, while the black is the transparent ones. Shades of gray are responsible for translucent areas.
By applying a layer mask, you can create a montage of two . To do this, place the images on different layers one above the other. In this case, one image will overlap the other. Then you need to create a layer mask for the top image. After that, you can start working in a mask. To work in the mask, click on it with the mouse or pen. Then fill the entire mask with black by pressing Ctrl+Backspace. When the entire mask is filled with black, it becomes transparent. Next, you can go directly to creating a collage. To do this, with the help of a brush, you need to paint over the area on the mask that you want to make visible.

Using a layer mask, you can create smooth transitions between two images using the Gradient tool. To do this, you need to copy the images on two different layers, and apply a mask to the top one. Then, after going into the mask, press the G key to apply the gradient. In this case, it is worth checking in the properties panel that the gradient is a smooth transition from black to white. To make the gradient smooth, hold down the Shift key and draw a line on the mask from top to bottom, starting from about one third of the image from the bottom.

A replicated effect such as text filled with an image can also be created using a layer mask. To do this, you need to create an empty document and copy any image to a new layer. Then you should press the T (Text) button and on the property bar, click the "Text mask" button. After that, you need to type the desired text and click on the button to create a layer mask. As a result of these simple manipulations, the text will be filled with an image.

note
By default, the created mask is filled with pure white. That is, the image is not masked, the degree of influence of the effect is 100%. A mask can only display shades of gray, so when using color gradients, the mask itself will still display only grayscale transitions.
Useful advice
Masks are convenient to use as a "cast" of the selection you have created. To do this, just go to the Channels tab and click the "Save selection as channel" button. A new black and white alpha channel will appear. Now you can deselect. The resulting mask can be used when needed, just click on it while holding down the Ctrl key.
Sources:
- A white mask does not change the transparency of the pixels below it.
- how to apply photoshop
If you're working with photos in Photoshop, it's very useful for you to know how to use masks. Most often, masks are used to isolate a part of an image, to separate it from the background, or to remove the background itself.

You will need
- Computer, Adobe Photoshop.
Instruction
Next, select the Brush Tool (brush). While in mask mode, you can simply paint over the image with the brush, removing or adding parts of the image. To do this, use the default black and white colors.

Related videos
There are many handy features in Adobe Photoshop that allow you to process photographs and other images, creating high-quality visual effects. One of Photoshop's universal tools is the mask. The mask is necessary for the correct and accurate selection of any complex area, and is often used as an additional halftone image channel. If you have an image with objects that are difficult to select, use a mask to select objects from the main layer so that you can use them in a photomontage.

Instruction
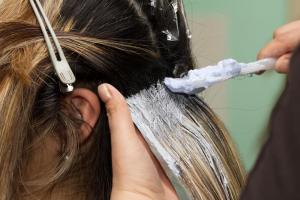
Apply masks in a uniform thin layer over the entire face, excluding the eye area and lips. Leave it on for 15-20 minutes or wait until it hardens completely, then rinse it off with warm water. In order not to damage the skin, you can use a sponge or cotton pad. Cosmetologists advise after the mask to apply a nourishing cream on the face, you can use it at night.
Apply the cream along the massage lines where skin stretching is minimal. On the forehead - with light movements in the direction from the middle of the forehead to the temples, in the eye area - in circular motions from the inner corner of the eye along the upper eyelid to the outer and back - along the lower eyelid. On the cheeks - from the nose to the temples, and from the chin to the earlobe.
The frequency of applying masks depends not only on the condition of your skin, but also on the type of masks used, they are firming, smoothing, nourishing and cleansing. Before using them, consult with a beautician, he will be able to choose the masks that are optimal for you, and, therefore, will help you always stay young and beautiful.
Sources:
- how to put on a face mask
A mask in Adobe Photoshop is used to hide an effect or graphic. Professionals use this tool, among other things, so that at any time they can return to one or another stage of work without starting it all over again. However, even without being a professional, it is worth learning this simple science. At least to broaden my horizons.

You will need
- - Adobe Photoshop.
Instruction
Create a new document in Adobe Photoshop: click the menu item "File" (File) -\u003e "Create" (New) or use the hot keys Ctrl + N. In the new window, specify an arbitrary "Width" (Width) and "Height" (Height), in the "Background contents" set "Transparent" (Transparent) and click "Create".
First, create a background: click the menu item "Layers" (Layers) -\u003e "New fill layer" (New fill layer) -\u003e "Pattern" (Pattern). In the window that appears, immediately click "OK". In the next one, select the texture you like the most (the author used a notebook sheet in), play around with the “Scale” setting (Scale) and click OK. Thus, you have created a background in the form of a mask.
Select the Ellipse Tool (U hotkey, switch between adjacent elements - Shift + U), and in the tool options panel, select the Paths item. Create a series of ellipses similar to the one in the title image for this article.
Open the "Layers" window and switch to the "Paths" tab. If it is not there, click "Window" (Window) -\u003e "Contours" (Paths)). At the moment there is one path, which includes several ellipses you have drawn. If you look closely, they are shown in miniature on the outline icon. Actually, these ellipses are what they are. Click the menu item “Layers” -> “New Fill Layer” -> “Color” (Solid Color). In the window that appears, immediately click OK, and in the next window select the color 511cd5 and also click OK. The ellipses will turn blue.
Create another mask: click on the Create new path button on the Paths tab. Select the Rectangle Tool (U, Shift+U) and close the entire working area of the document with it. This is also a vector mask. Click the menu item “Layers” -> “New Fill Layer” -> “Gradient” (Gradient). In the new window, immediately click OK, and in the next window create a gradient that goes from red to transparent at a 90 degree angle. Click OK. As a result, you should get something like in the title picture.
Related videos
A vector mask in Adobe Photoshop can be used in a variety of ways. In this case, we will consider how to use it to apply color correction to a separate section of the image.

You will need
- - Adobe Photoshop CS5
Instruction
Launch Adobe Photoshop and create a new document. To do this, click the menu item "File" (File)\u003e "Create" (New) or press the hot keys Ctrl + N. In the new width and height, for example, specify 500 each, in the "Background content" (Adjustment) field, set "Transparent" (Transparent) and click OK.
Click the menu item “Layers” (Layer)> “New fill layer” (New pattern fill)> “Pattern” (Pattern) and in the next window immediately click OK. The panel "Fill" (Pattern fill) will open. On its left side there is a button that calls a drop-down menu in which you can select the desired pattern. Using the “Scale” setting, the pattern can be zoomed in or out. After setting the required options, click OK. The background of the document will take on the outlines of the selected pattern, and later vector masks will be applied to it. With the Move tool, you can move this pattern around.
Select the tool "Rectangle" (Rectangle tool), on the options panel, click on the item "Contours" and create with it a small frame in any part of the workspace. Click the menu item “Layer” (Layer)> “New adjustment layer” (New adjustment layer)> “Color background / Saturation” (Hue / Saturation) and in the new window immediately click OK. A new window will open in which you can change the Hue, Saturation and Lightness parameters by turning the corresponding sliders. Note that changes occur only with the selected area, i.e. with a border created by the Rectangle tool. Actually, this rectangle, on which you can apply various effects, is the vector mask.
Sources:
- Rectangle Tool
The mask in Photoshop is one of the tools used to reversibly create a transparent area on any of the layers, with the exception of the background. There are several ways to create masks in this graphical editor.

You will need
- - Photoshop program;
- - image.
Instruction
To create a layer mask in Photoshop, select one of the options in the Layer Mask group from the Layer menu. Using the Reveal All option will not visually change the image located on the masked layer, however, a mask icon will appear next to the layer thumbnail.
To start editing the mask instead of the image, click on the mask icon. Using the Reveal All option is justified if the area of the layer that needs to be made transparent is much smaller than the image fragment that will remain unchanged. In order to make a part of the image transparent, paint over the desired fragment with black using the mask.